Are you confused at the meat counter when you want to buy pork for a stir-fry or Chinese BBQ pork (char siu––one of our most popular recipes)? We get questions all the time about what cuts of pork are best for Chinese cooking and which cuts make sense for different dishes. My quickest answer is: pork shoulder––specifically, the picnic shoulder. This humble, large cut of meat holds a wealth of diverse cuts perfect for grilling/roasting, stewing/braising, soup/congee, stir-fry, and ground meat. In this post, we’ll talk about how to cut pork shoulder into different usable parts, and I’ll even show you the process in a video from start to finish!
Why Pork Shoulder?
The pork shoulder, also sometimes labeled “picnic ham,” “picnic shoulder,” or “picnic roast” at the grocery store, is one of the most versatile cuts of meat on the pig.
More typical cuts, like center-cut chops, pork loin, and ribs are great, but pound for pound, a pork shoulder is going to give you more bang for your buck than any other cut out there.
The best part is, these “picnic hams” are economical and widely available in supermarkets across the U.S. Wherever you are, you should be able to find it.
People often use the picnic shoulder for things like pulled pork or a whole roast, but there is so much more you can do with it, especially in the Chinese kitchen!
All it takes is a little elbow grease to break it down and package it up for your freezer. Total time will be about 15-30 minutes, depending on how experienced you are with your chef’s knife.
What Can You Do with a Pork Shoulder?
One pork picnic shoulder can yield:
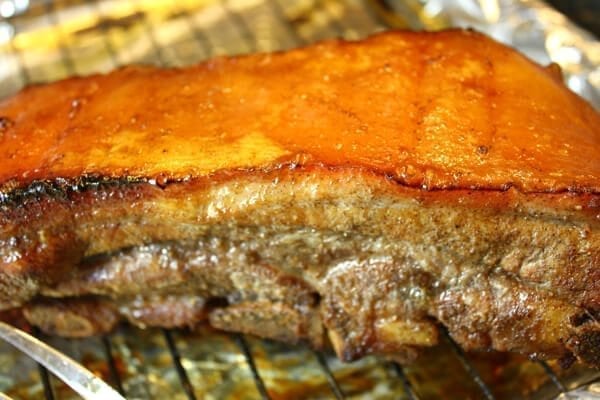
- Fatty strips of tender meat for grilled or roasted pork dishes such as Char Siu (Chinese BBQ Pork) or even Char Siu on the Grill
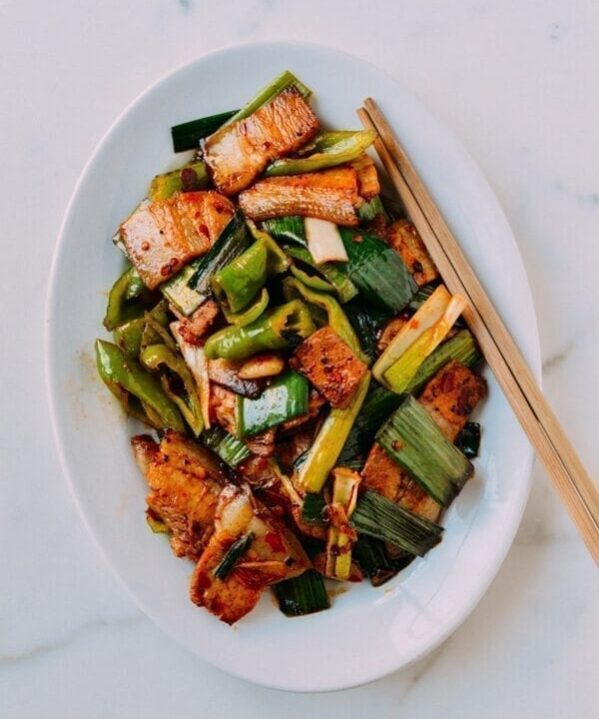
- Lean chunks of pork perfect for slicing and stir-frying
- A long strip of meat with intramuscular fat and skin that resembles pork belly (this “faux pork belly” can serve as a substitute in our pork belly recipes if you can’t find skin-on belly)
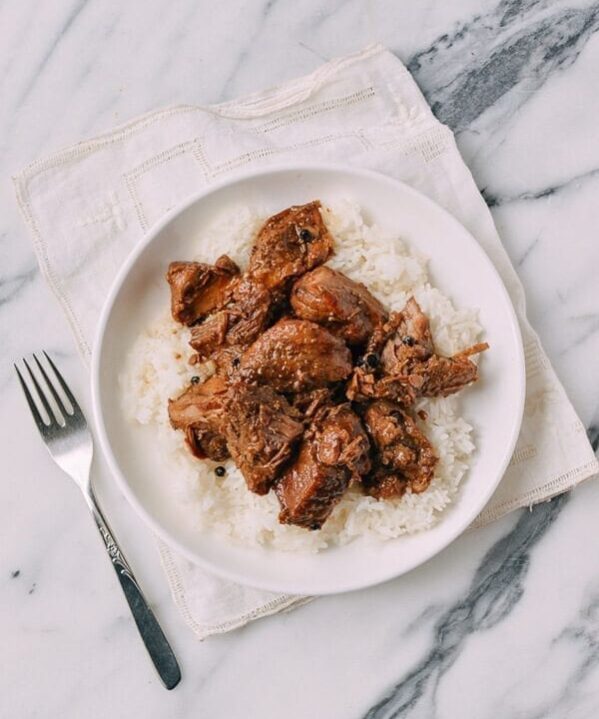
- Additional smaller pieces of pork to cut into chunks for stews or to grind (either using a meat grinder, or Judy’s easy method without a grinder) for sausage, dumpling/wonton filling, steamed dishes, stir-fries, etc.
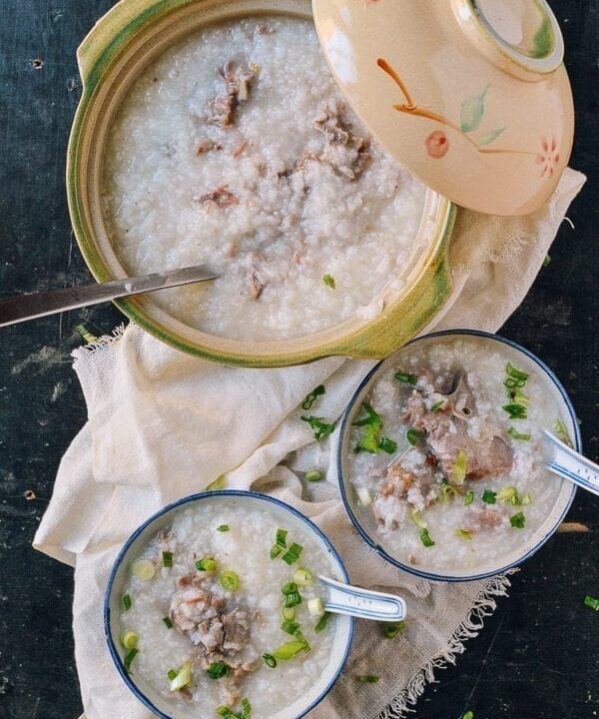
- A large flavorful bone to make soups, stocks, or congee (try Judy’s pork & chicken stock or my mom’s Pork Bone Congee)
- Gelatinous pork skin to make aspic for soup dumplings (xiao long bao) or even chicharron/pork rinds!
All that, at a very economical price! Picnic shoulders can run anywhere from 6-11 pounds, and cost about $2 to $3 per pound. I’ve seen it priced as low as $1.19/pound when it’s on sale. At that price, a ten pound piece of meat will yield all those cuts above (many many meals) for less than $12!
So why not save some money, learn a quick new skill, AND fill your freezer with lots of tasty meal ideas?
Where Is the Pork Shoulder on the Pig?
You’re probably wondering where exactly the picnic ham is on the pig. I found a graphic on Amazon that shows where all the pork cuts come from.
You can see from the diagram that they label the pork shoulder as the “picnic.” The actual “shoulder” refers to the portion of meat above that. Confusingly, that piece of meat is commonly called “pork butt,” or the “Boston butt.” We’ll get to that in the next section.
All you have to know is that the pork shoulder comes from the front of the pig (the back leg is known as the “leg” or “ham”). It generally contains the meatiest portion of the foreleg, and is usually sold with the skin on.
You may see some variation in how different butchers cut and package it. It may contain mostly the upper arm portion (the meatier portion,) or more of the lower foreleg (a more tapered end, and generally more bone and skin).
Pork Shoulder vs. Butt
Pork shoulder and pork butt sound like they should come from opposite ends of the pig, but they both come from the front of the animal. The entire pork “shoulder” consists of these two parts. The butt is the upper portion of the shoulder, and the “picnic” (also sometimes simply referred to as the “shoulder”) is the lower portion closer to the leg.
You can easily tell them apart, because the butt is usually sold skinless, and the whole “picnic shoulder” usually still has the skin on. Grocery stores sell the butt both boneless and bone-in.
Since the butt comes from the thicker section of the shoulder, it is generally larger and meatier (more meat to bone). It also contains more marbled fat through the meat as well as a larger fat cap, making it a popular option for roasting and slow barbecuing.
Like the “picnic” the “butt” also has several names:
- Boston butt
- Boston roast
- Shoulder butt
- Shoulder blade roast
- Boston shoulder roast
Both the picnic shoulder and the butt are great cuts of meat. If your main goal is to make roast pork (char siu), the butt is an ideal option, as it’s a bit easier to break down and has a lot of fat to ensure your char siu is nice and juicy! It’s also a good option for making ground pork.
Today, though, we’re going to focus on the picnic shoulder, which is great for char siu as well as many other different dishes!
How to Cut Pork Shoulder & Break It Down: VIDEO
In the video below, I’ll show you the different cuts you can get from the shoulder, how to remove the bone, and how to break it down further. I will talk through the whole thing from start to finish, so you can see exactly how I did it.
If you’d rather read the instructions with step-by-step photos, scroll down below the video.
Step-by-Step Instructions
Preparation
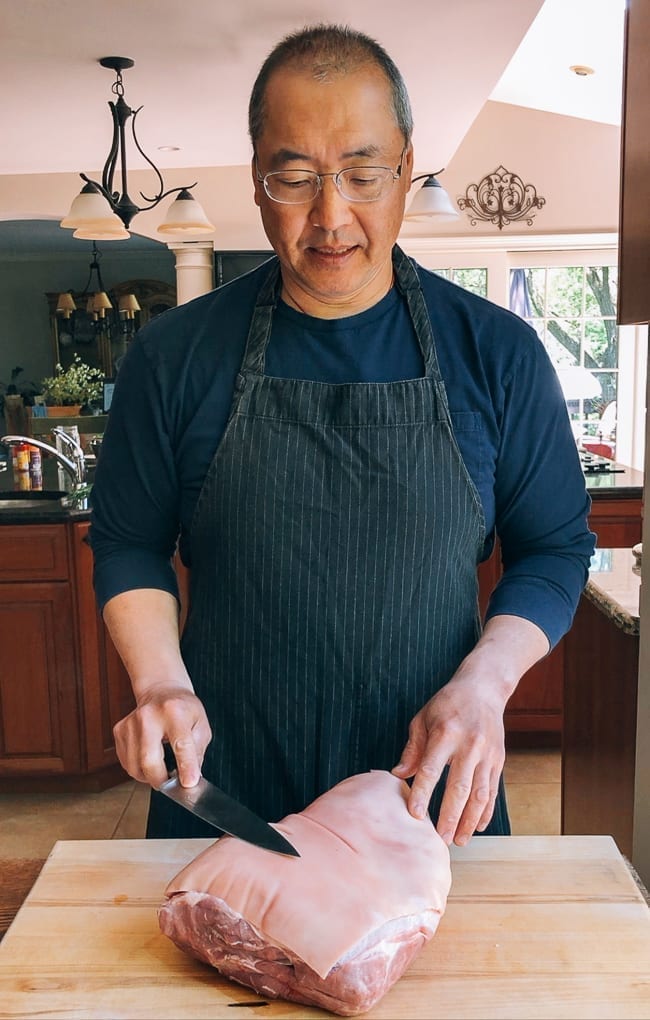
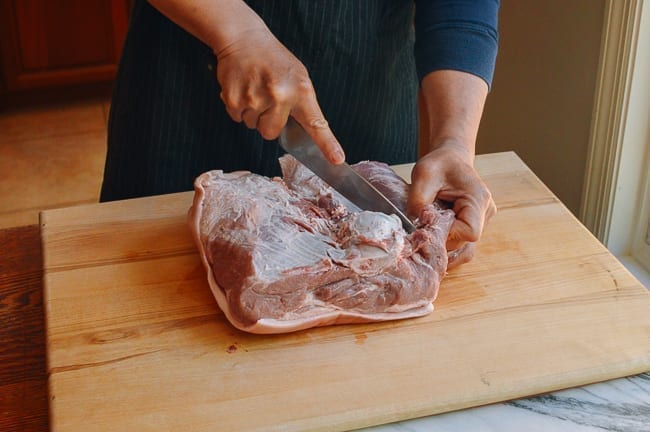
In your kitchen sink, carefully remove the pork shoulder from the packaging. There is almost always excess liquid to drain off. Gently rinse the pork shoulder (avoid splashing water around, and be sure to disinfect the area afterwards). Pat dry with a paper towel and transfer the pork shoulder to a large cutting board.
De-Boning
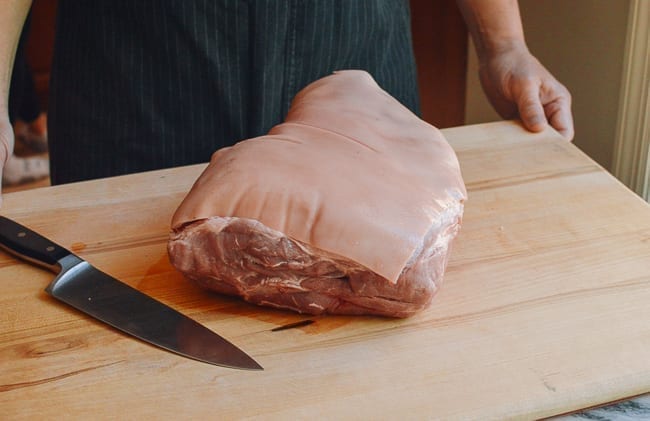
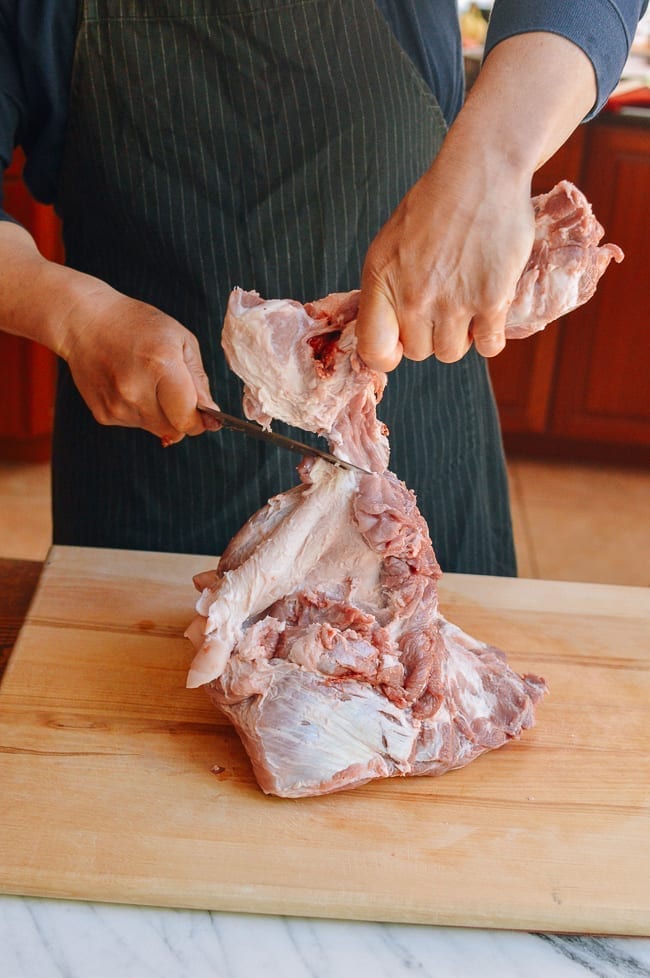
Position the pork shoulder with the large skin side down and the broad side facing away from you. You can see the inside bone poking through both ends.
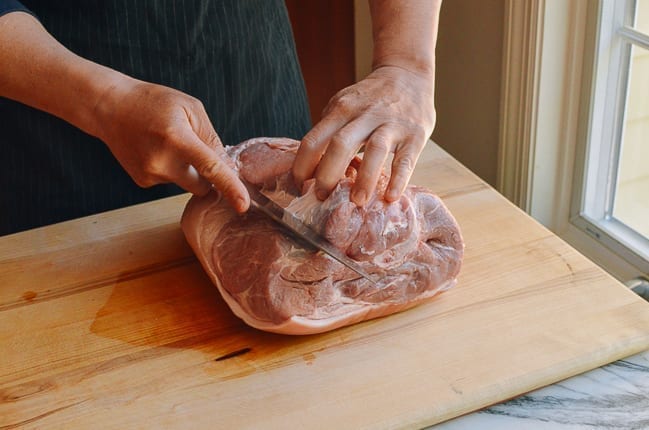
Find the seam/muscle membrane that runs from one end of the bone to the other and use your fingers to separate and pull the meat apart. Carefully make small cuts in the seam until the membrane pulls apart. (Jump to 02:25 into the video for a demo of this.)
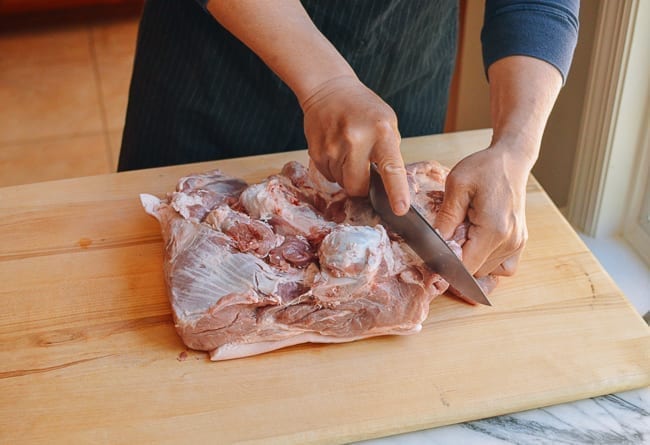
Continue to cut along the bone from the broad end of the pork shoulder over to the tapered end to fully expose it.
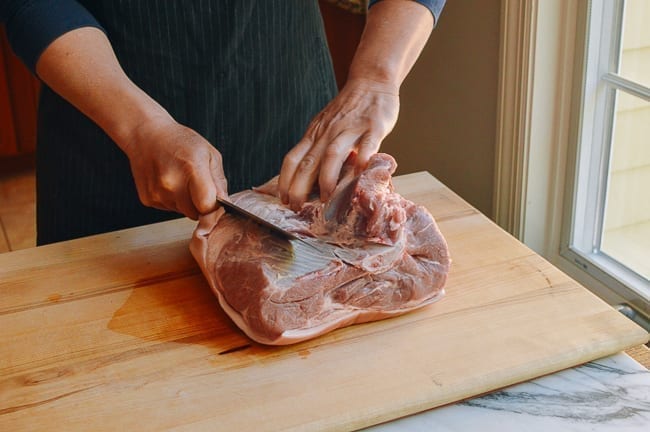
Note that the bone is not straight, but bent at an angle. Gently pull the meat apart, and cut around and down the lengths of bone. Pulling the meat creates tension, which makes cutting through the membrane around the bone easier. Take your time with it! (Skip to 04:27 in the video for this step.)
Soon, you’ll see that you’ve sort of “flattened” the pork shoulder, and the bone will be clearly exposed. Continue to cut around the bone until you can get your fingers under it. Next, lift the bone and slide your knife tip under it. Cut under and around the bone to separate it from the meat. (05:40 in the video.)
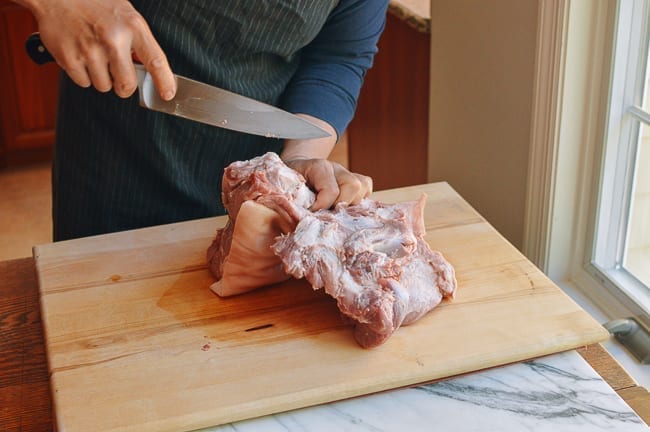
Don’t worry if you leave some meat on the bone. It will be nice to have meat in your stock or soup. Practice makes perfect, and you will get better each time you do it.
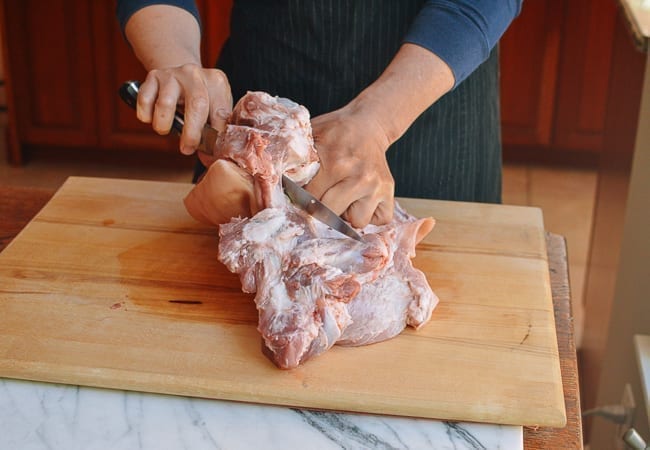
Now grip the detached end of the bone. Continue to cut the meat around the bone until the bone is completely separated from the meat. Lifting the bone up and letting the neat hang down creates tension between the meat and bone that makes cutting the meat away from the bone easier. (06:10 in the video.)
Be sure to use slow, deliberate controlled cuts with very little tension on your knife. This prevents any big unsafe movements in case your knife slips. Safety first!
Breakdown
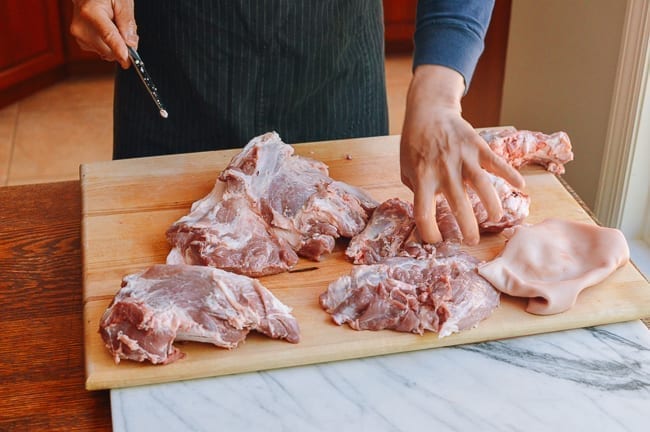
Now you should have the extracted bone and large slab of meat on the cutting board. It’s time to break it down!
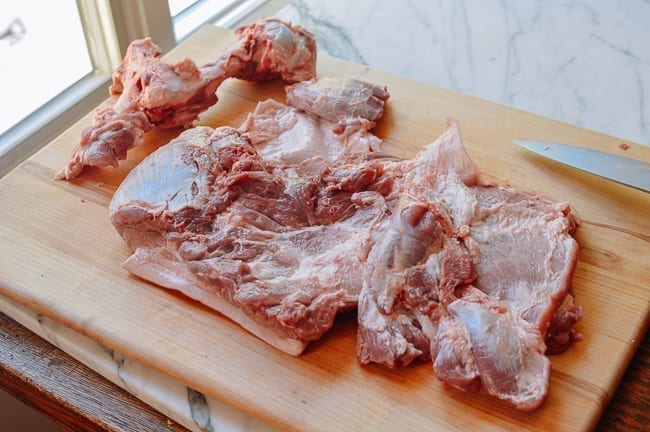
Find other muscle membranes, and cut between the membrane/seams to separate the pieces of meat. Like my father taught me, follow the shape of the meat, and you’ll end up with separate chunks of pork to use however you like. We have recommendations (see our explanation at 08:36 in the video), but there are no set rules on how to use the various cuts.
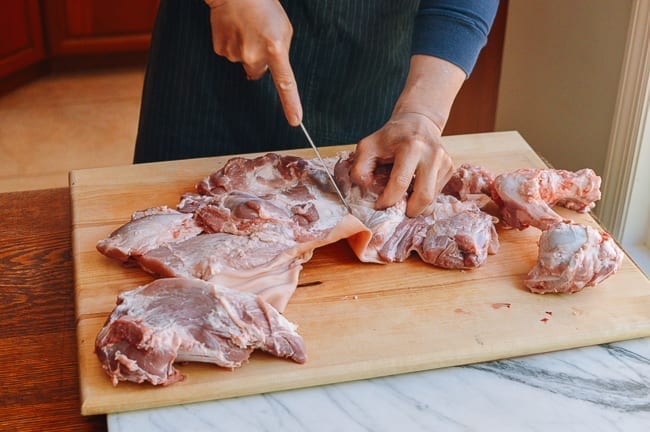
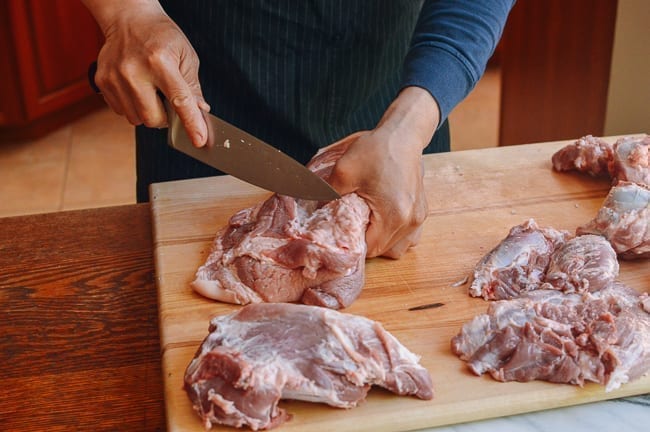
Find the thickest pork chunk on the broad end of the roast. This works well for stir fries, since it is quite lean. (Skip to 10:07 in the video––I mention in the video that you can use the chunk for char siu, but it is a leaner cut that’s also ideal for stir-frying.)
Cut along the seam of this large chunk until you get to the skin. Continue to cut and separate the meat from the skin until you’ve detached that large chunk. Before stir-frying, trim off the muscle membrane and fat to ensure you get tender slices.
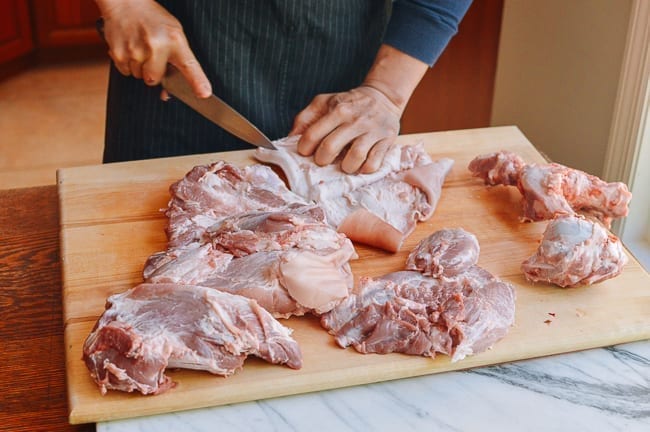
Continue to find and cut along membranes and seams. Separate the pork chunks from the middle, and near the narrow part of the pork on the leg. You can cut the medium pieces into chunks for stewing, ground pork, or even butterflied pieces for roasting/char siu.
NOTE: It’s not necessary to trim off the muscle membranes when making char siu. For more pork preparation photos and a great summer recipe, see my post on how to make char siu on the grill.
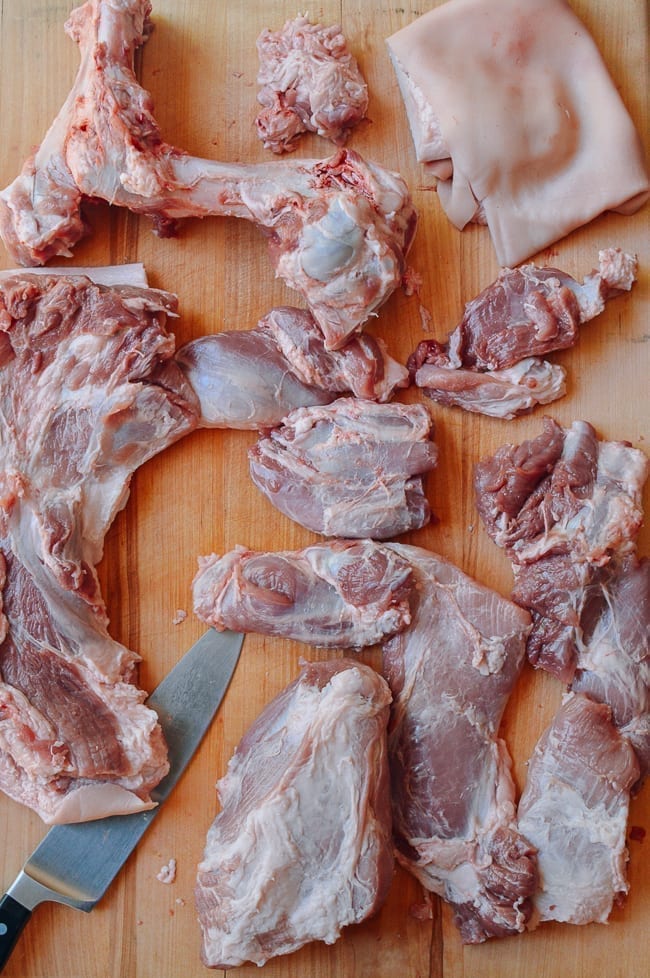
Now you should have clean bit of skin and fat on one side and the remaining meat/fat/skin on the other side. Cut off the portion that has only skin and fat. (Skip to 12:06 in the video.) You can use this to make aspic for soup dumplings, or slice it up and render out the fat for lard/pork rinds.
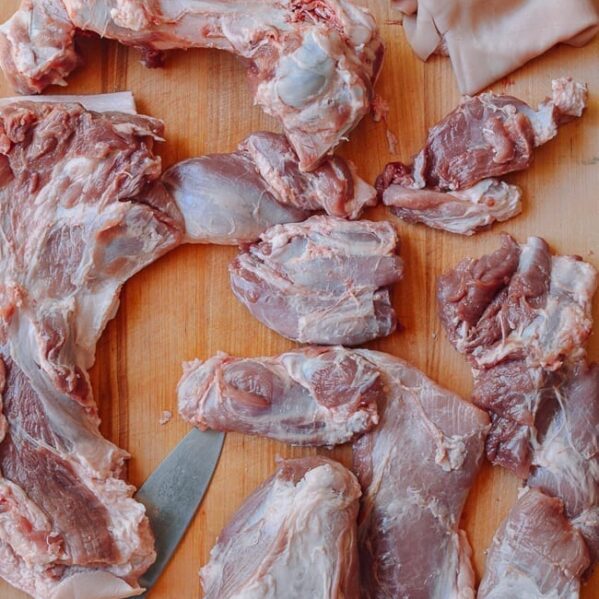
Now you have what resembles pork belly. It’s a long piece with layers of fat, meat and skin (along with some remaining chunks of pork). Remove the pork belly piece, and continue cutting along the seams to separate the remaining pork chunks. (Skip to 12:44 in the video for this step.)
Once you have all your cuts, you can pack them up in freezer bags for longer-term storage. We like these reusable/washable silicone bags.
And there you have it! To see the entire process from start to finish, you can watch the whole video. You’ll be amazed at how economical and easy it is to break down a pork shoulder yourself at home. Not to mention the wide array of recipes you can make!
Watch Video!
How to Cut Whole Pork Shoulder
Ingredients
Instructions
Preparation:
- In your kitchen sink, carefully remove the pork shoulder from the packaging. There is almost always excess liquid to drain off. Gently rinse the pork shoulder (avoid splashing water around, and be sure to disinfect the area afterwards). Pat dry with a paper towel and transfer the pork shoulder to a large cutting board.
De-boning:
- Position the pork shoulder with the large skin side down and the broad side facing away from you. You can see the inside bone poking through both ends.
- Find the seam/muscle membrane that runs from one end of the bone to the other and use your fingers to separate and pull the meat apart. Carefully make small cuts in the seam until the membrane pulls apart.
- Continue to cut along the bone from the broad end of the pork shoulder over to the tapered end to fully expose it. Note that the bone is not straight, but bent at an angle. Gently pull the meat apart, and cut around and down the lengths of bone. Pulling the meat creates tension, which makes cutting through the membrane around the bone easier. Take your time with it!
- Soon, you’ll see that you’ve sort of “flattened” the pork shoulder, and the bone will be clearly exposed. Continue to cut around the bone until you can get your fingers under it. Next, lift the bone and slide your knife tip under it. Cut under and around the bone to separate it from the meat.
- Now grip the detached end of the bone and continue to cut the meat around the bone until the bone is completely separated from the meat. Lifting the bone up and letting the neat hang down creates tension between the meat and bone that makes cutting the meat away from the bone easier.
Breakdown:
- Find other muscle membranes, and cut between the membrane/seams to separate the pieces of meat. You’ll find that the thickest pork chunk on the broad end of the roast works well for stir fries, since it is quite lean. Cut along the seam of this large chunk until you get to the skin, and continue to cut and separate the meat from the skin until the large pork chunk is detached. (Before stir-frying, trim off the muscle membrane and fat to ensure you get tender slices.)
- Continue to find and cut along membranes and seams until you have separated most of the pork chunks from the middle, and near the narrow part of the pork on the leg. The medium pieces can be cut into chunks for stewing, used to make ground pork, or even butterflied for char siu.
- Now you should have skin and fat on one side and a thinner cut of fat and meat that resembles pork belly on the other side. Cut off the portion that has only skin and fat and reserve.
- Now you’ll be left with what resembles pork belly––a long piece with layers of fat, meat and skin––along with some remaining chunks of pork. Remove the pork belly piece, and continue cutting along the seams to separate the remaining pork chunks.
Tips & Notes:
- Be sure to use slow, deliberate controlled cuts with very little tension on your knife. This prevents any big unsafe movements in case your knife slips. Safety first!
- When de-boning, don’t worry if you leave some meat on the bone, as it will provide flavor in your stock or soup.
- For storage, we like these reusable/washable silicone bags. They’re better for the environment than single-use plastic!