Moab mountain biking, on the White Rim Trail through Canyonlands National Park, is the ultimate adventure trip for bikers. Whether you’re a road biker, mountain biker, or you just like riding a bike, it’s a great way to enjoy the rugged outdoors and the beautiful scenery of Moab, Utah.
While I don’t have an official bucket list, a Moab mountain biking trip was always on my list of things to do one day. I’ve been on and off both road bikes and mountain bikes all my life, even though I’m not a particularly experienced rider. So when some good friends asked if I wanted to join an overnight mountain biking trip back in April, I jumped right on board!
Where is the best mountain biking in the U.S.?
Most of the best scenery and mountain biking trails are west of the Mississippi, and Moab, Utah is known for some of the best mountain biking in the country. We heard good things about the White Rim Trail in Canyonlands National Park, in particular.
We knew we wanted a hassle free multi-day mountain biking experience. Quite a few companies offer fully supported overnight mountain biking trips, where all we had to do was show up. We chose to go with Rim Tours and had a great experience (though let me say up front that this is NOT a sponsored post).
Is mountain biking for you?
If you’ve never been on a bike before, tour companies may even discourage you from joining, because who wants to pay for a helicopter ride out of a canyon to the nearest emergency room?
That said, if you’ve mountain biked before or spent some time on a bike, and are in relatively good shape, Moab’s White Rim Trail is a good choice! Some things to keep in mind when evaluating your fitness level are:
- Mountain biking is more difficult than road biking! Sand, gravel, and fat tires will all slow you down, especially if you’ve never been on a mountain bike.
- Altitude is a factor, since Moab is at about 4000 feet above sea level.
- Train your legs, because there are some challenging hill climbs that require some strength and endurance. The better shape you’re in, the better the experience you’ll have on the trail!
- It is hot and dry in Moab, so you need to drink lots of water, use sunblock, and ensure you’re in good physical condition. It’s always best to check with your doctor and get his/her approval before going on such a physically demanding excursion.
What’s the best time to bike in Utah?
The best time for mountain biking in Utah is either April-May or September-October. Any other time of year is generally too hot or cold for multi-day trips. It’s best to check with tour companies, so check out their schedules or give them a call!
In his infinite wisdom, John, our trip organizer, allowed ample time for us to converge in Moab and adjust to the altitude. We rented a car for the day to get from the airport to a townhouse we rented through Airbnb, and explored the area. Moab is a great little town, filled with restaurants, bars, grocery stores, and bike shops.
Arches National Park
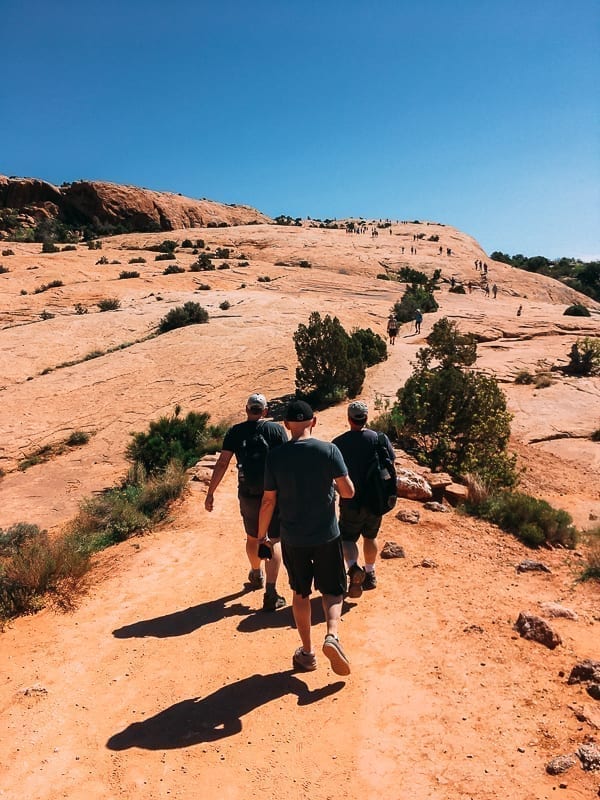
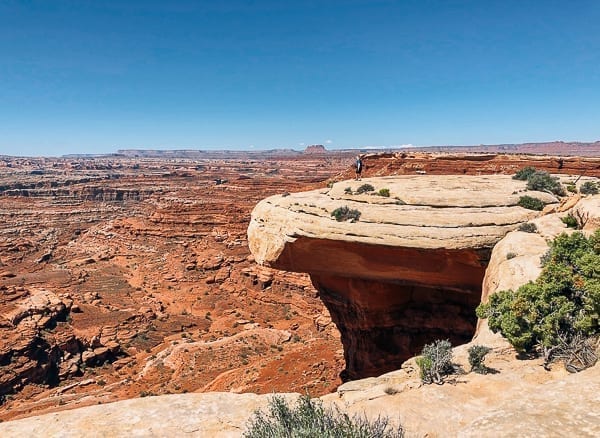
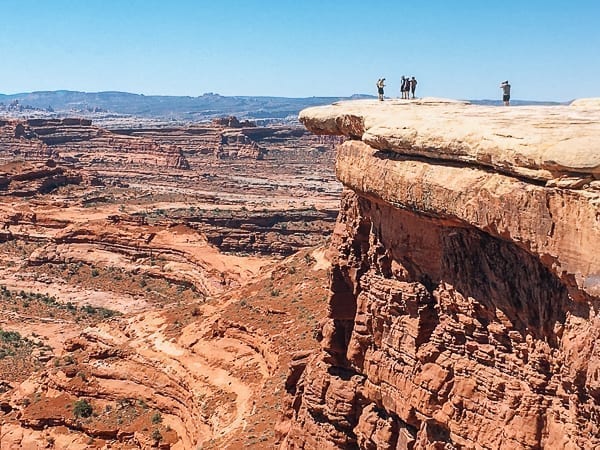
Arches National Park is an iconic park located in eastern Utah, just a few minutes north of Moab. With over 2000 natural stone arches, it’s a must-see destination. Hiking the popular Delicate Arch Trail is a great way to acclimate to the altitude and enjoy the scenery.
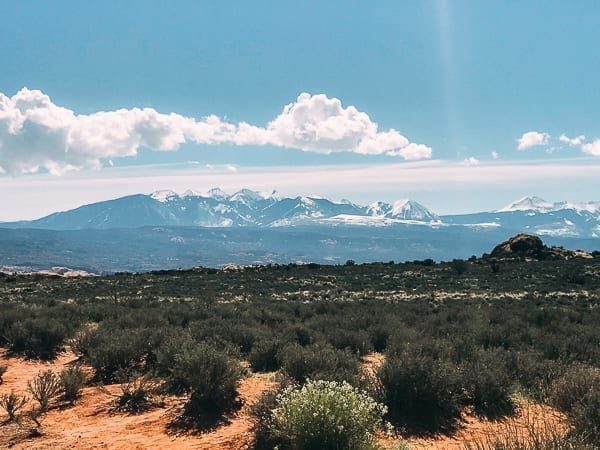
We first stopped at the Visitor Center and checked out the La Sal mountains, still snow-capped in late spring. It was something we’d see throughout the trip over the White Rim Trail.
In addition, we took a short walk through Park Avenue near the park entrance.
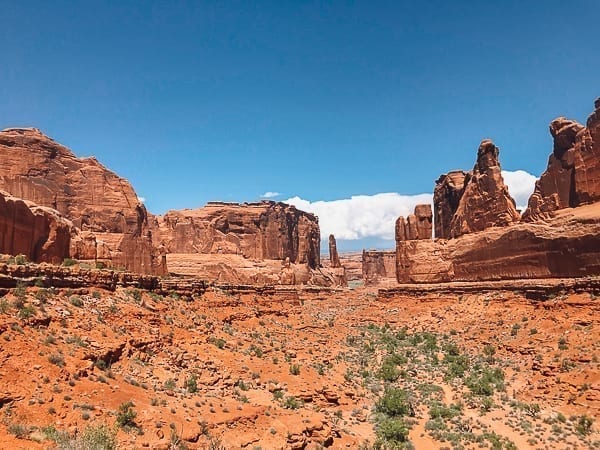
And saw Courthouse Towers Viewpoint.

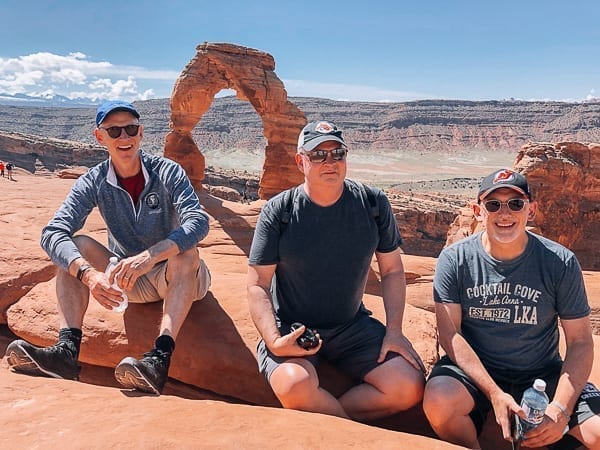
Our main target that day was Delicate Arch Trail, a 3 mile hike (in the hot sun, so bring plenty of water and salty snacks). The scenery was both spectacular and humbling.
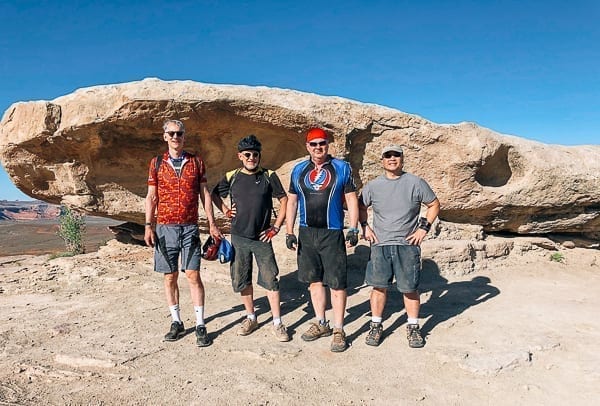
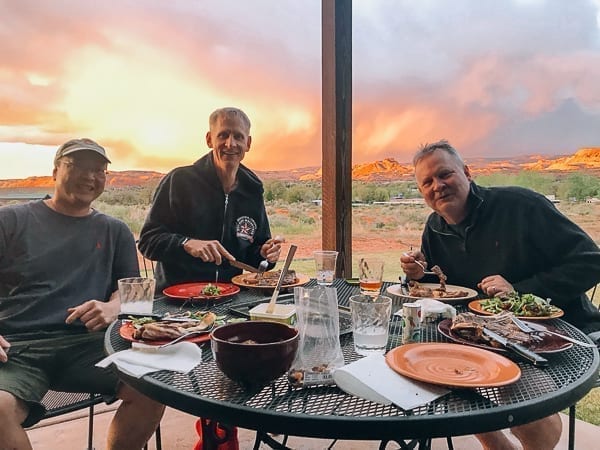
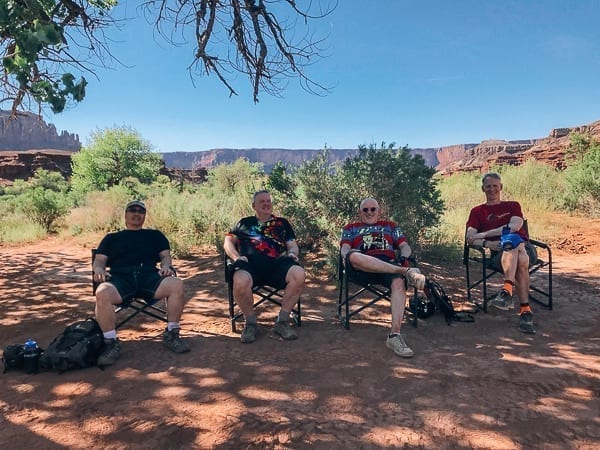
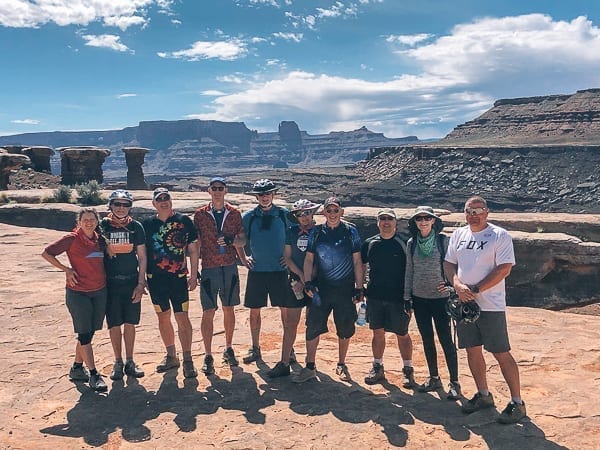
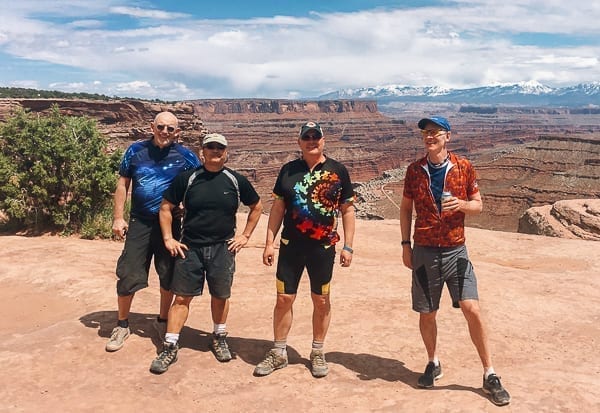
The area at the top near the famous arch is a great place to relax, have a snack, and do some people watching while taking in the scenery! (I’ll also take a minute to introduce my friends here, from left to right: Lee, John, and Scott.)
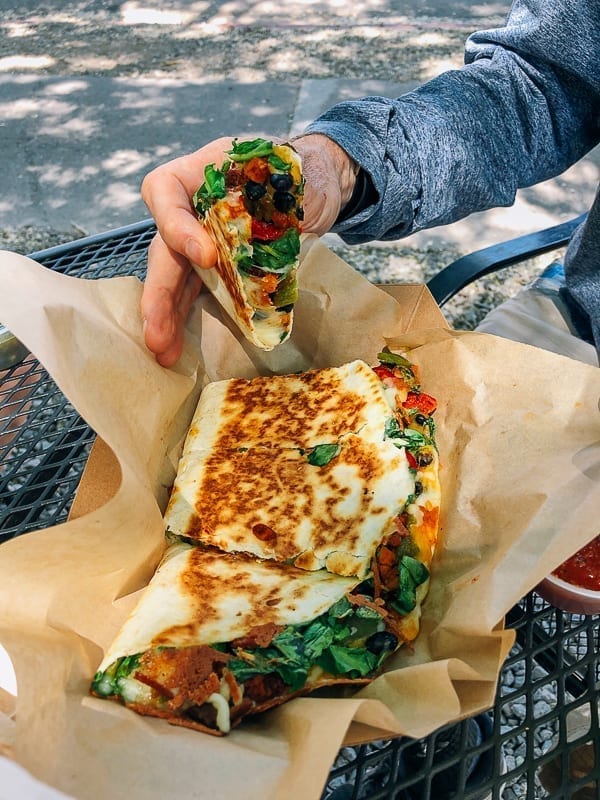
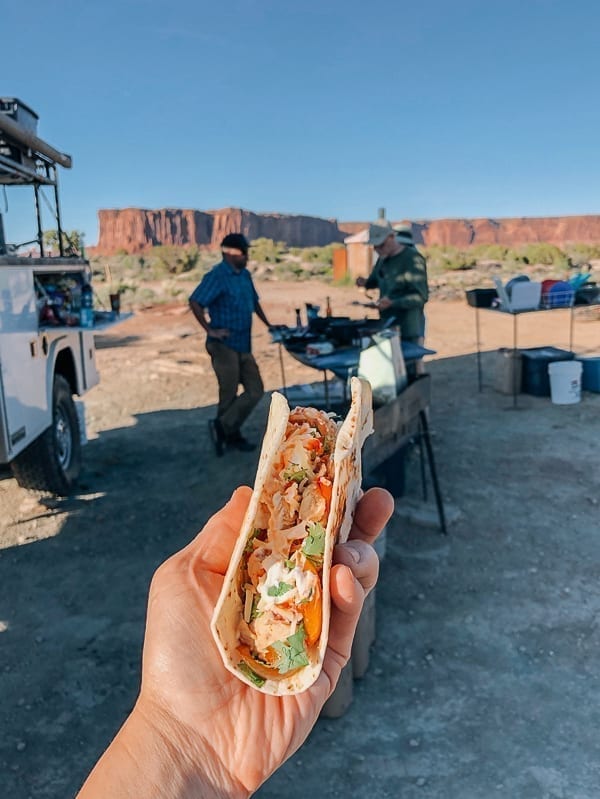
Of course, all that hiking made us hungry. After calling it a day, we headed to downtown Moab’s hottest permanently placed food truck, Quesadilla Mobilla.
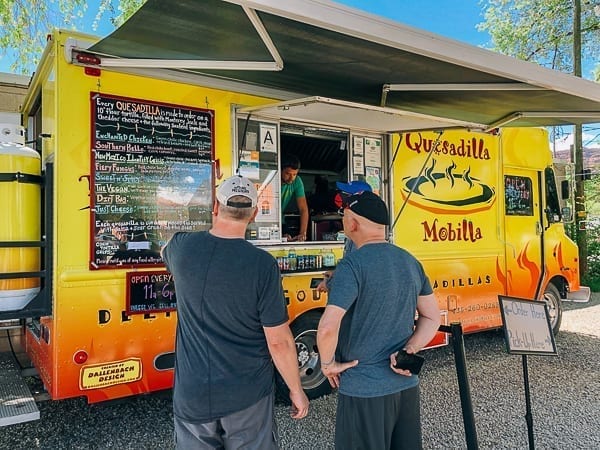
If you’re ever in Moab looking for a quick meal, their quesadillas are some of the best I’ve ever had!
No sooner than we finished lunch, we were thinking about dinner. After picking up some beers at the local Moab Brewery, we headed over to Moonflower, a great natural food store in town where we did some grocery shopping for dinner. It’s a great place to get fresh produce, meats, spices sold by weight, and anything else you may have forgotten to bring on the trip, like sunscreen and bug repellent!
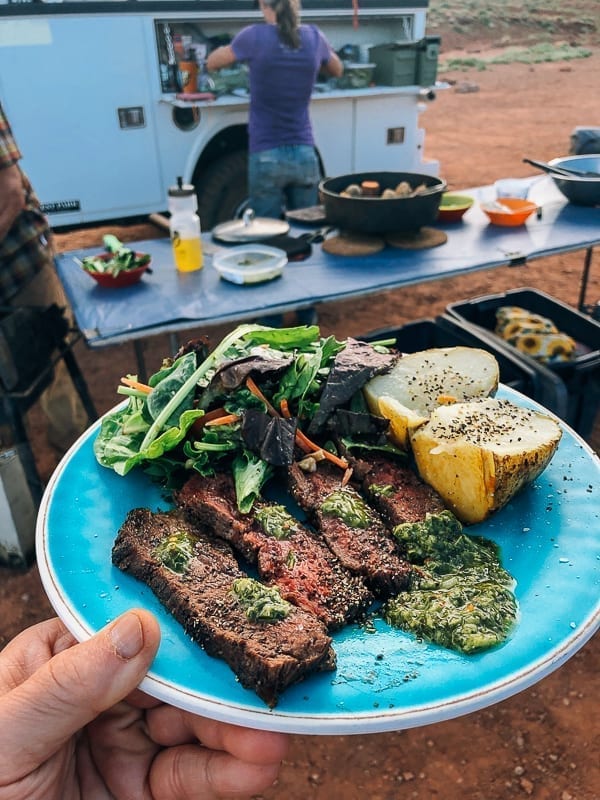
A steak dinner with grilled asparagus, scallions and potatoes with a sunset view at the townhouse was just what we needed. We dug right into our steaks before I even thought about taking a photo! Imagine if you could enjoy this scenery with dinner every day?
Getting a good night’s sleep was a priority for an early morning start to our 4-day White Rim Trail bike tour!
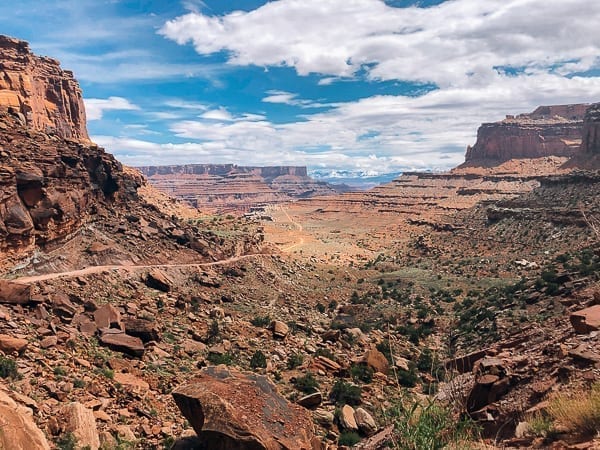
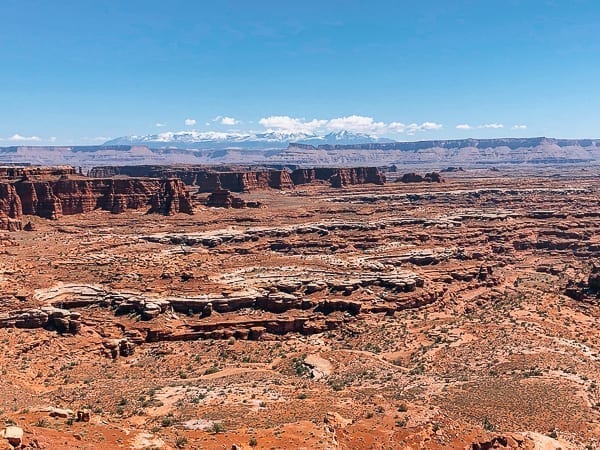
What is the White Rim Trail?
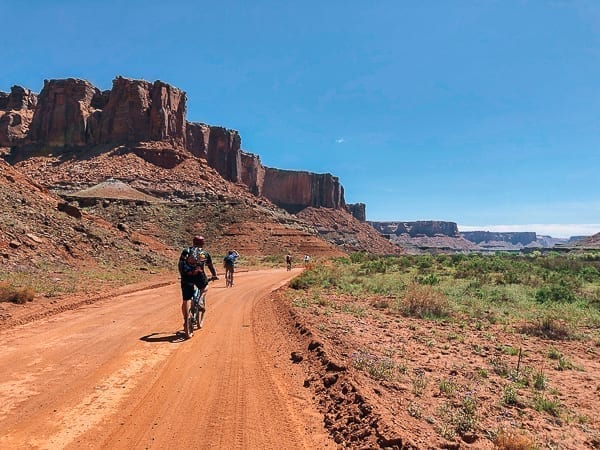
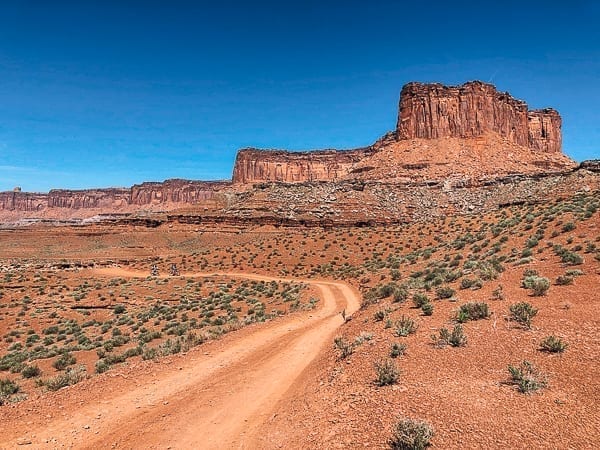
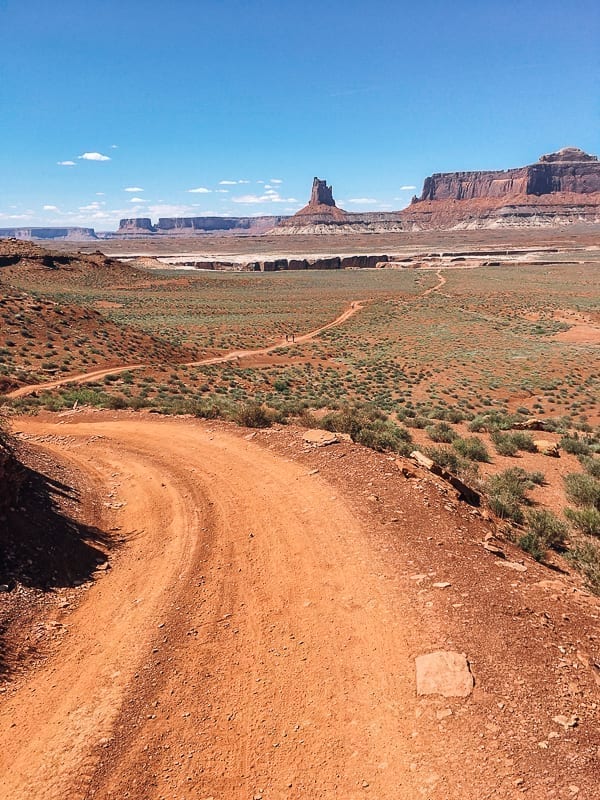
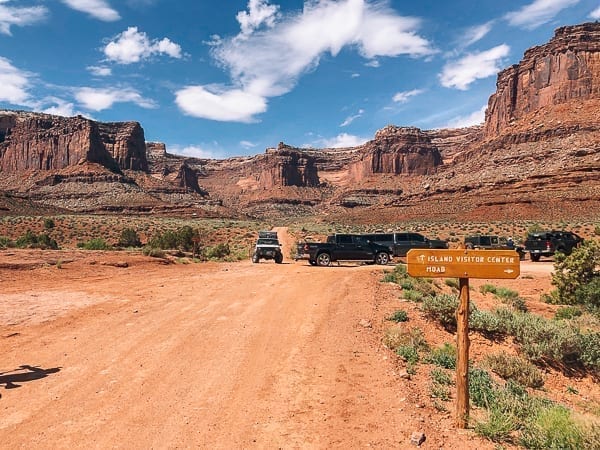
Our tour basically followed the 100-mile White Rim Road, looping around the Island in the Sky mesa top. The road is a double track, made for 4WD vehicles, motorcycles, and mountain bikes.
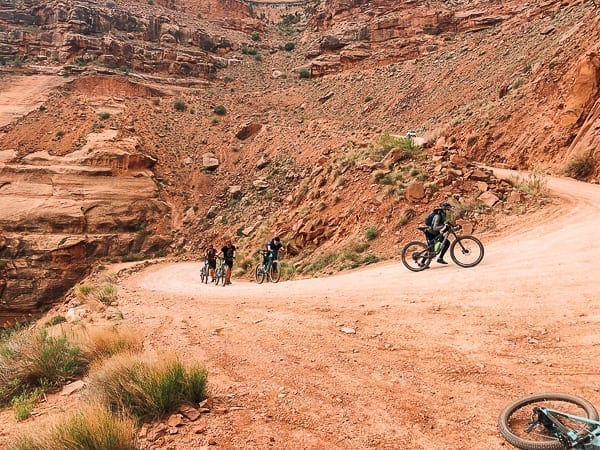
Day 1: Mineral Canyon Access Road to Potato Bottom Campground (15-18 miles)
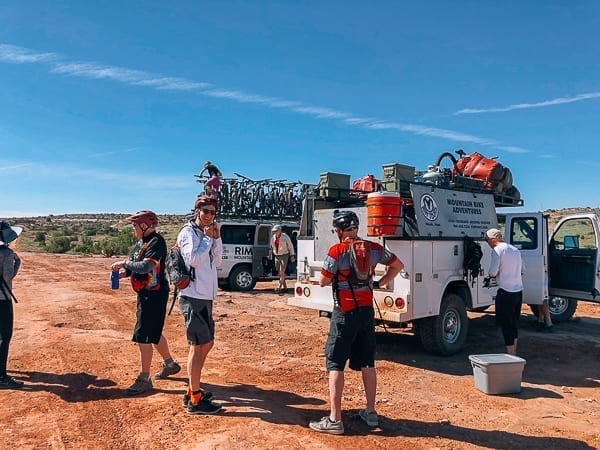
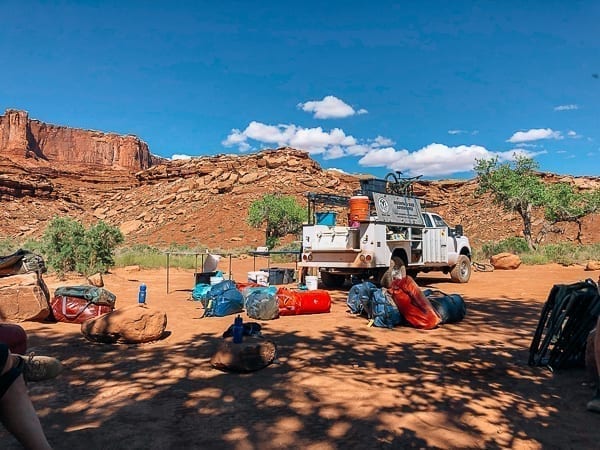
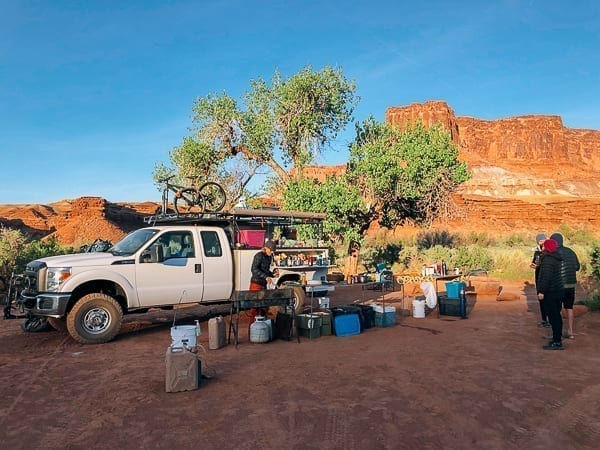
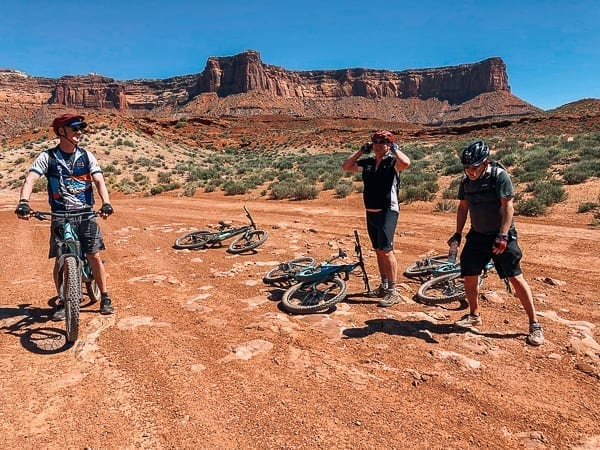
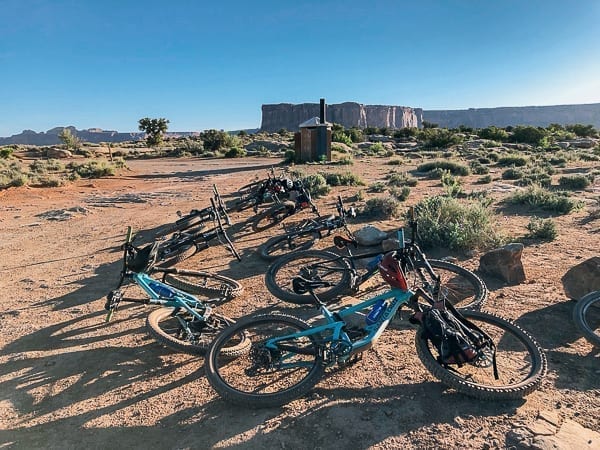
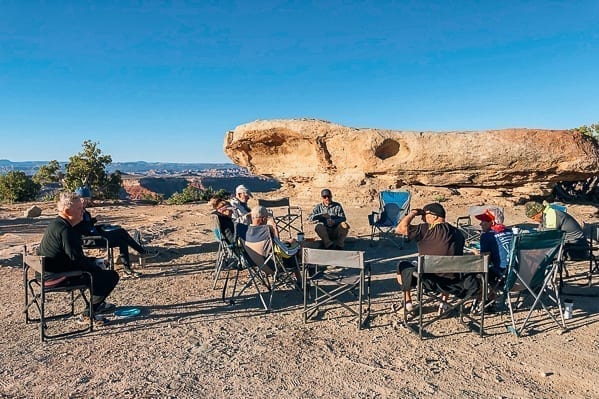
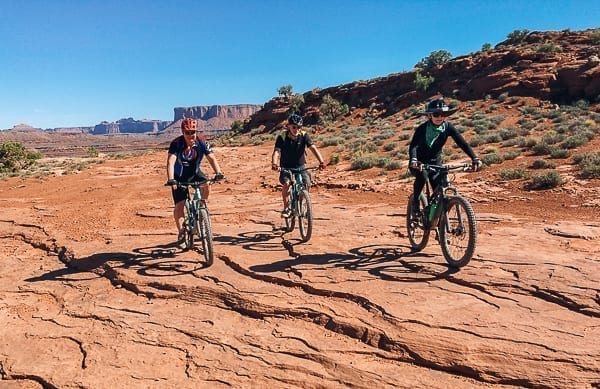
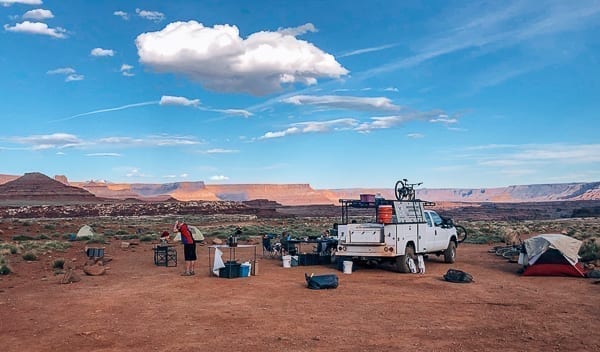
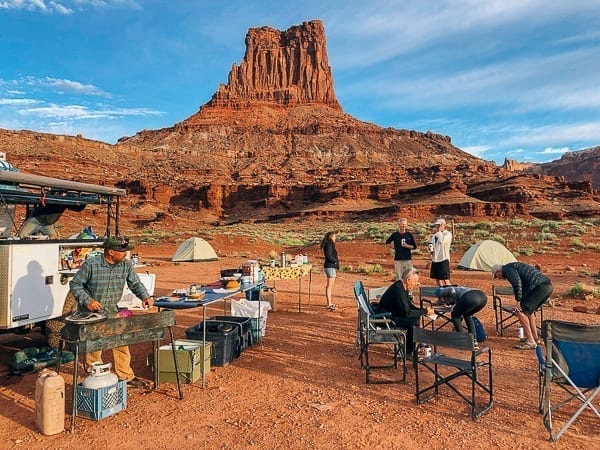
At the Rim Tours office, we met our guides, checked out our bikes, helmets and backpacks, and met the rest of our group (ten riders and two guides).
The van dropped us off at Mineral Canyon Access Road, where we got more familiar with our bikes and our support vehicle. One guide rode with us, while the other followed in the vehicle.
You could feel everyone’s excitement as the bikes were unloaded. After a few words of wisdom from the guides, we were on our way and riding for the next 4 days.
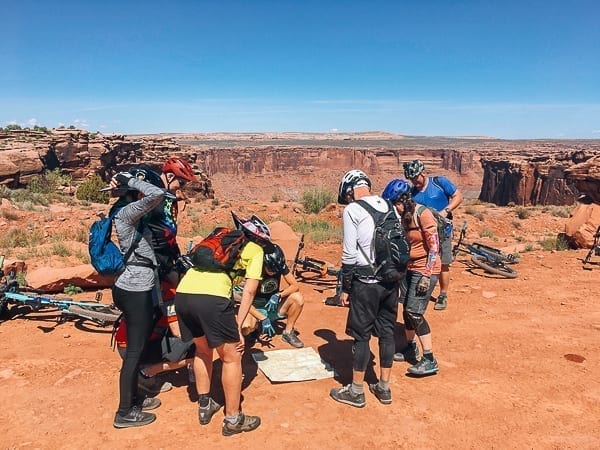
Every day, our guides went over exactly where we were on the map and any planned stops.
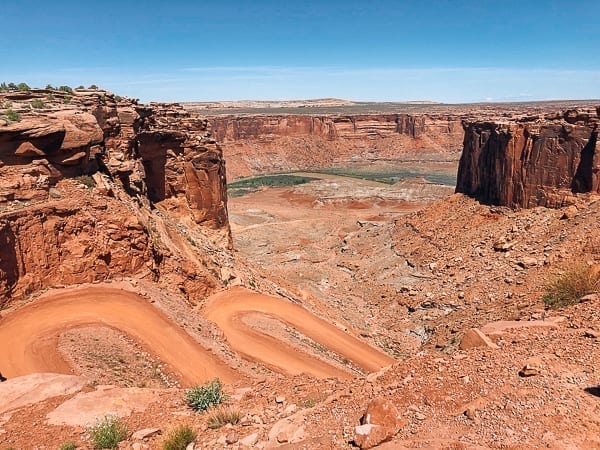
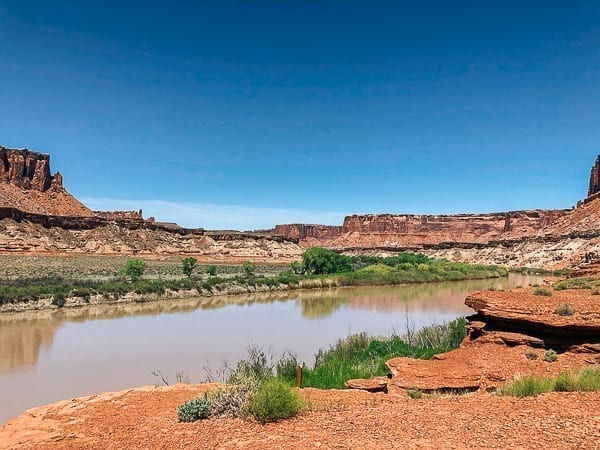
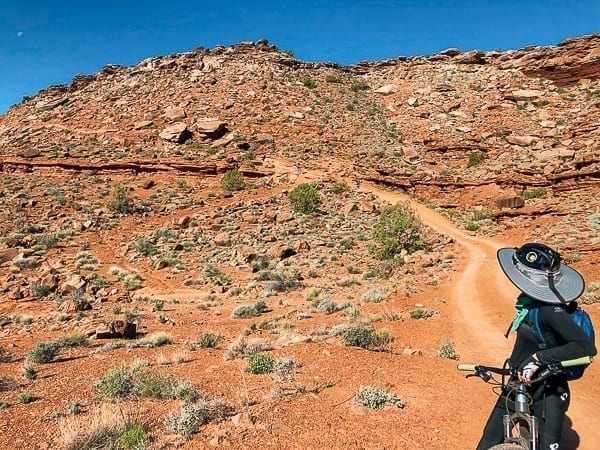
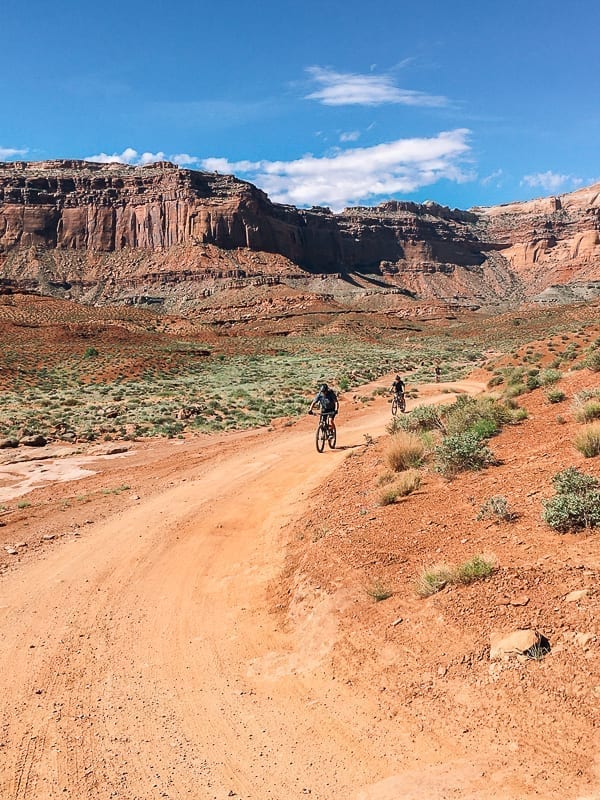
It was a nice flat ride to start, but became steep and curvy very quickly. Riding on roads with steep drop-offs right next to us took some getting used to, but it soon became a fun and winding descent along the river to hardscrabble bottom.
We had a quick lunch on the river, surrounded by beautiful views of the canyon rim. There was so much beautiful scenery to look at, and it would get even better!
A nice flat ride after lunch soon turned into a gradual ascent and our first tough climb over Hardscrabble.
John was riding like a pro just like on his road bike back home.
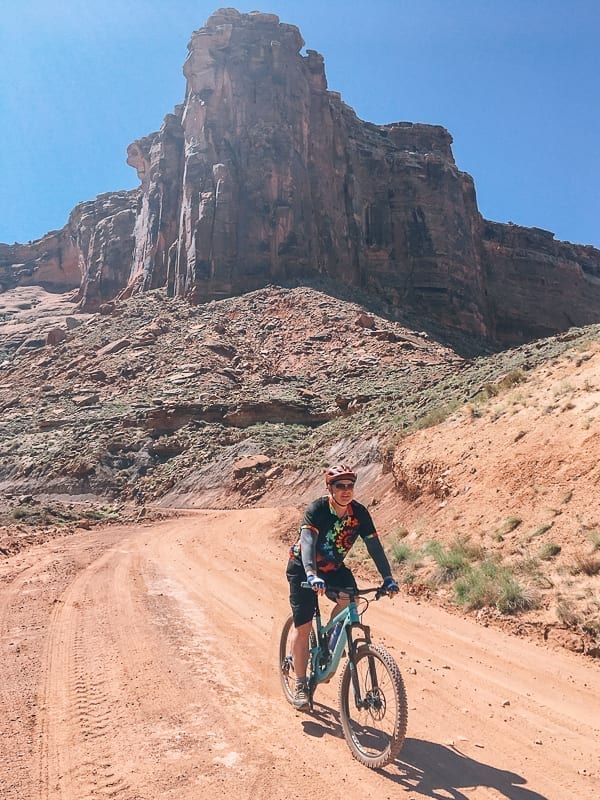
We all quickly realized how fortunate we were to have full suspension mountain bikes under our saddles, especially after riding across a cattle guard. It was like riding a Cadillac compared to my old hardtail mountain bike, and I think Lee agreed with me.
Our first hike to Fort Ruin bottom was a short one for me, because my legs cramped up due to a lack of electrolytes and probably lactic acid buildup. So I rested and enjoyed the scenery while waiting for the others to return. Canyonlands is so vast and peaceful that you could hear a pin drop.
After some rest and Gatorade, my legs loosened up, and I took it slow and easy on the bike. When I made it to Potato Bottom campground, one of our guides, Beth, gave me some electrolyte drops to put in my water. She said I may have over-hydrated without replenishing salts and electrolytes.
Lack of electrolytes can lead to a mild form of hyponatremia, a condition in which sodium levels get dangerously low. Symptoms include fatigue, weakness, muscle cramps, headaches and nausea, so definitely hydrate with electrolytes and salt your food during your ride!
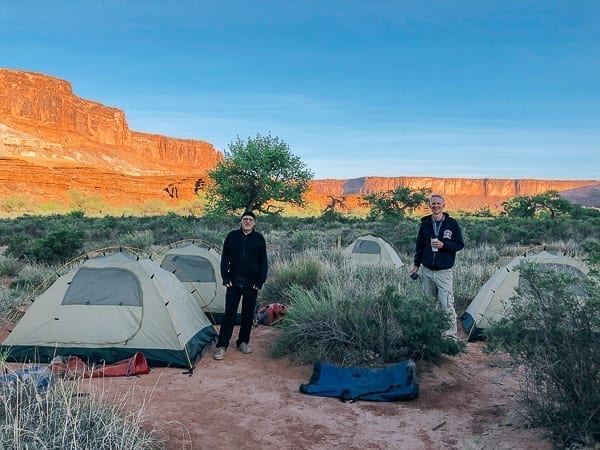
After some rest in the shade and some cheese and crackers (our Rim Tours support team made us before-dinner snacks!), we unloaded our bags and camping equipment off the truck and pitched our tents.
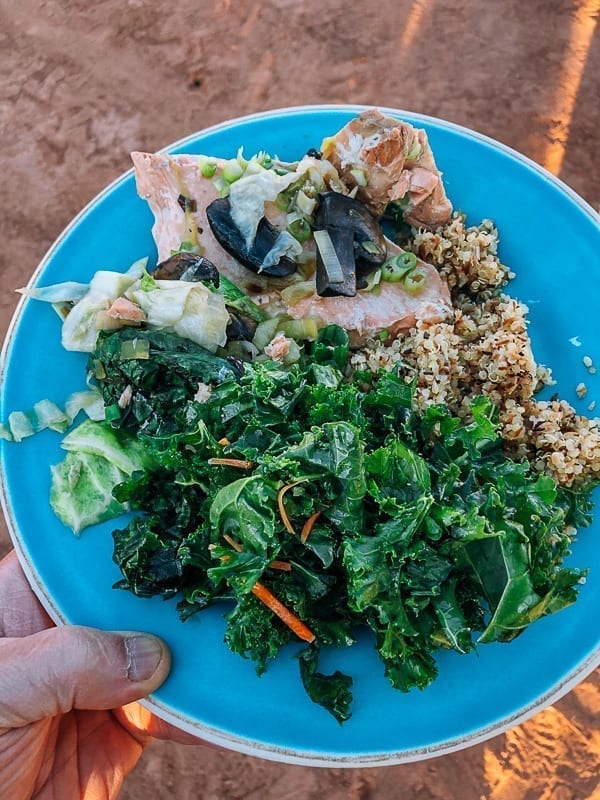
Dinner was poached salmon with mushrooms, quinoa, and kale salad––delicious and very nicely done by our multi-talented guides. All the food on our tour was excellent!
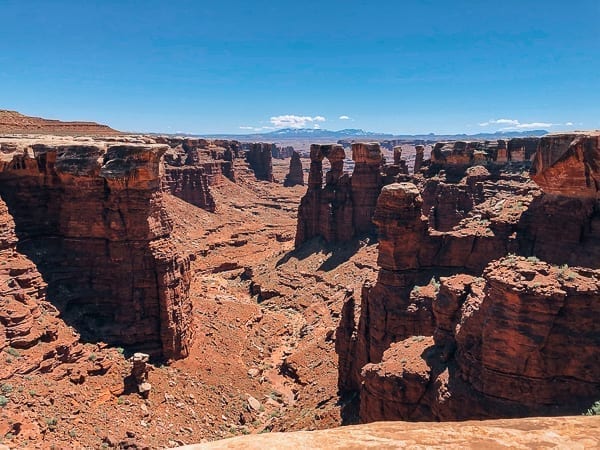
And all the scenery around us was incredibly beautiful.
Did I say that already?
Needless to say, we all had a good night’s sleep after dinner.
Day 2: Potato Bottom to Murphy’s Hogback CG (~21 miles)
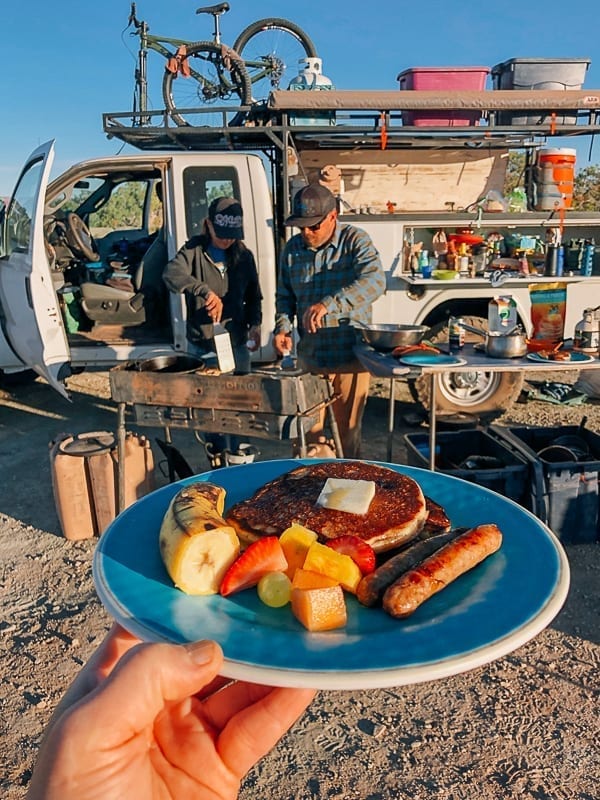
After a cup of strong coffee and full breakfast of scrambled eggs, bacon, hash browns, and fruit salad, we were back on the trail.
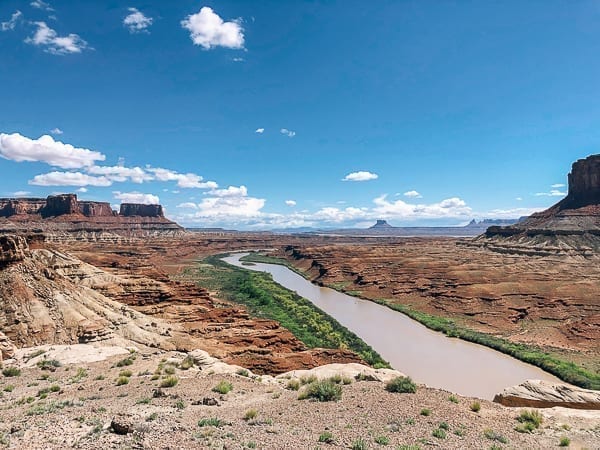
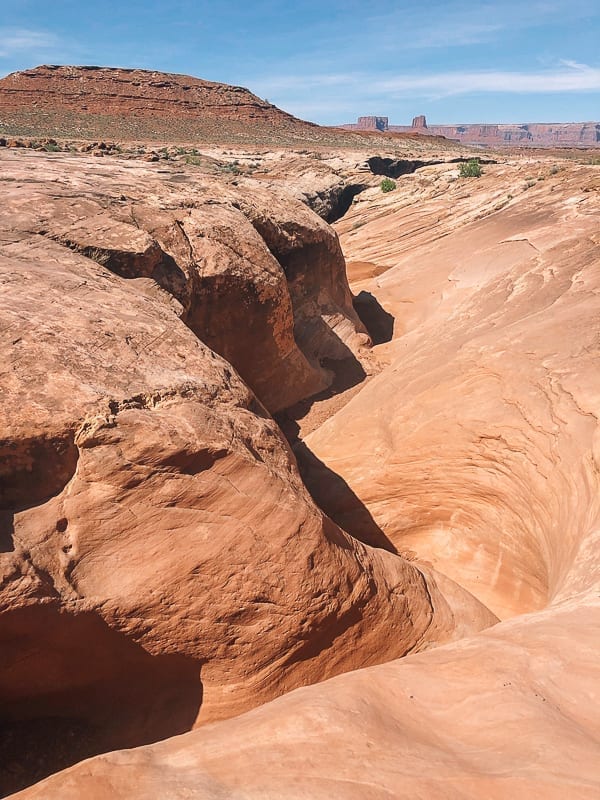
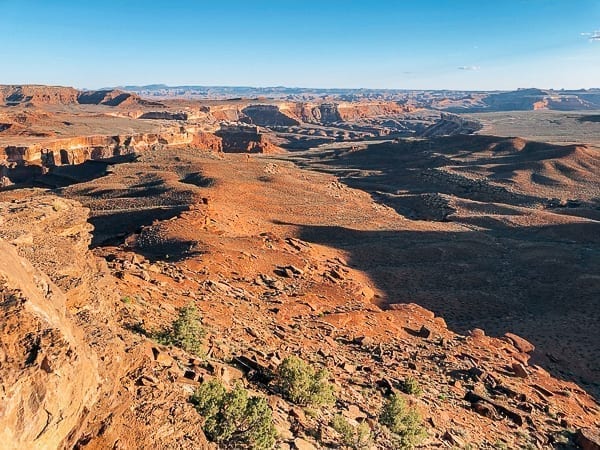
Along the river and canyon rim, we enjoyed spectacular views. Look at the light color of the rock along the top of the canyon, and you’ll see why the area is called the white rim.
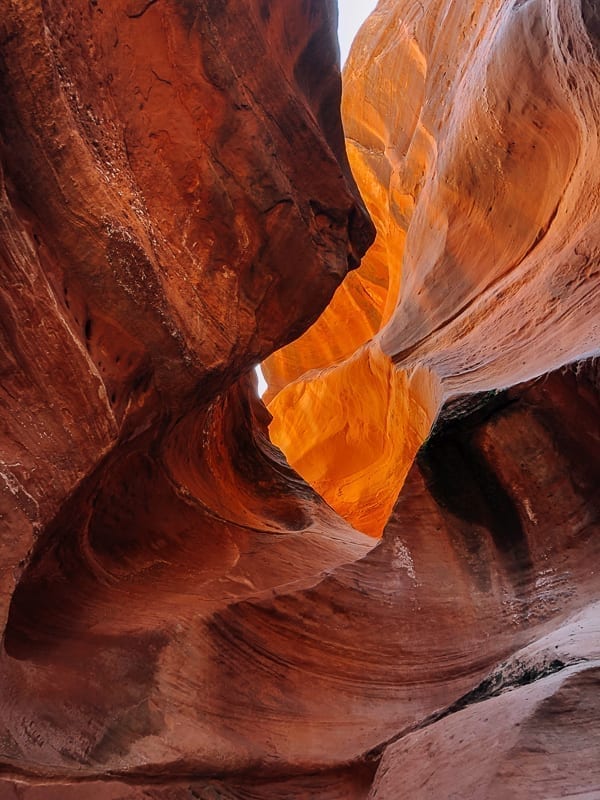
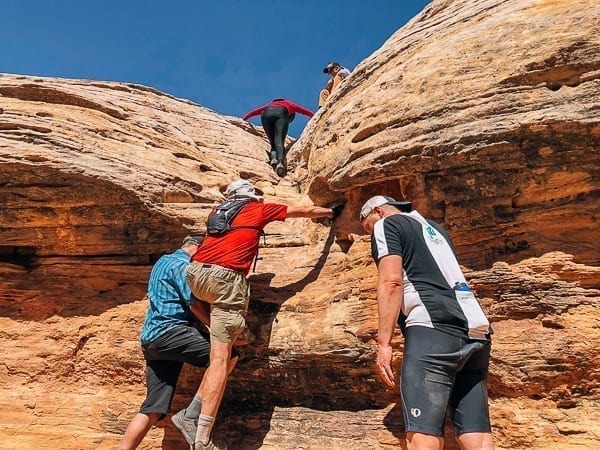
We continued the ride to our next stop at Holeman Slot Canyon, which was a very cool experience of slot canyon hiking, climbing and rock scrambling.
Climbing in was a little tricky, but lots of fun. Here, my buddy Scott showed us how’s it’s done.
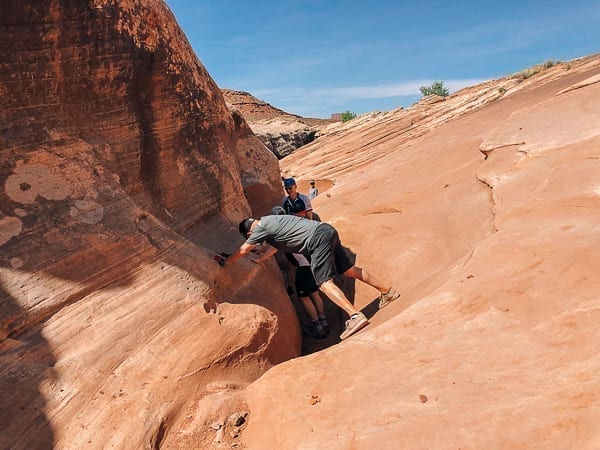

A few more places descending into the canyon were a little tricky, but super cool! Our guide, Dave assisted us climbing down into the canyon.
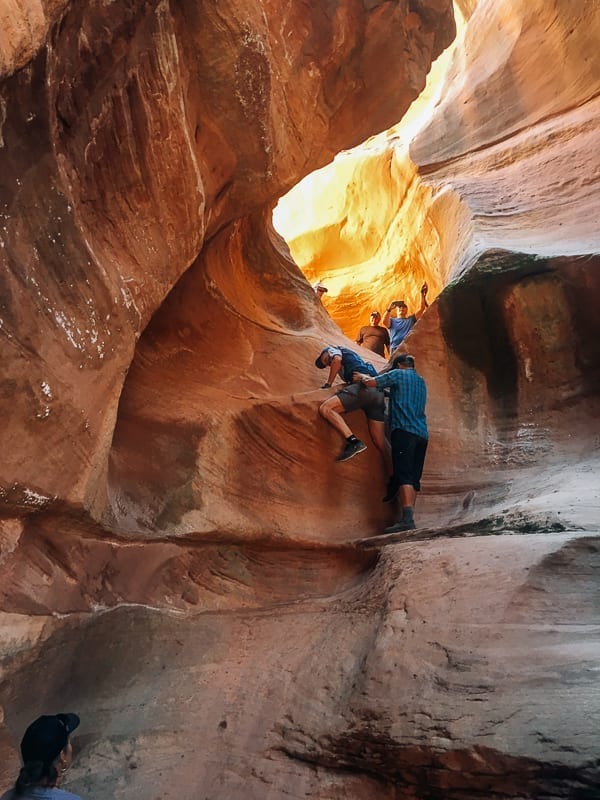
I didn’t expect to have such a great slot canyon experience on the trip––it was a pleasant surprise.
Climbing back out was just as fun and adventurous as the descent!
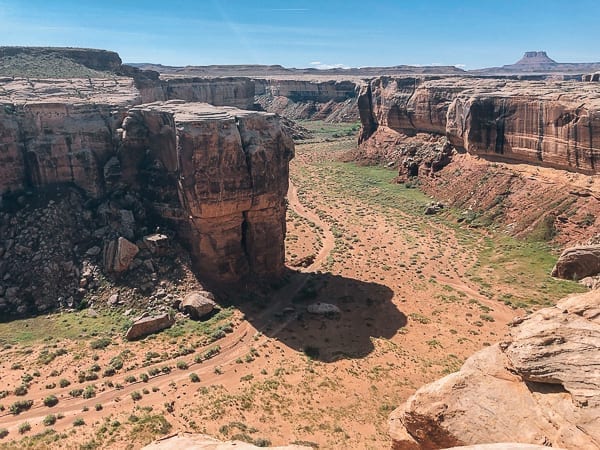
These short hikes, walks and quick stop-offs were great breaks from biking. Our rest break was at the second large bend of the Green River, where we hopped over the “Black Crack,” a rather intimidating natural fissure squarely between the us and our scenic views of the canyon and river.
Some parts of the crack were pretty wide, and you definitely could not see the bottom.
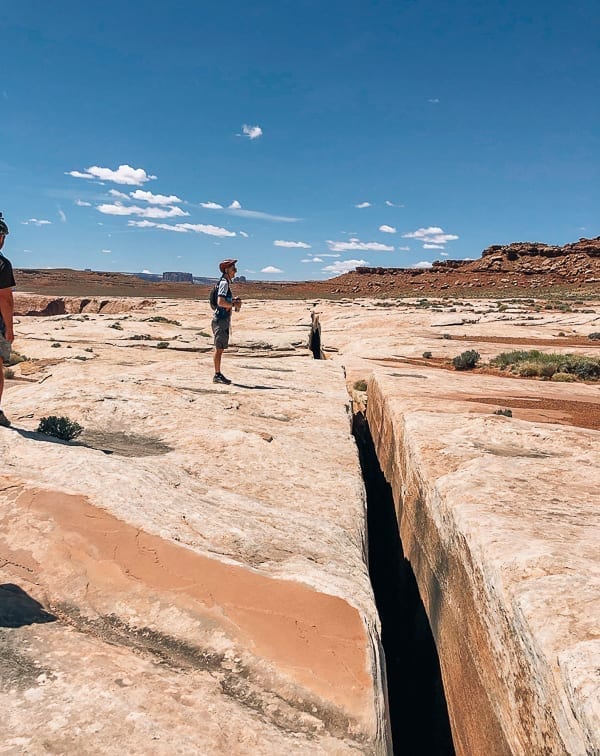
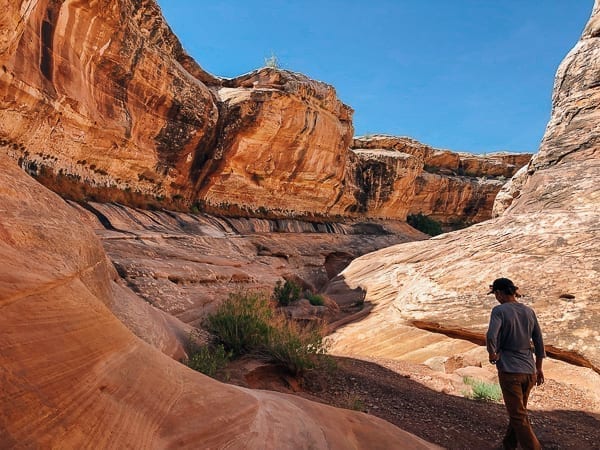
Canyonlands is so vast that we felt tiny no matter where we were.
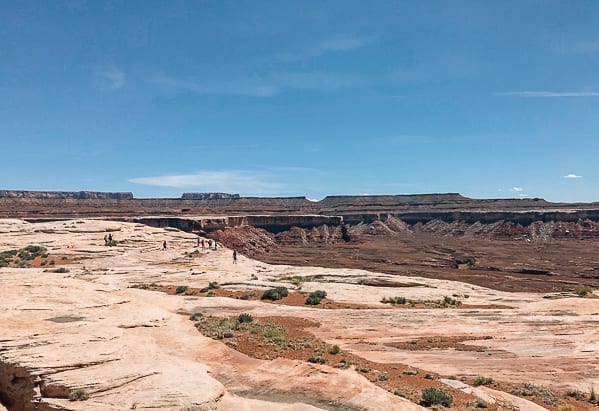
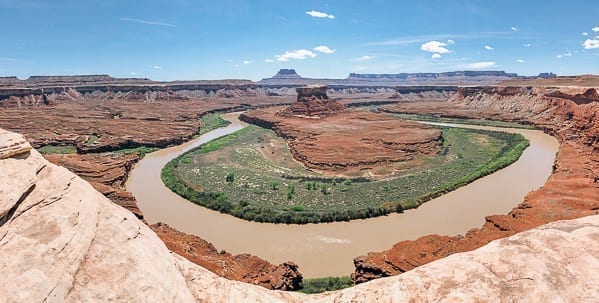
From the viewpoint, you could see great views of the winding Green River, which runs along the western portion of the White Rim Trail.
In addition to the group breaks, we took individual breaks to snack, hydrate, trade riding tips, talk about the incredible views, and bask in being away from our day-to-day grind back home. We were having a great time and grateful to share the experience.
The initial ascent to Murphy Hogback was gradual, but turned into a very steep climb that required some walking and bike pushing at the end.
Our mountain bikes lay in waiting as we settled into the campsite. If you were wondering, yes, they had bathrooms at every campsite, and they were among the cleanest I’ve ever used while camping.
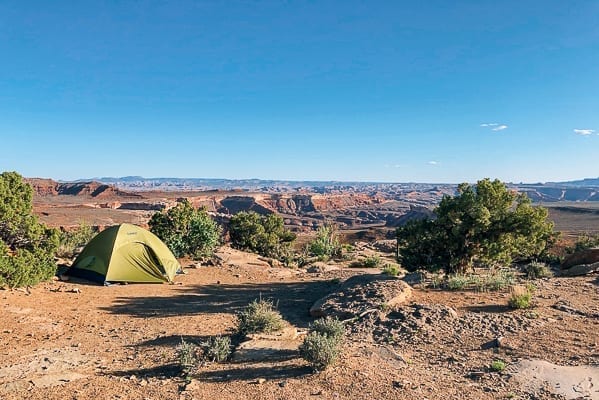
These were the views from the Murphy Hogback campsite, which speak for themselves.
The campsites were so picturesque, it was hard to imagine any place better to spend the night. Murphy Hogback was a definite favorite.
The only downside of this place was the gnats buzzing around, so remember to bring your insect repellant. After taking care of that and cleaning up, we devoured our tasty chicken enchiladas.
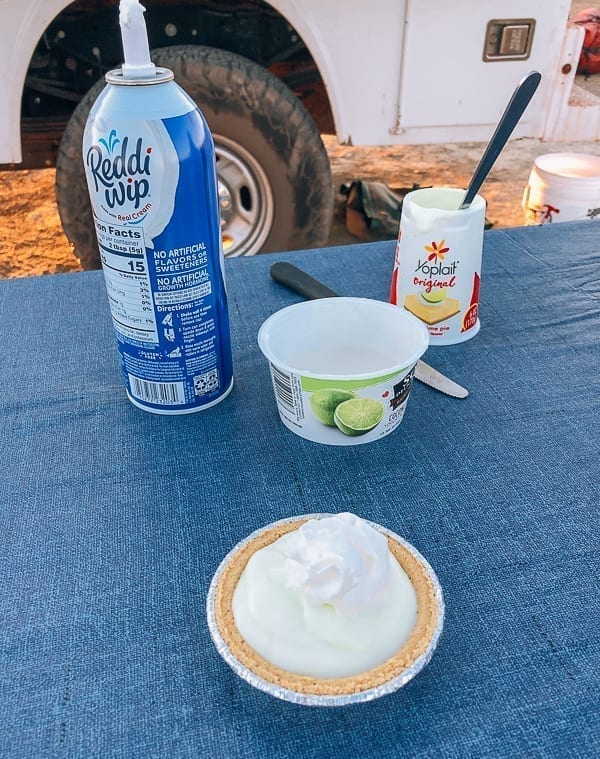
That evening, I also learned a smart shortcut recipe for key lime pie that I have to remember for our next camping trip. Pre-made graham cracker shells, lime yogurt, canned whipped cream, and voila! After a day’s riding, it tasted just like the real thing.
The nights were also beautiful, and if you stayed up late enough after the moon disappeared, you could spot the Milky Way. Sarah would have loved it, since she did a lot of star-gazing while camping at Big Bend National Park. I just wish I had a camera that could have captured it!

Day 3: Murphy Hogback to Airport Campground (~27 miles)
The next morning, we emerged one by one from our tents, as our guides Beth and Dave were already busily making breakfast.
Fresh coffee, almond meal pancakes, sausage, and fruit––a breakfast of champions, and we didn’t have to do any cooking or washing!
It was just as delicious as it looked. People quickly found out I was part of a food blogger family, as they saw me snapping photos of all the food on the trip. With each snap, I proclaimed, “for the blog!”
Coming down the initial hill from Murphy Hogback Campground was probably the most intimidating stretch on the tour. The road was so steep, narrow and rough, and you picked up speed very quickly. You can’t tell from this photo, except for one of the bikers in our group looking back at the trail glad she made it (we all did)!
After that first challenging downhill run, we relaxed to a relatively easy and relaxing ride with expansive views along the way.
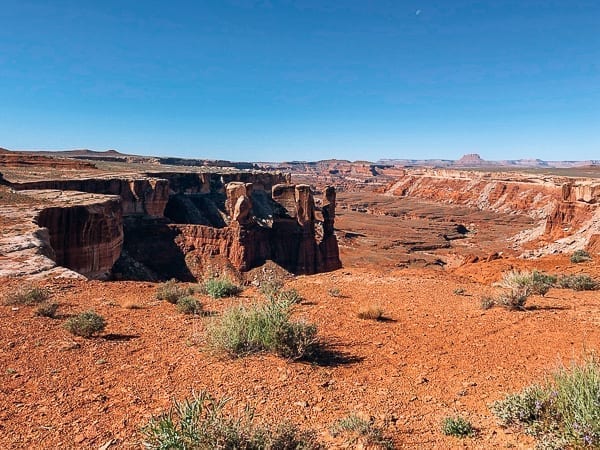
Our next stop was near White Crack Campground, where we enjoyed a short walk with some history.

People (described to us as mom and pop operations) used to mine the canyons you see in the back of the photo below for low grade uranium to sell to the government. You can still see small remnants of the mining operations attached to the rocks, from equipment used to move supplies in and out of the canyon.
We walked out to a central viewpoint located smack in the middle of the park. From there, we could see the La Sal Mountains, Bears Ears National Monument, and the Needles, just to name view of the sites. Our guide Dave called it the perfect 360 degree view of Canyonlands National Park.
We saw too many things to share here in this post, so I encourage you to put Moab Mountain Biking on the White Rim Trail on your bucket list!
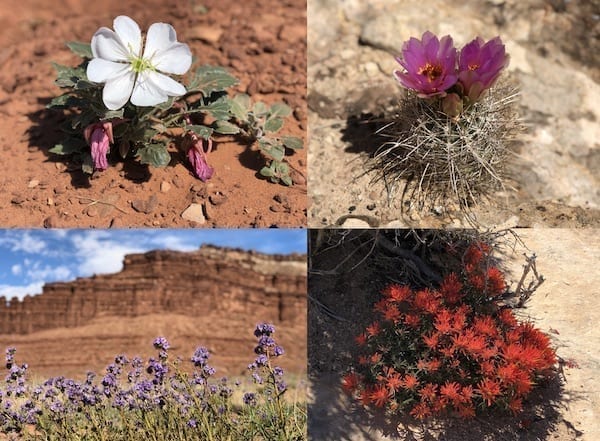
If you plan your trip during the spring season, you’ll also see lots of wildflowers!
After a long ride to finish the day, we arrived at Airport Campground and settled in for a splendid evening.
Our guides worked especially hard to prepare a hearty dinner of steak with chimichurri sauce, baked potatoes, and salad. Kudos again to the Rim Tours team!
Day 4: Airport Campground to Top of Schafer’s Trail (~ 18 miles)
Our last morning in the canyon was another beautiful one. I could get used to sleeping outdoors and waking up to the smell of fresh brewed coffee and breakfast every day!
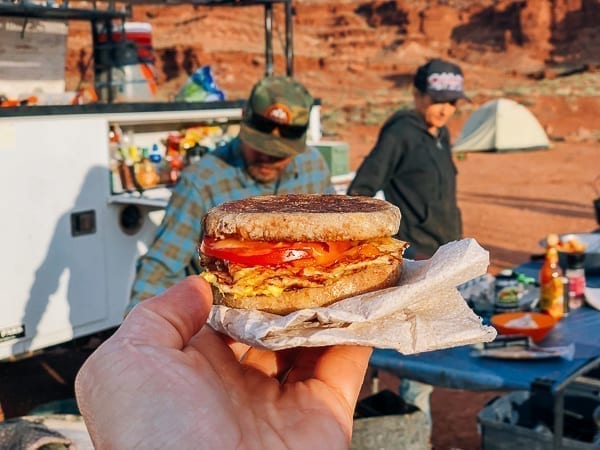
I couldn’t help taking more photos of food, this time of a delicious fried egg, Canadian bacon, and tomato on a whole wheat English muffin. If I didn’t mention it before, Dave was not only an accomplished mountain biker and guide, but a darn good camp cook!
Next stop, Musselman Arch!
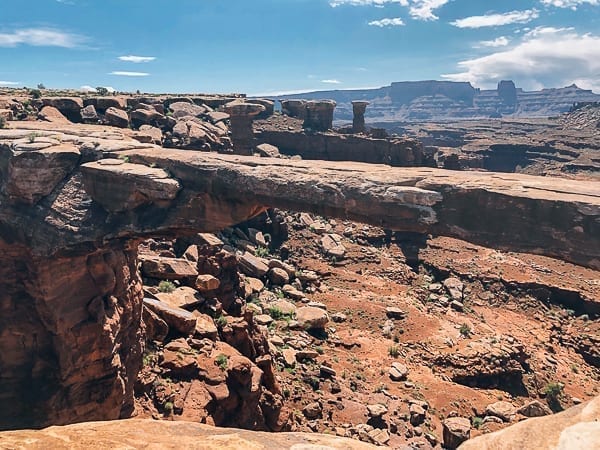
Where we all decided it was time for a group photo:
And just when you thought that you’d seen it all, we enjoyed yet another panoramic vista at Gooseneck Overlook. I spent some time getting some memorable photos.

It was our last group stop before continuing on to the junction of Potash Road and the Schafer trail.
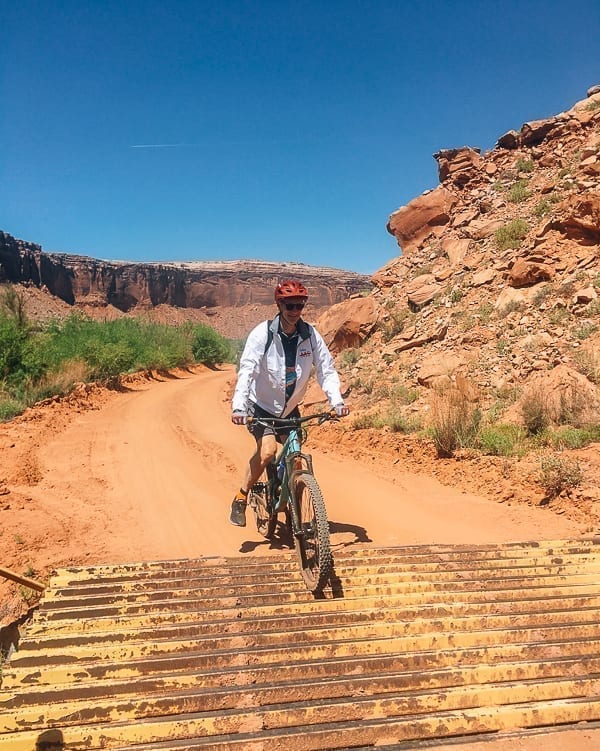
It was a busy intersection with lots of 4WD vehicles on the road. This was the start of our last steep climb out of the canyon…
…up Shafer trail.
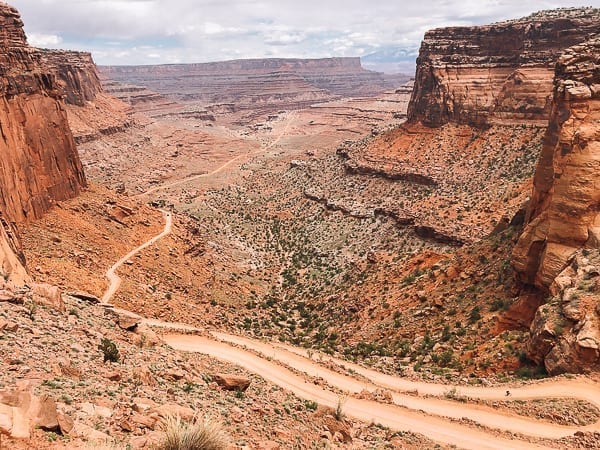
While the climb was a bit grueling and a test of endurance, we were rewarded with beautiful views of the long roads across canyon country.
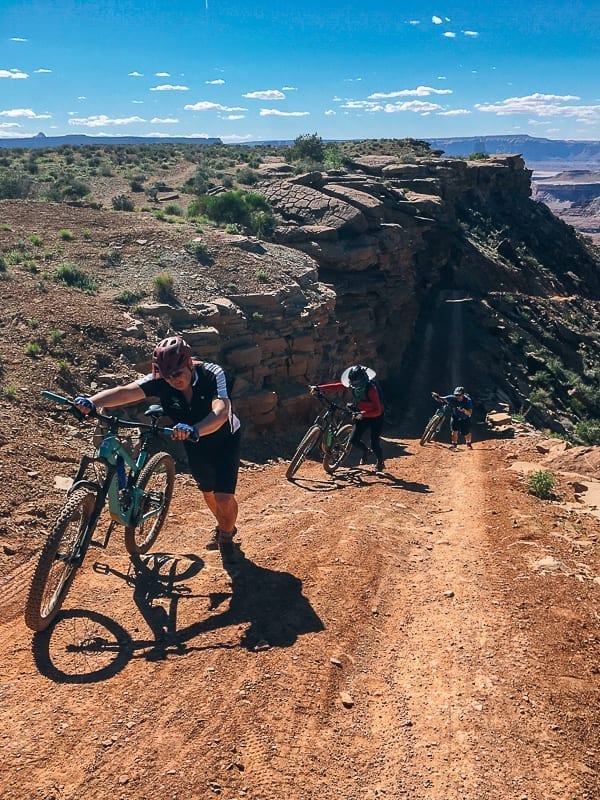
At the steep switchbacks, we alternated between walking and riding.
But we made it and took our final celebratory group photo!
It was tougher than we thought, but we walked away with a sense of accomplishment, and will have many stories to tell for years to come!
Tips for a Successful Mountain Biking Trip
- Plan ahead for travel, accommodations and trip reservations. Multi-day tours run in spring and fall, so check with your tour company of choice for details.
- Do some aerobic training for the high altitude and cycle training for the hill climbs to make your trip more enjoyable, and don’t underestimate the physical challenge.
- Avoid alcohol, hydrate with electrolytes, and snack often. I would recommend using electrolyte drops (no sugar).
- Take Vitamin C to keep your immune system strong, since you’re basically running down your body everyday. I’m no doctor, but I do think this helped me personally.
- Don’t be afraid to stop and walk! Accidents are more likely to happen if you push yourself too hard.
- Do some stargazing at night, but be sure to get a good night sleep and rest.
- Prepare for the sun. Apply sunscreen often and bring a hat for when you’re off the bike. A wide-brimmed hat is best for full coverage.
- There is no cell coverage on most of the White Rim Trail, so your phone should always be in airplane mode to conserve battery for photo taking!
What to Bring for an Overnight Mountain Biking Tour
Best to pack light for a trip like this, but here are some key items to bring:
- Small travel pack of Advil for muscle aches, joint pain, and inflammation after a day’s riding
- Bug repellant. The small gnats/no-see-ums ate me alive on nights I forgot to use bug spray!
- A portable charger for your phone/camera
- Lightweight high-tech warm clothes
- A headlamp for the tent and going to the bathroom at night––you are camping after all!
- A cooling towel or handkerchief and a small washcloth or pack of wet wipes for the evening wash-up
- Consider bringing an action camera––the Gopro is popular, but I found that the Akaso EK 7000 is a great value
Resources for Moab Mountain Biking:
- Canyonlands National Park
- Discover Moab Website
- White Rim 4 day Tour (lots of info on Moab)
Hope you all enjoyed this recounting of this recent trip, or found it helpful if you’re planning a trip on your own. If you have any questions or your own travel experiences to share, feel free to do so in the comments below!