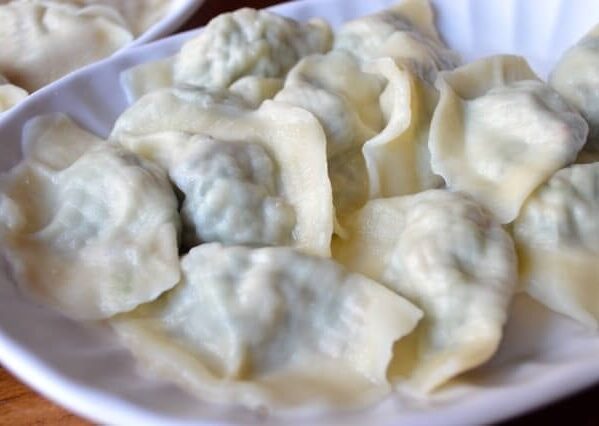
Chinese Soup Dumplings, or xiaolongbao (小笼包), are perhaps the most perfect single bite of food ever conceived by man. This tantalizing, dreamy snack is probably the most famous dish to come out of the Jiangnan region of China. It is often associated with the city of Shanghai (the largest city in the region by population, and also the largest city in all of China!), which is why soup dumplings are often called “Shanghai Soup Dumplings.”
If you’ve never tried xiaolongbao and don’t have any authentic Chinese restaurants near you that serve them, we have good news. You can make soup dumplings at home!
What Are Soup Dumplings?
Chinese soup dumplings, sometimes also referred to as Shanghai Soup Dumplings, xiaolongbao, tang bao, or “soupy buns” (as it is hilariously translated on some menus), are a steamed dumpling consisting of a paper thin wrapper enveloping a seasoned pork filling and hot, flavorful soup.
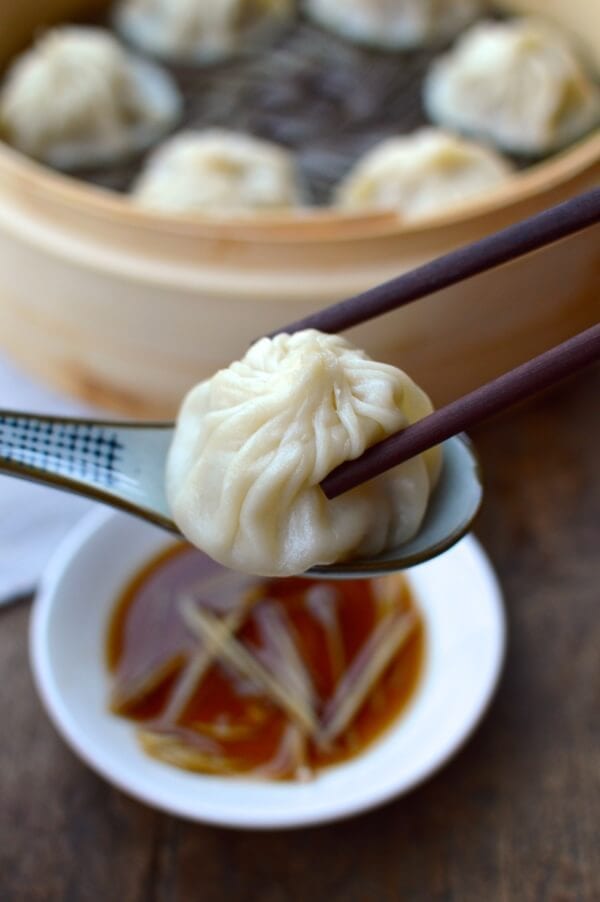
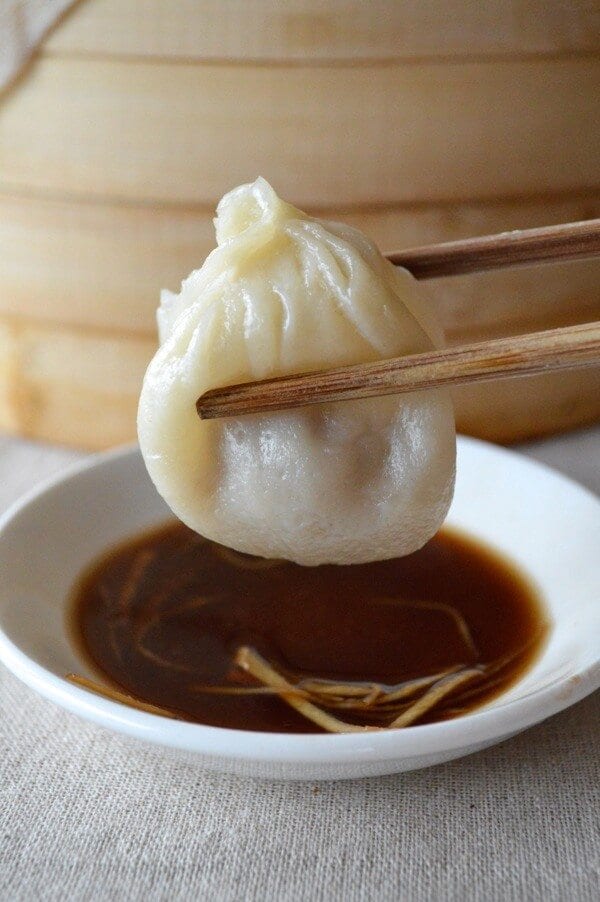
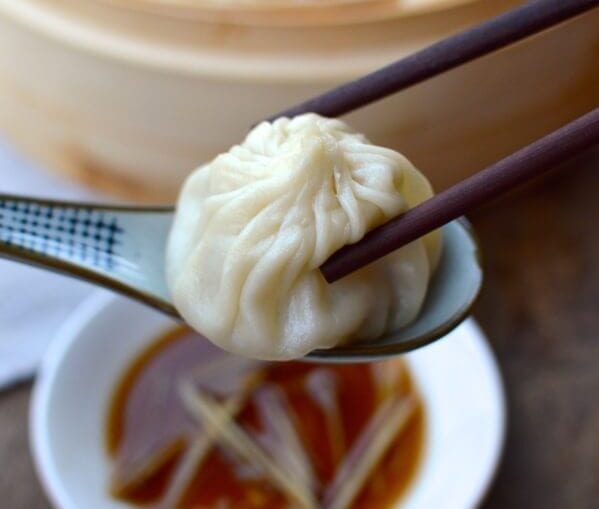
Each dumpling is pleated with many folds. (Some, like the famed soup dumpling restaurant Din Tai Fung, say that 18 folds is the perfect number!) Once steamed, the delicate dumplings are dipped in a mixture of Chinese black vinegar and julienned ginger for the perfectly balanced bite.
Soup dumplings are traditionally made with a plain pork filling, while some versions contain a mixture of pork and crab. New and modern versions may also contain other types of meat, seafood, or vegetarian fillings.
How Do They Get the Soup into the Soup Dumpling?
That, my friends, is the million dollar question!
The secret to getting the soup into a Chinese soup dumpling is to create a rich pork aspic using collagen/gelatin-rich pork skin and neck bones. The aspic is basically the soup in solid form, allowing you to fold it into the filling.
Once steamed, the gelatinous aspic returns to its liquid form, creating those rivers of hot soup that you can slurp out the sides of the dumpling!
Developing This Recipe
Perfecting this technique is not easy, and I will say that this was not an easy recipe to create. Having eaten these in restaurants in Beijing, Shanghai, and around the world, our standards are high.
We tested and tried many versions to get each element correct, from the dough, to the filling, to the soup. Now, every time we walk into a xiaolongbao restaurant, we’re amazed by the speed and ease with which those cooks prepare these delicate dumplings.
But I’m so excited about this recipe and to finally be able to share it with everyone. It’s a family favorite (Sarah has a particular obsession with them), and well worth a little patience in the kitchen.
I still feel I have so much to tell you about these Shanghai soup dumplings. But as Confucius said, “I hear and I forget; I see and I remember; I do and I understand.” I will let you come to your own conclusions about these. Follow the recipe’s steps as closely as possible, and you will be overjoyed with the result!
If you don’t have a bamboo steamer, try your Asian grocer or click here to get one on Amazon (note, this is an affiliate link, so any purchases from Amazon using this link will help support The Woks of Life).
Other recipes where you will find the investment in the steamer basket useful is in our dim sum collection. For other kitchen tools we use and recommend, take a look at our cooking tools page.
Soup Dumpling Recipe Instructions
Below, you will find step-by-step detailed instructions with photos. For the full recipe card in condensed form, scroll down to the bottom of this post.
Step 1: The Aspic
The first thing to make is the aspic, or meat gelatin, which will create the soup in the soup dumplings.
You’ll make a pork soup with bones and skin (don’t freak out at this! The Chinese—as well as all of the world’s great food cultures—have learned to utilize every part of an animal and leave nothing behind to waste!), which will help you create a smooth, firm aspic once chilled.
You can use the skin from a skin-on pork shoulder and buy pork neck bones or ham bones. If they’re not readily available in your local market, ask the butcher.
- ½ lb pork skin (225g), cut into 1-inch strips
- 1 lb (450g) pork neck bones (you want neck bones that still have meat on them!)
- water
- 2 slices ginger
- 1 scallion, cut into 3 pieces
- 1 tablespoon shaoxing wine
In a small pot, add the pork skin and pork bones and cover with cold water. Bring to a rolling boil, and immediately drain and rinse off the bones and the skin. This gets rid of any impurities.
Rinse out the pot and put everything back in. Add 4 cups (950 ml) of water along with the ginger, scallion and wine. Bring the pot to a boil and then reduce the heat to low. Cover and simmer for 2 hours.
After 2 hours, turn off the heat, allow the soup to cool, and strain the liquid into a bowl. As to the leftovers in the pot, you can discard them or go the Chinese route, which would be to drizzle some light soy sauce over everything and start grazing).
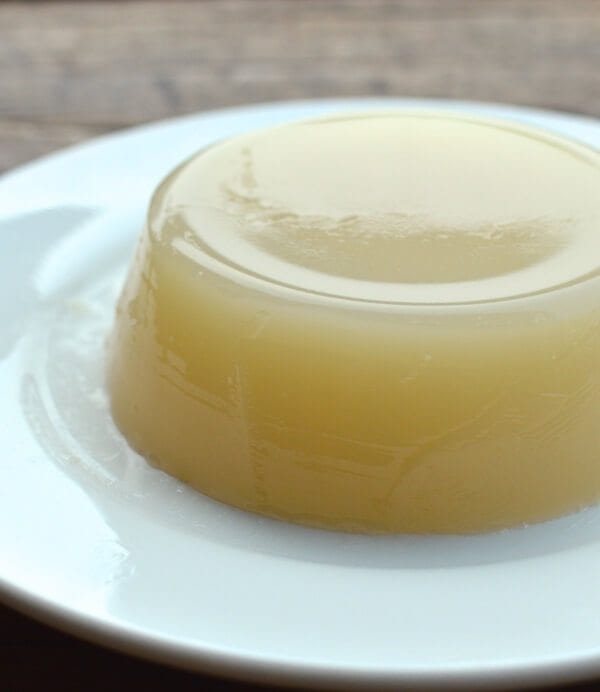
Once the liquid is completely cooled, cover and refrigerate overnight.
This is what you’ll have the next day. Meat jello!
Step 2: The Dough
- 1 cup all-purpose flour (130g)
- 6 tablespoons warm water (90 ml)
In a mixing bowl, add the flour and warm water 1 tablespoon at a time. Work and knead the dough for 15-20 minutes. The dough should be very soft and smooth. Cover with a cloth and let it rest for 30 minutes.
Step 3: The Filling
- 1 pound (450g) ground pork (70% lean 30% fat)
- 2 tablespoons shaoxing wine
- 3/4 teaspoon salt
- 1/2 teaspoon sesame oil
- 3/4 teaspoon sugar
- 3 teaspoons light soy sauce
- 3 tablespoons water
- A pinch of ground white-pepper
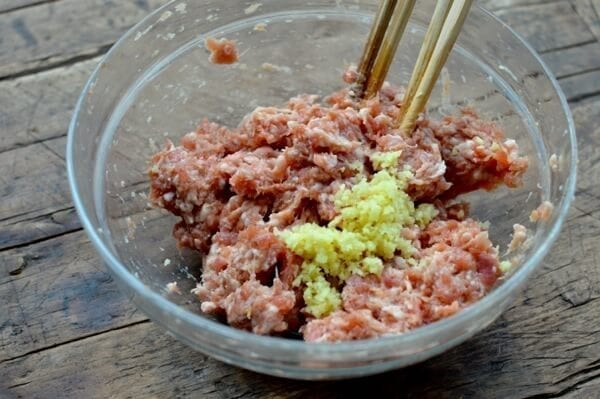
- 1 tablespoon minced ginger
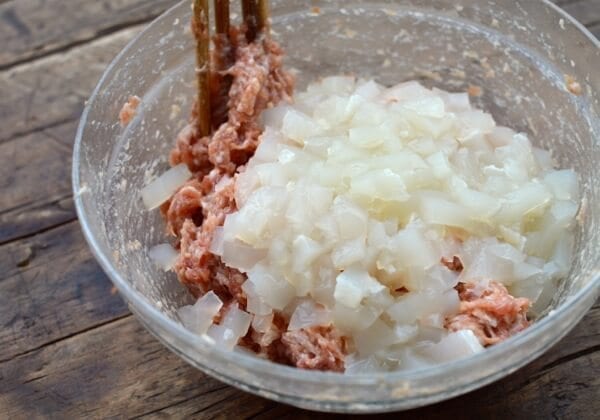
- 1 heaping cup of your aspic, diced into ½-inch pieces
Take your ground pork and put it in the food processor. Pulse for 30-60 seconds until the pork resembles paste. In a mixing bowl, add the pork and all the rest of the ingredients except the aspic.
Whip everything together thoroughly, for about 2 minutes. You want everything to be extremely well combined, and the pork should look like a light, airy paste. Gently fold in the diced aspic, and do not over-mix.
Cover and transfer the filling to the refrigerator until ready to make the dumplings. If you’re ready now, you can put it in the freezer for 15 minutes to allow it to firm up and make assembling the buns easier.
Step 4: Assembly
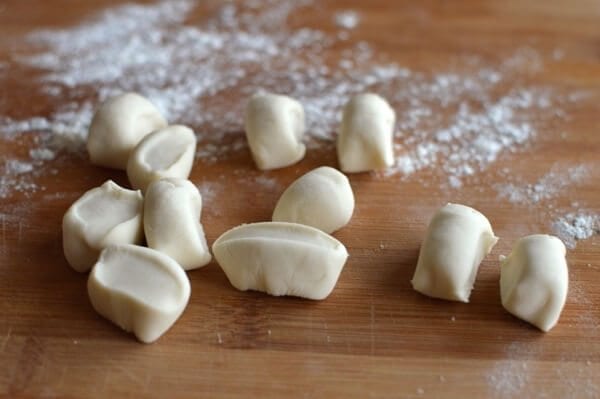
Lightly dust a clean work surface with flour and roll the dough into a long cylinder/cigar, about an inch in diameter. Cut the dough into small equal pieces weighing about 11 grams each (the dough chunks should be a size resembling that of gnocchi).
Roll out each piece into a round disc about 3 – 3 ¼ inches diameter. Keep everything under a damp cloth.
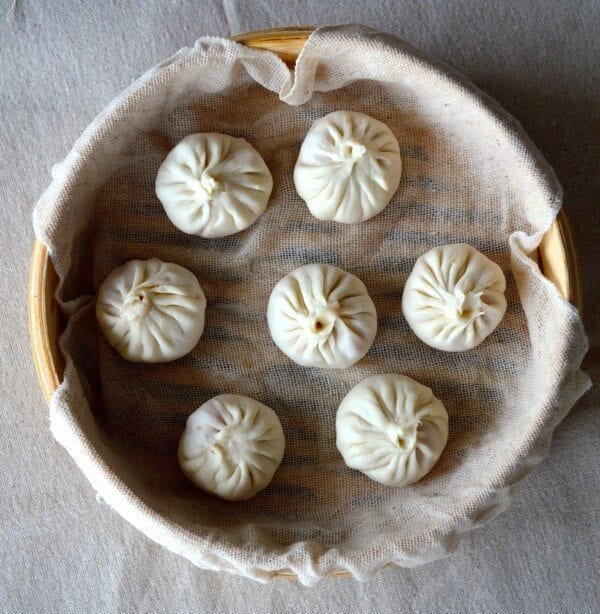
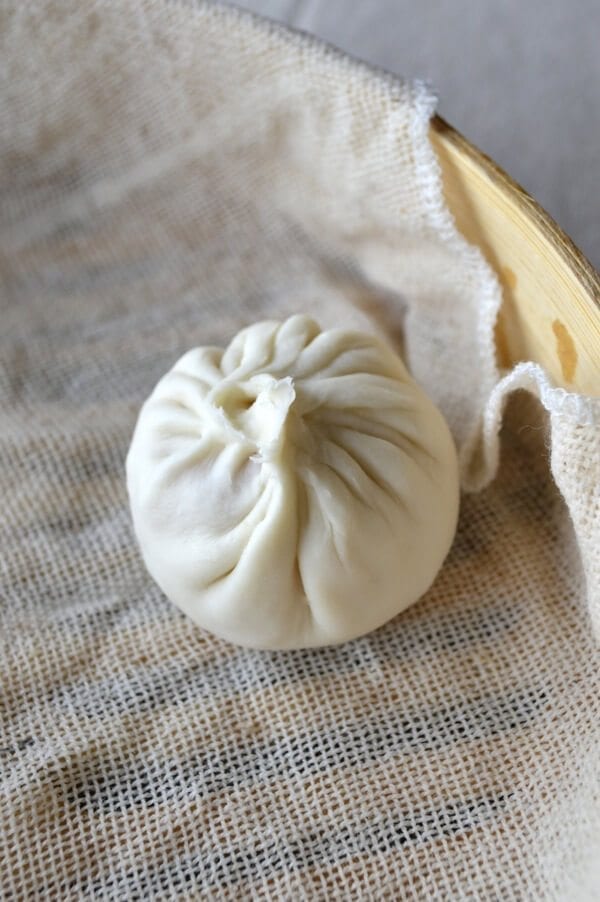
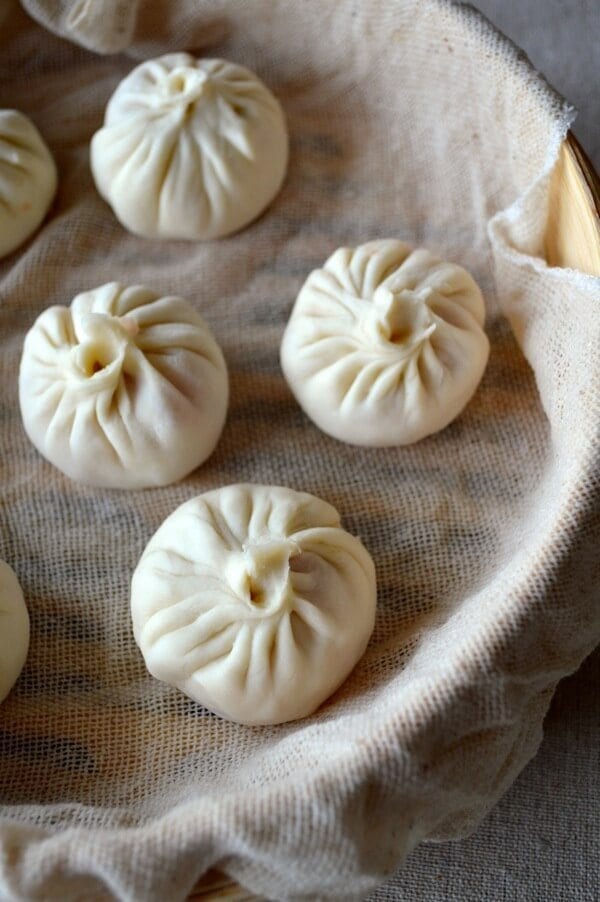
Prepare your bamboo steamer. You can line it with cheese cloth…
…napa cabbage leaves, or these lovely bamboo steamer discs, which can be found in some Chinese restaurant supply stores (if using these, you must brush the discs with oil first!).
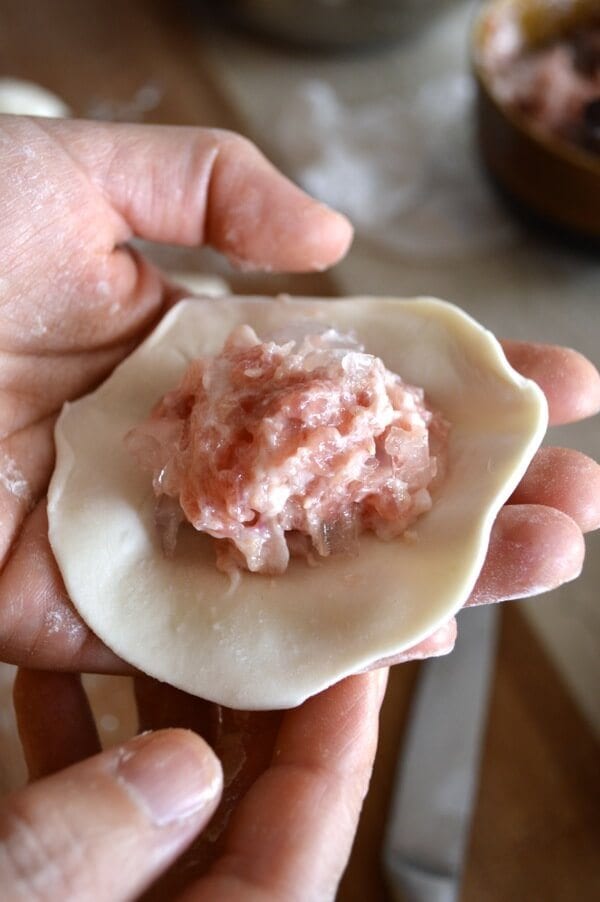
When all that is prepared, take out the filling. You’ll be making each bun one at a time. Place about 1 tablespoon of filling in the middle of your dumpling skin. Pleat with as many folds as you can muster: 12-18 folds should do it.
Watch the video in our Carrot Ginger Pork Bun post. The technique is very similar. Basically, as you fold, you’re constantly using your thumb to push the filling into the resulting little “bag” that you’re creating with the dough. For this one, you’re just making more folds.
Make sure the top is sealed. If the filling ever gets too wet or hard to handle, put it in the freezer for another 15 minutes and start again.
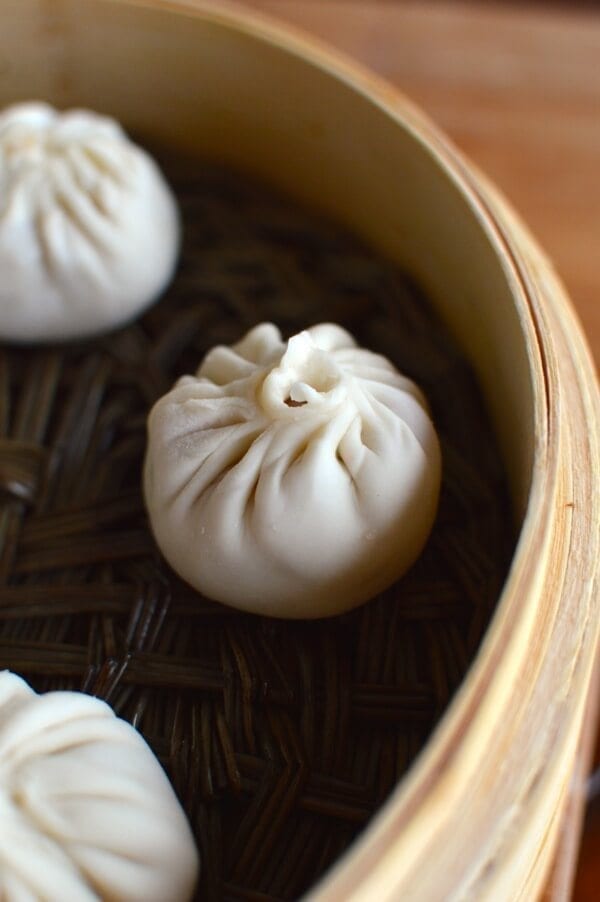
Place the buns in the lined steamer basket, about 1 1/2 – 2 inches apart.
Step 5: Steaming
In a metal steamer pot or wok, boil water. If using a wok, put the water at a level so that when you put the bamboo steamer into the wok, the water rises about ½ inch up the bottom of the bamboo base. You never want the water to touch the dumplings inside, though, so make sure not to fill it too high!
Make sure not to fill it too low either, because if all the water evaporates, you could end up burning your bamboo steamer. See our post on how to set up a steamer if you’re not familiar with steaming foods in Chinese cooking.
Once the water is boiling, put the bamboo steamer in the wok or steamer pot, cover with the bamboo steamer lid, and steam over high heat for 8 minutes. Immediately remove the bamboo steamer from the pot and serve.
Step 6: Eating!
Ok, so there is definitely a proper way to enjoy these dumplings. Put away the soy sauce, because it has no place on the table right now. What you want is Chinese black vinegar.
Pour some out into a small, round dish or bowl, and top with some very thin matchsticks of ginger. You can also dilute the vinegar with a tiny splash of water to make the flavor a little more delicate.
Take out your two utensils—chopsticks and a Chinese soup spoon (a fork would just butcher these and the soup would dribble out all over the table. It would be a tragedy of Shakespearean proportions).
Carefully, slowly peel the xiaolongbao off of the steamer basket and dip it into the vinegar.
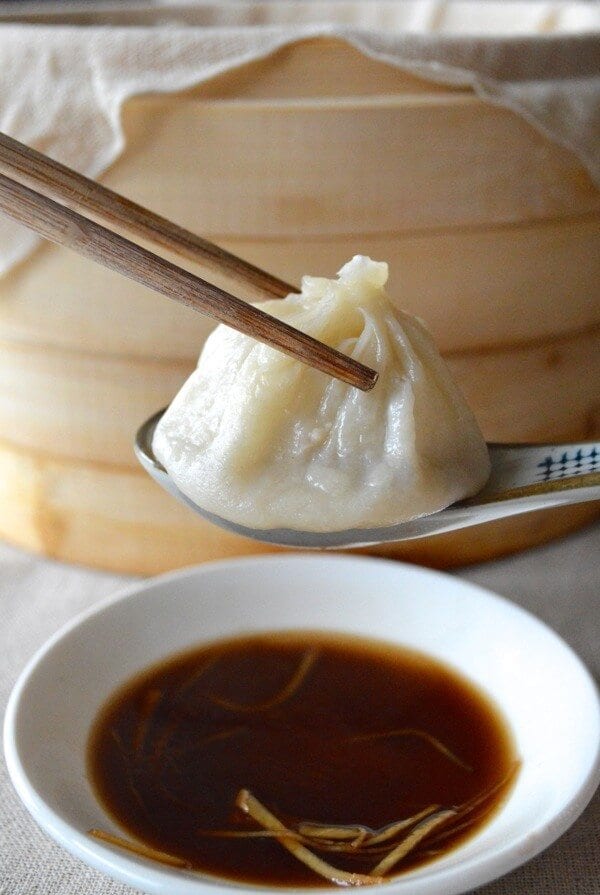
Gently transfer the dumpling to your soup spoon…
…and take a tiny bite out of the skin on the side of the soup dumpling to make a little hole. Proceed to slurp the soup out of the bun (Carefully. It’s HOT). Then, with a little more vinegar, finish the whole thing off in one bite.
Repeat as needed until all of the Shanghai Soup Dumplings are gone!
By the way, as if it could get any better, a side benefit of this soup dumpling is that it’s full of collagen from all that pork skin, which is a major skin-booster. Xiaolongbao are delicious AND can help you stay young!?! Come ON!
Soup Dumplings (Xiaolongbao)
Ingredients
For the aspic:
- ½ pound pork skin (225g, cut into 1-inch strips)
- 1 pound pork neck bones (450g, you want neck bones that still have meat on them!)
- water
- 2 slices ginger
- 1 scallion (cut into 3 pieces)
- 1 tablespoon shaoxing wine
For the dough:
- 1 cup all-purpose flour (130g)
- 6 tablespoons warm water (90 ml)
For the filling:
- 1 pound ground pork (450g, 70% lean 30% fat)
- 2 tablespoons shaoxing wine
- 3/4 teaspoon salt
- 1/2 teaspoon sesame oil
- 3/4 teaspoon sugar
- 3 teaspoons light soy sauce
- 3 tablespoons water
- 1/8 teaspoon ground white-pepper
- 1 tablespoon ginger (minced)
- 1 heaping cup aspic (diced into ½-inch pieces)
To serve:
- Chinese black vinegar
- fresh ginger (julienned)
Instructions
The Aspic:
- In a small pot, add the pork skin and pork bones and cover with cold water. Bring to a rolling boil, and immediately drain and rinse off the bones and the skin. This gets rid of any impurities. Rinse out the pot and put everything back in. Add 4 cups (950 ml) water, ginger, scallion and wine. Bring the pot to a boil and then reduce the heat to low. Cover and simmer for 2 hours.
- After 2 hours, turn off the heat, allow the soup to cool, and strain the liquid into a bowl. Once the liquid is completely cooled, cover and refrigerate overnight.
The Dough:
- In a mixing bowl, add the flour and the warm water 1 tablespoon at a time. Work and knead the dough for 15-20 minutes. The dough should be very soft and smooth. Cover with a cloth and let it rest for 30 minutes.
The Filling:
- Take your ground pork and put it in the food processor. Pulse for 30-60 seconds until the pork resembles paste. In a mixing bowl, add the pork and the rest of the ingredients except the aspic. Whip everything together thoroughly, for about 2 minutes. You want everything to be extremely well combined, and the pork should look like a light, airy paste. Gently fold in the diced aspic, and do not over-mix. Cover and transfer the filling to the refrigerator until ready to make the dumplings. If you’re ready now, you can put it in the freezer for 15 minutes to allow it to firm up and make assembling the buns easier.
Assembly:
- Lightly dust a clean work surface with flour and roll the dough into a long cylinder/cigar, about an inch in diameter. Cut the dough into small equal pieces weighing about 11 grams each (the dough chunks should be a size resembling that of gnocchi). Roll out each piece into a round disc about 3 - 3 ¼ inches diameter. Keep everything under a damp cloth.
- Prepare your bamboo steamer. You can line it with cheese cloth, napa cabbage leaves, or these lovely bamboo steamer discs, which can be found in some Chinese restaurant supply stores (if using these, you must brush the discs with oil first!).
- When all that is prepared, take out the filling. You’ll be making each bun one at a time. Place about 1 tablespoon of filling in the middle of your dumpling skin. Pleat with as many folds as you can muster: 12-20 folds should do it. Make sure the top is sealed. If the filling ever gets too wet or hard to handle, put it in the freezer for another 15 minutes and start again.
- Place the buns in the lined steamer basket, about 2 inches apart.
Steaming:
- In a metal steamer pot or wok, boil water. If using a wok, put the water at a level so that when you put the bamboo steamer into the wok, the water rises about ½ inch up the bottom of the bamboo base. You never want the water to touch the dumplings inside, though, so make sure not to fill it too high!
- Once the water is boiling, put the bamboo steamer in the wok or steamer pot, cover with the bamboo steamer lid, and steam over high heat for 8 minutes. Immediately remove the bamboo steamer from the pot and serve.
Eating:
- Ok, so there is definitely a proper way to enjoy these dumplings. Put away the soy sauce because it has no place on the table right now. What you want is Chinese black vinegar. Pour some out into a small, round dish or bowl, and top with some very thin matchsticks of ginger.
- Take out your two utensils—chopsticks and a Chinese soup spoon (a fork would just butcher these and the soup would dribble out all over the table. It would be a tragedy of Shakespearean proportions).
- Carefully, slowly peel the xiaolongbao off of the steamer basket and dip it into the vinegar. Gently transfer the dumpling to your soupspoon and take a tiny bite out of the skin on the side of the bun to make a little hole. Proceed to slurp the soup out of the bun (Carefully. It’s HOT). Then, with a little more vinegar, finish the whole thing off in one bite.
Tips & Notes:
nutrition facts
Note: This recipe was originally published on September 1, 2014. We have since updated it with clearer instructions, nutrition information, metric measurements, and more, as of October 2019. Though the instructions have been made clearer, the recipe remains the same as it was five years ago. Enjoy!
