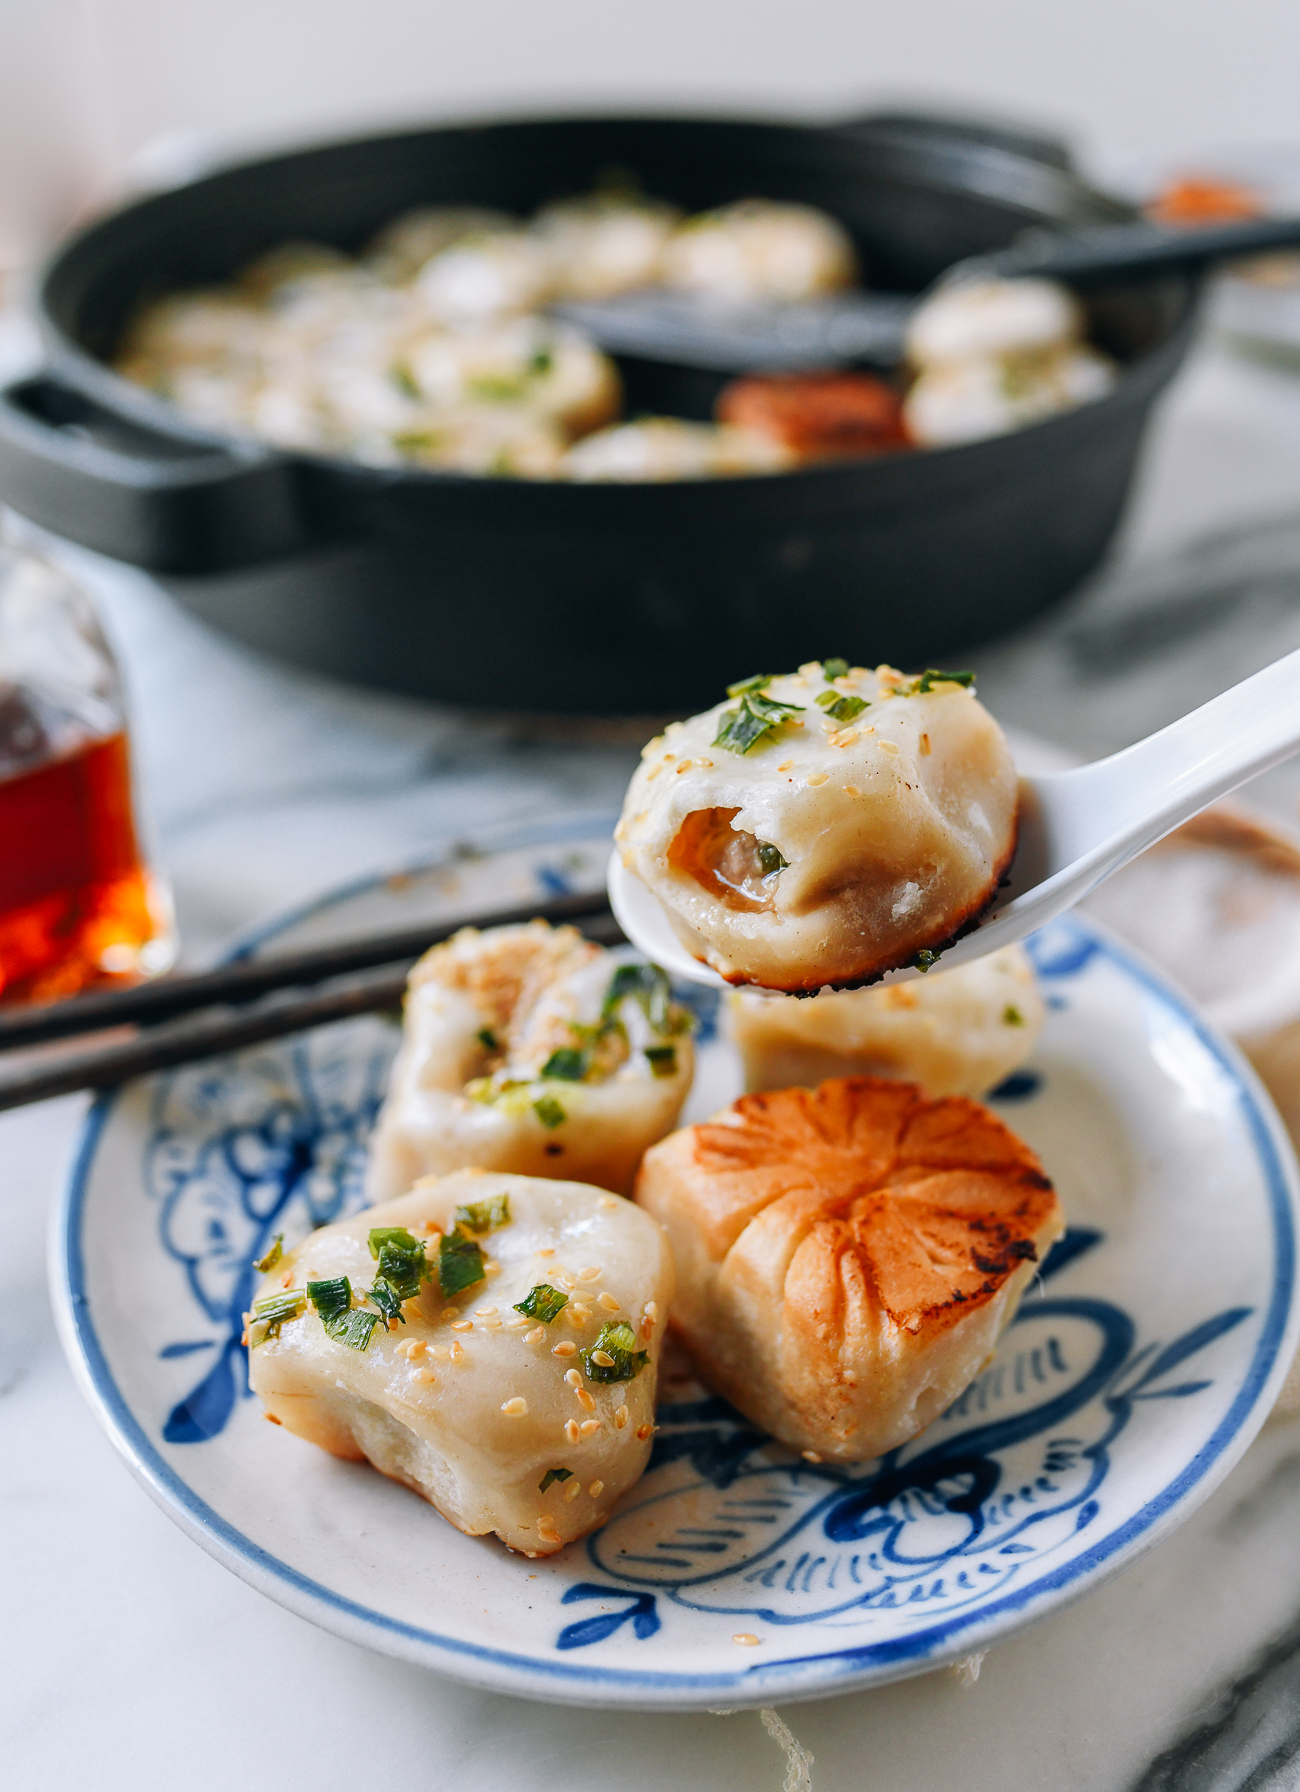
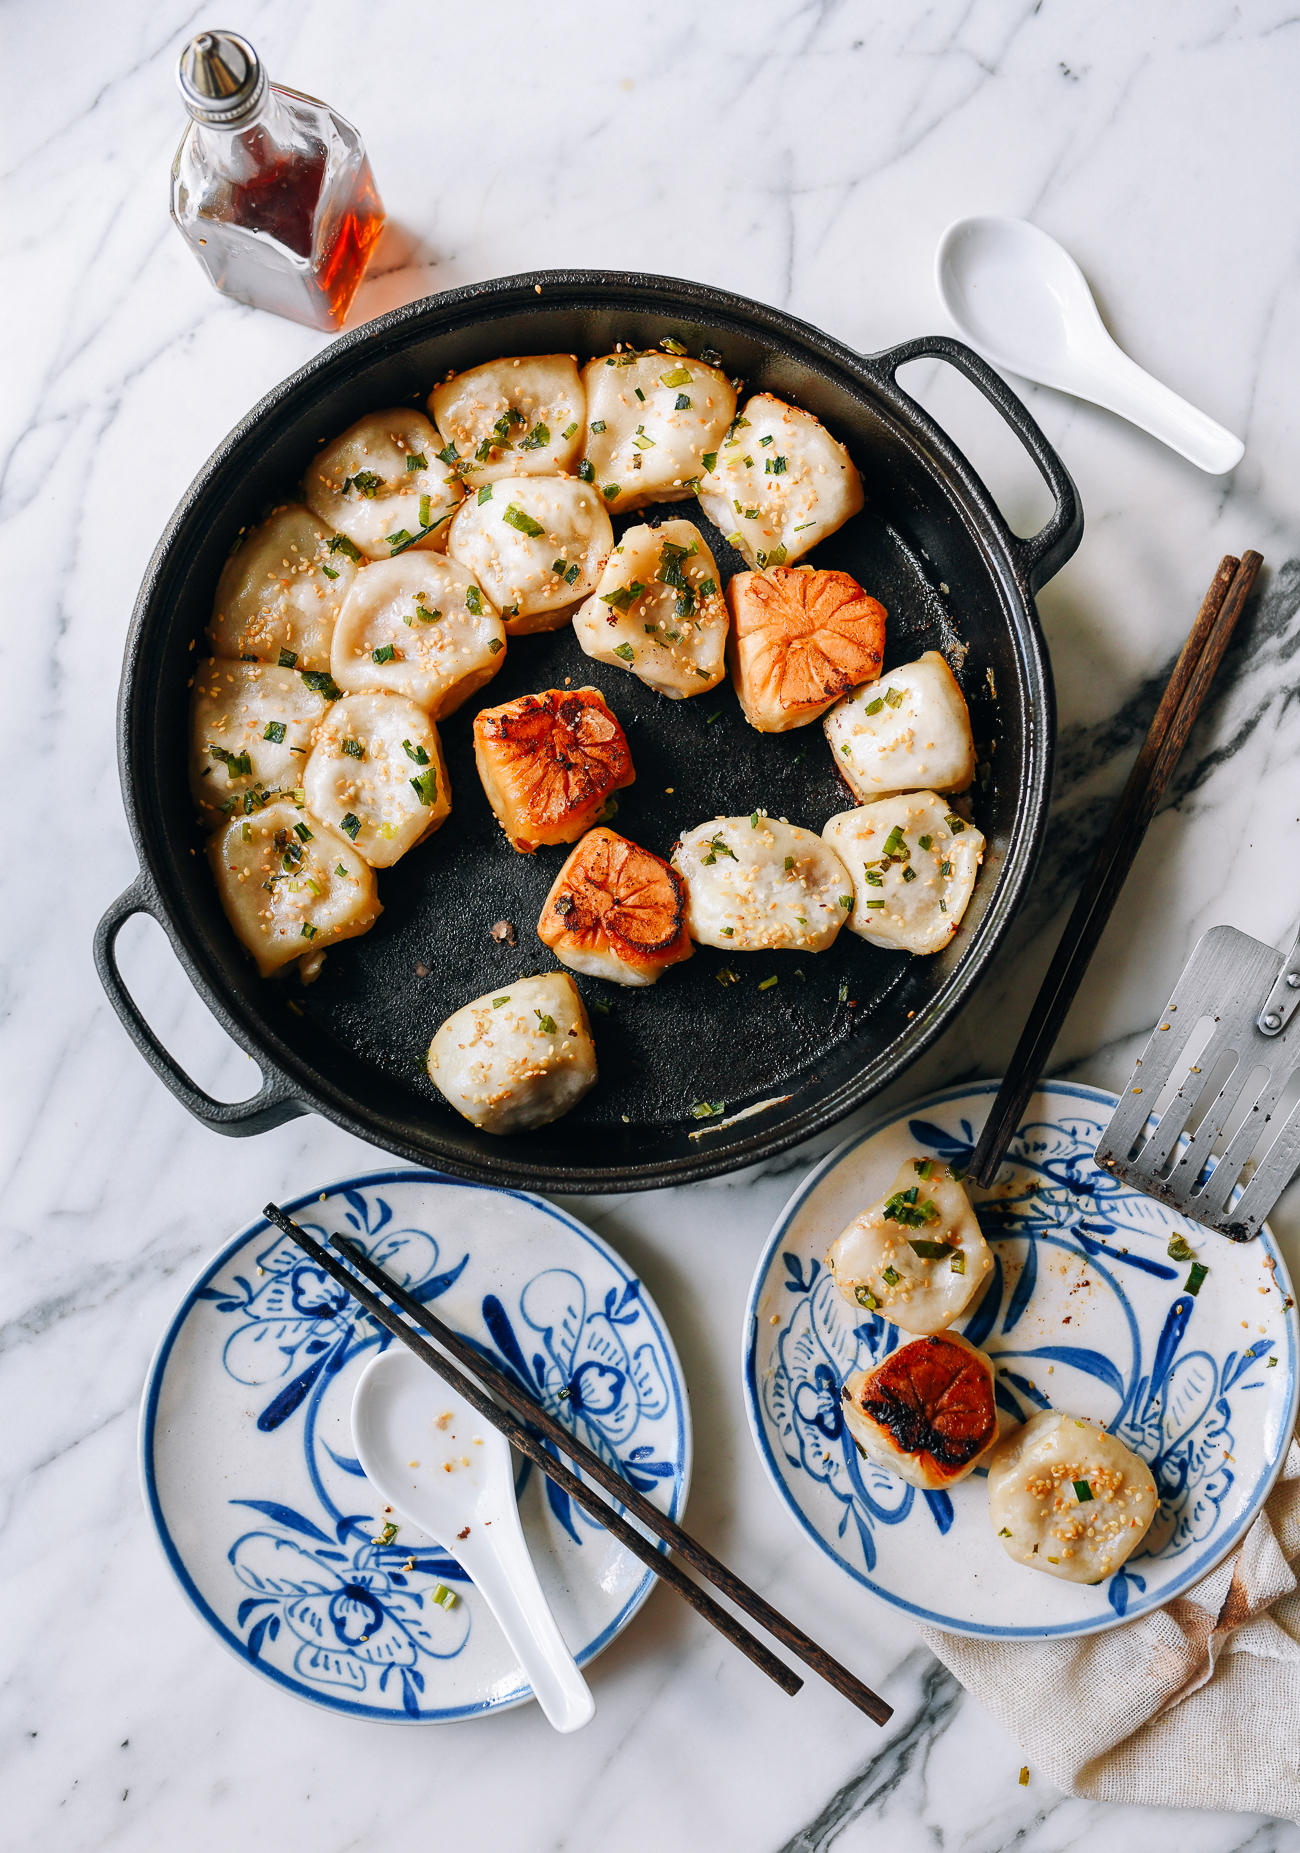
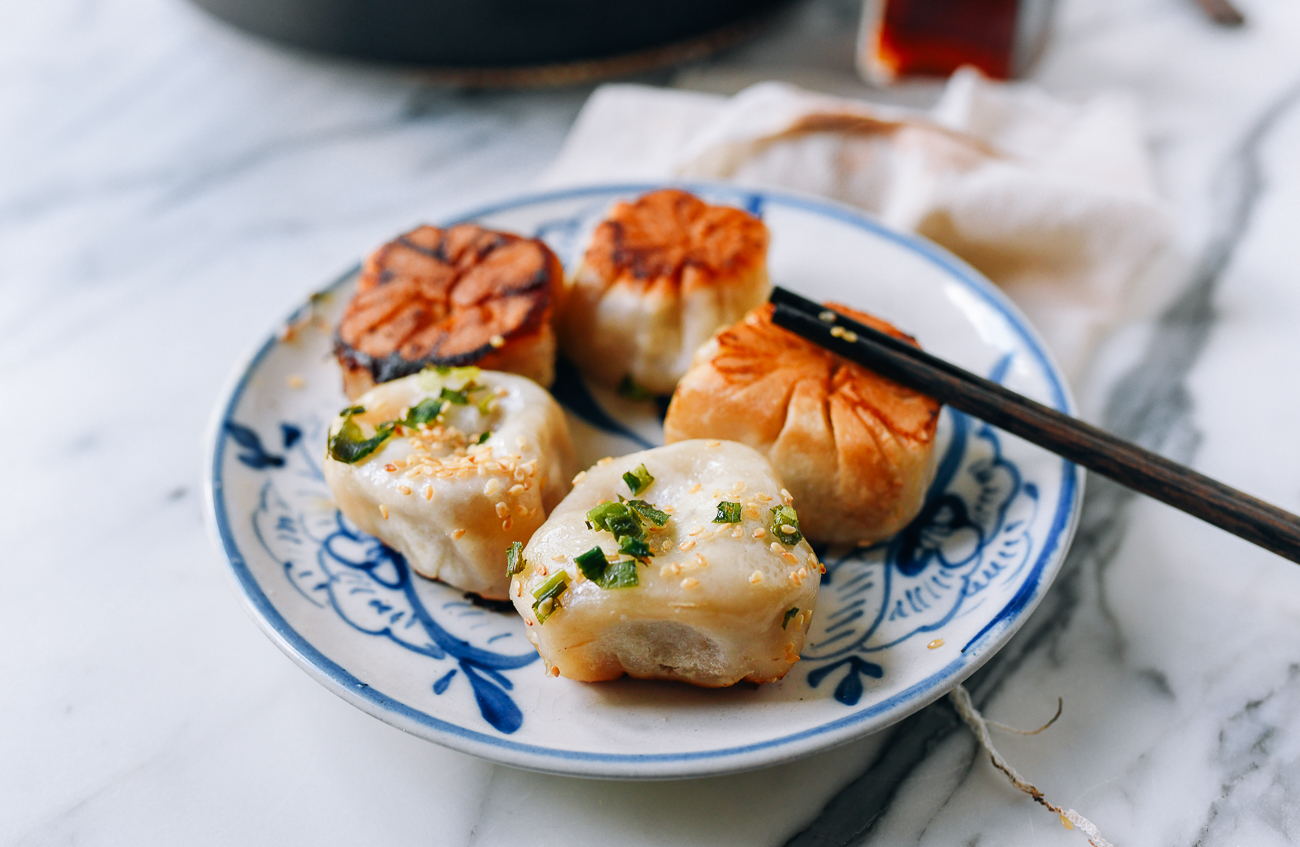
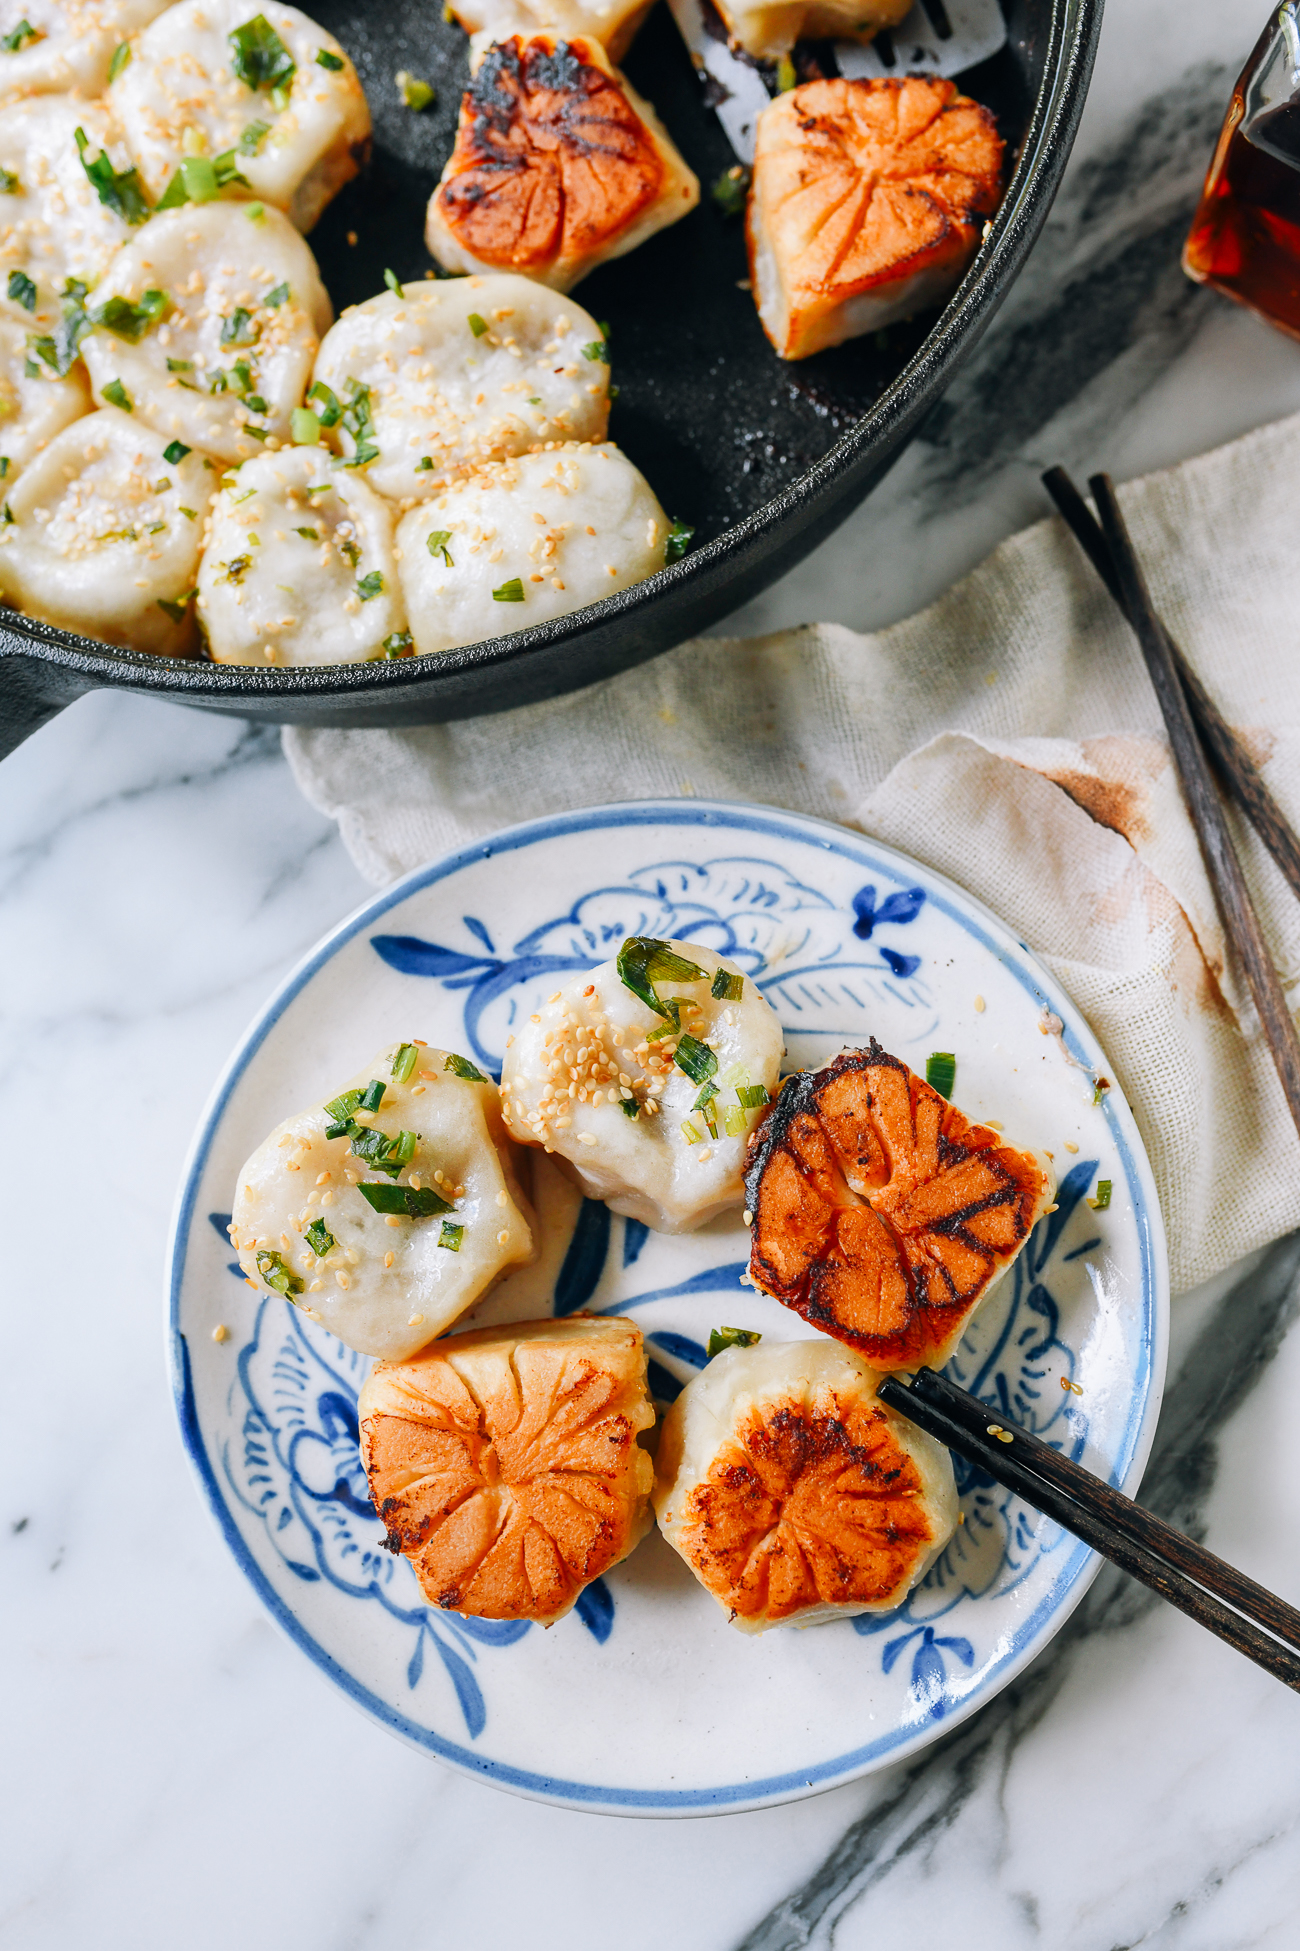
Shanghai Pan-Fried Pork Buns, or shengjian bao (生煎包) / shengjian mantou (生煎馒头) in Chinese, are iconic.
Breakfast, brunch, lunch, or snack, people love them as much as the celebrated four Shanghai breakfast warriors. The combination of umami filling dripping with juicy “soup” and the crunchy pan-fried bottoms are simply extraordinary. You really have to try it to know what I mean!
Since she was old enough to eat solid food, Sarah has been obsessed with these juicy buns, perhaps more than soup dumplings. But here in the U.S., it can be very hard to find Shanghai-style pan-fried pork buns that taste comparable to what you can get on the streets of Shanghai.
That is why I’ve made it my mission to get this recipe right!
Note:
If I’m being honest, this is not the easiest recipe to make. I strongly suggest reading through the whole post before starting!
What Makes Shanghai Pan-fried Pork Buns Special?
Many Americans and others outside of China have come to love Shanghai Soup Dumplings. Well, Shanghai Pan-Fried Pork Buns are like the soup dumpling’s crispy, crunchy cousin.
It’s definitely a tight race when you put these side-by-side. I think they are equally good! They’re also equally tricky to make successfully.
Shanghai Soup Dumplings are more pure and delicate. Shanghai Pan-Fried Pork Buns are more robust, with a fried crispy bottom. They’re both rich, which is why they’re served with vinegar.
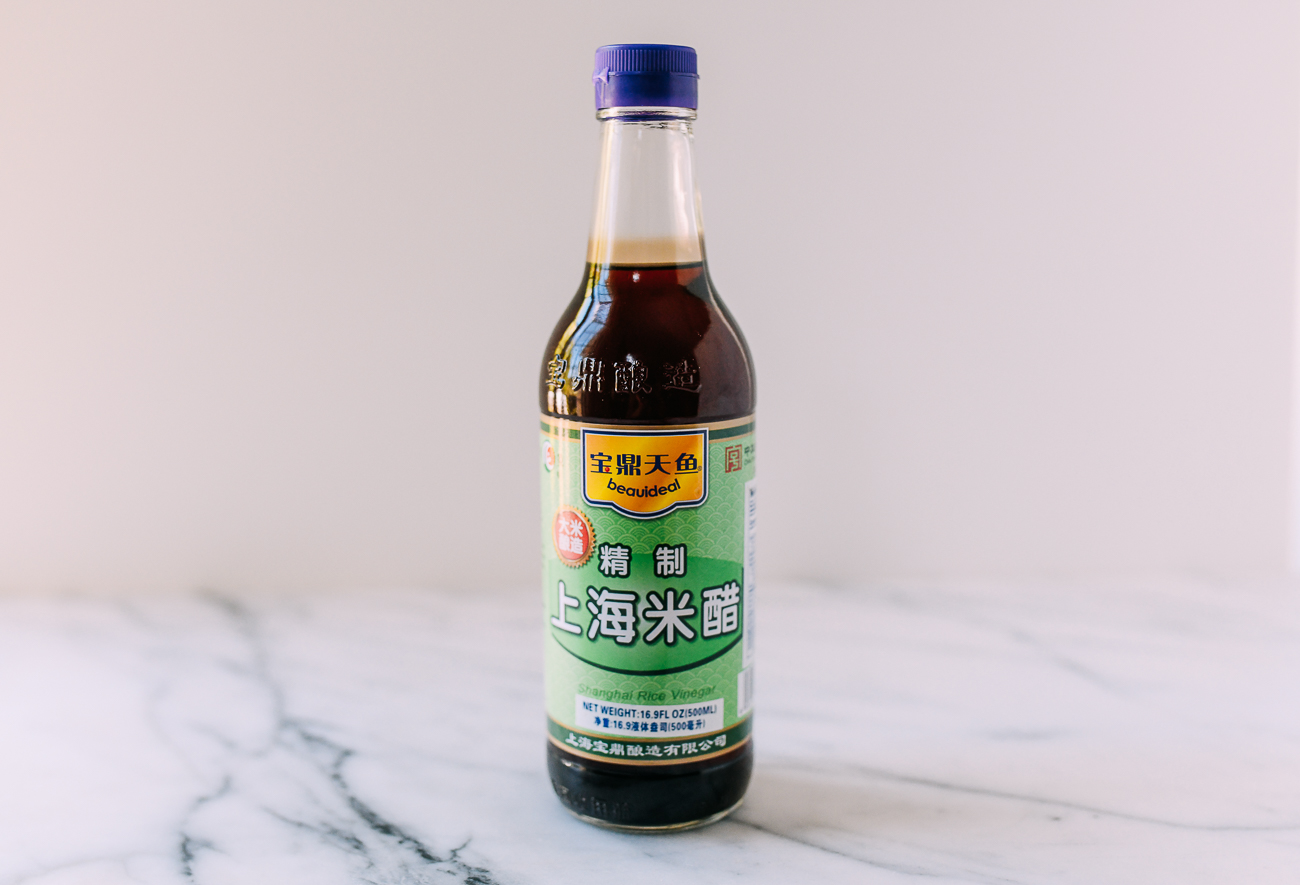
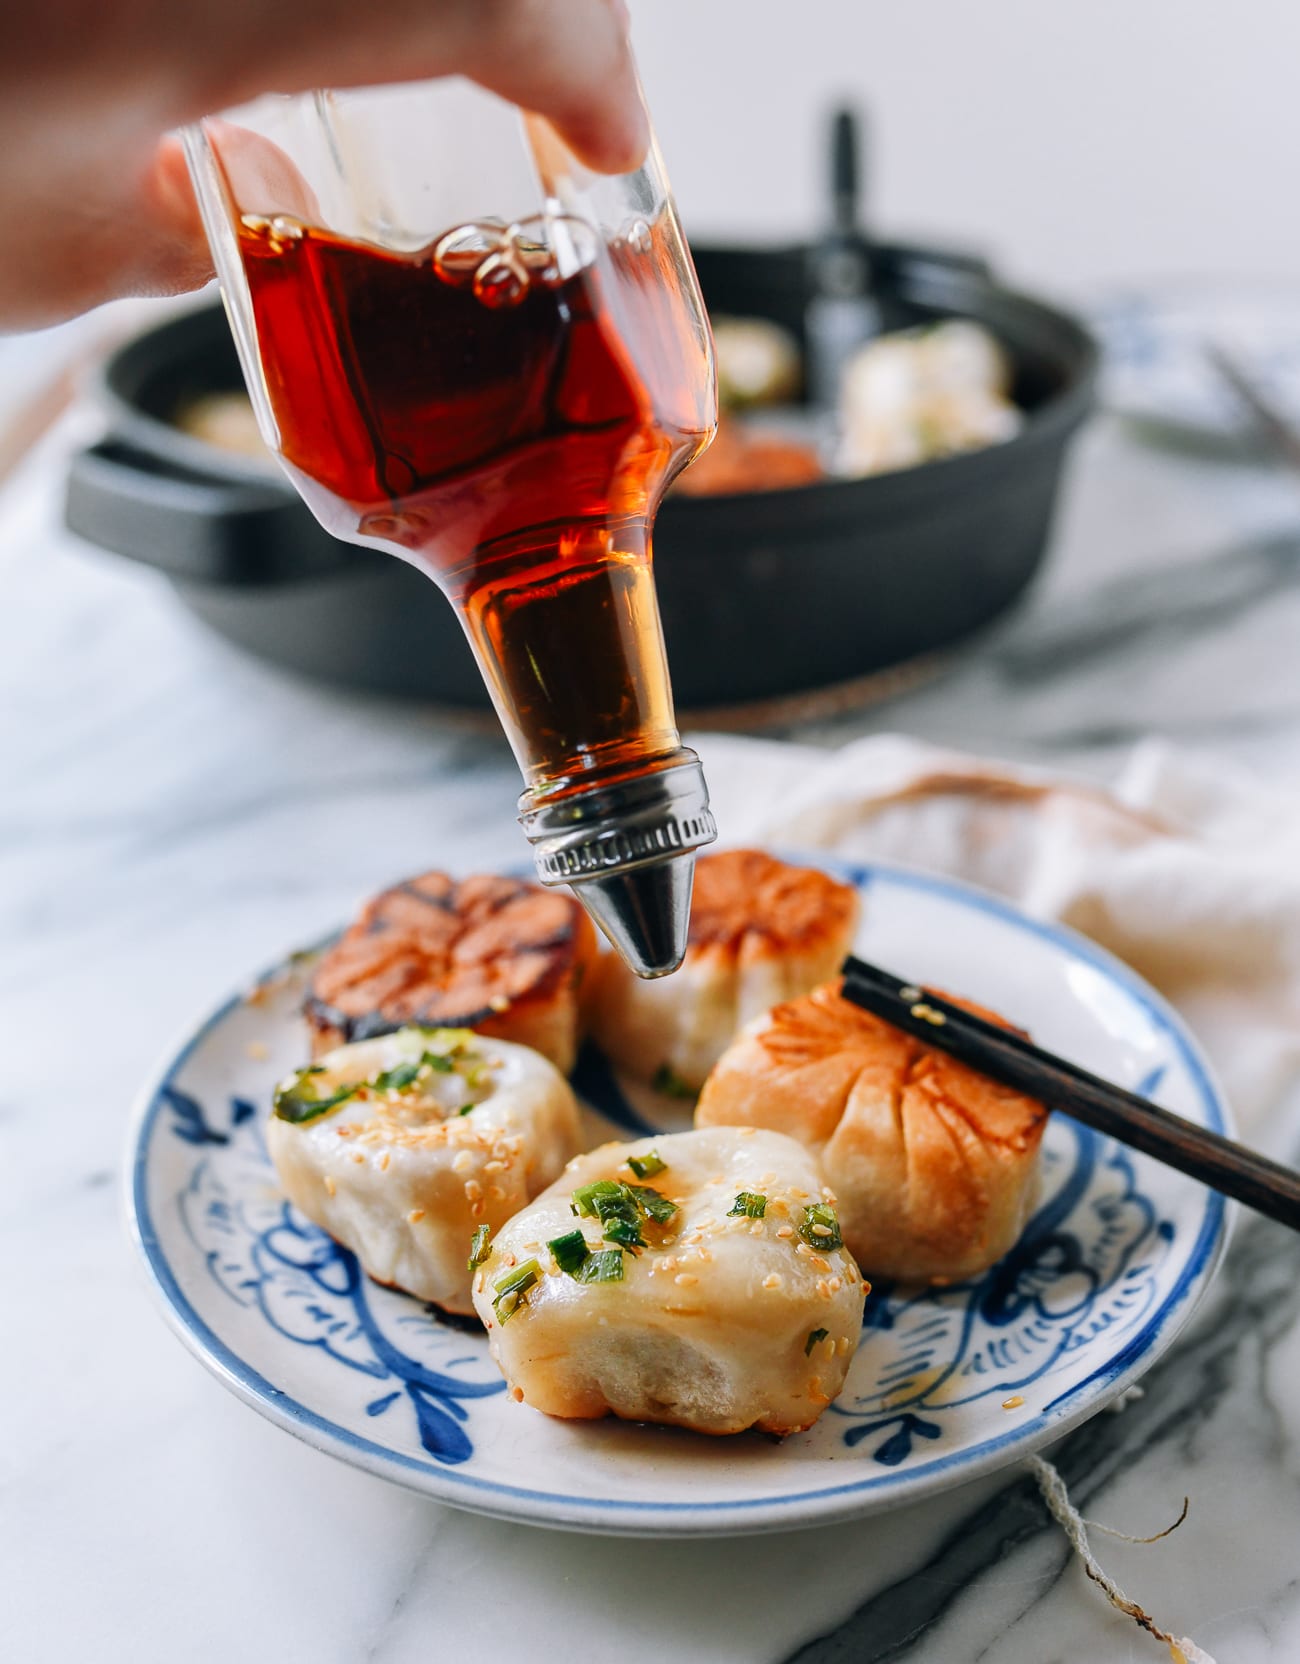
Soup dumplings are served with Chinese black vinegar, and these shengjian mantou are served with Shanghai rice vinegar.
This vinegar is lighter and less overpowering, but still cuts through the richness of the bun.
Shanghai Pan-Fried Pork Buns are unlike any other pan-fried buns, because the dough is chewy rather than fluffy.
Most pan-fried buns—even my carrot ginger pork buns—are not as special as Shanghai shengjian bao. You can tell just by inspecting the dough.
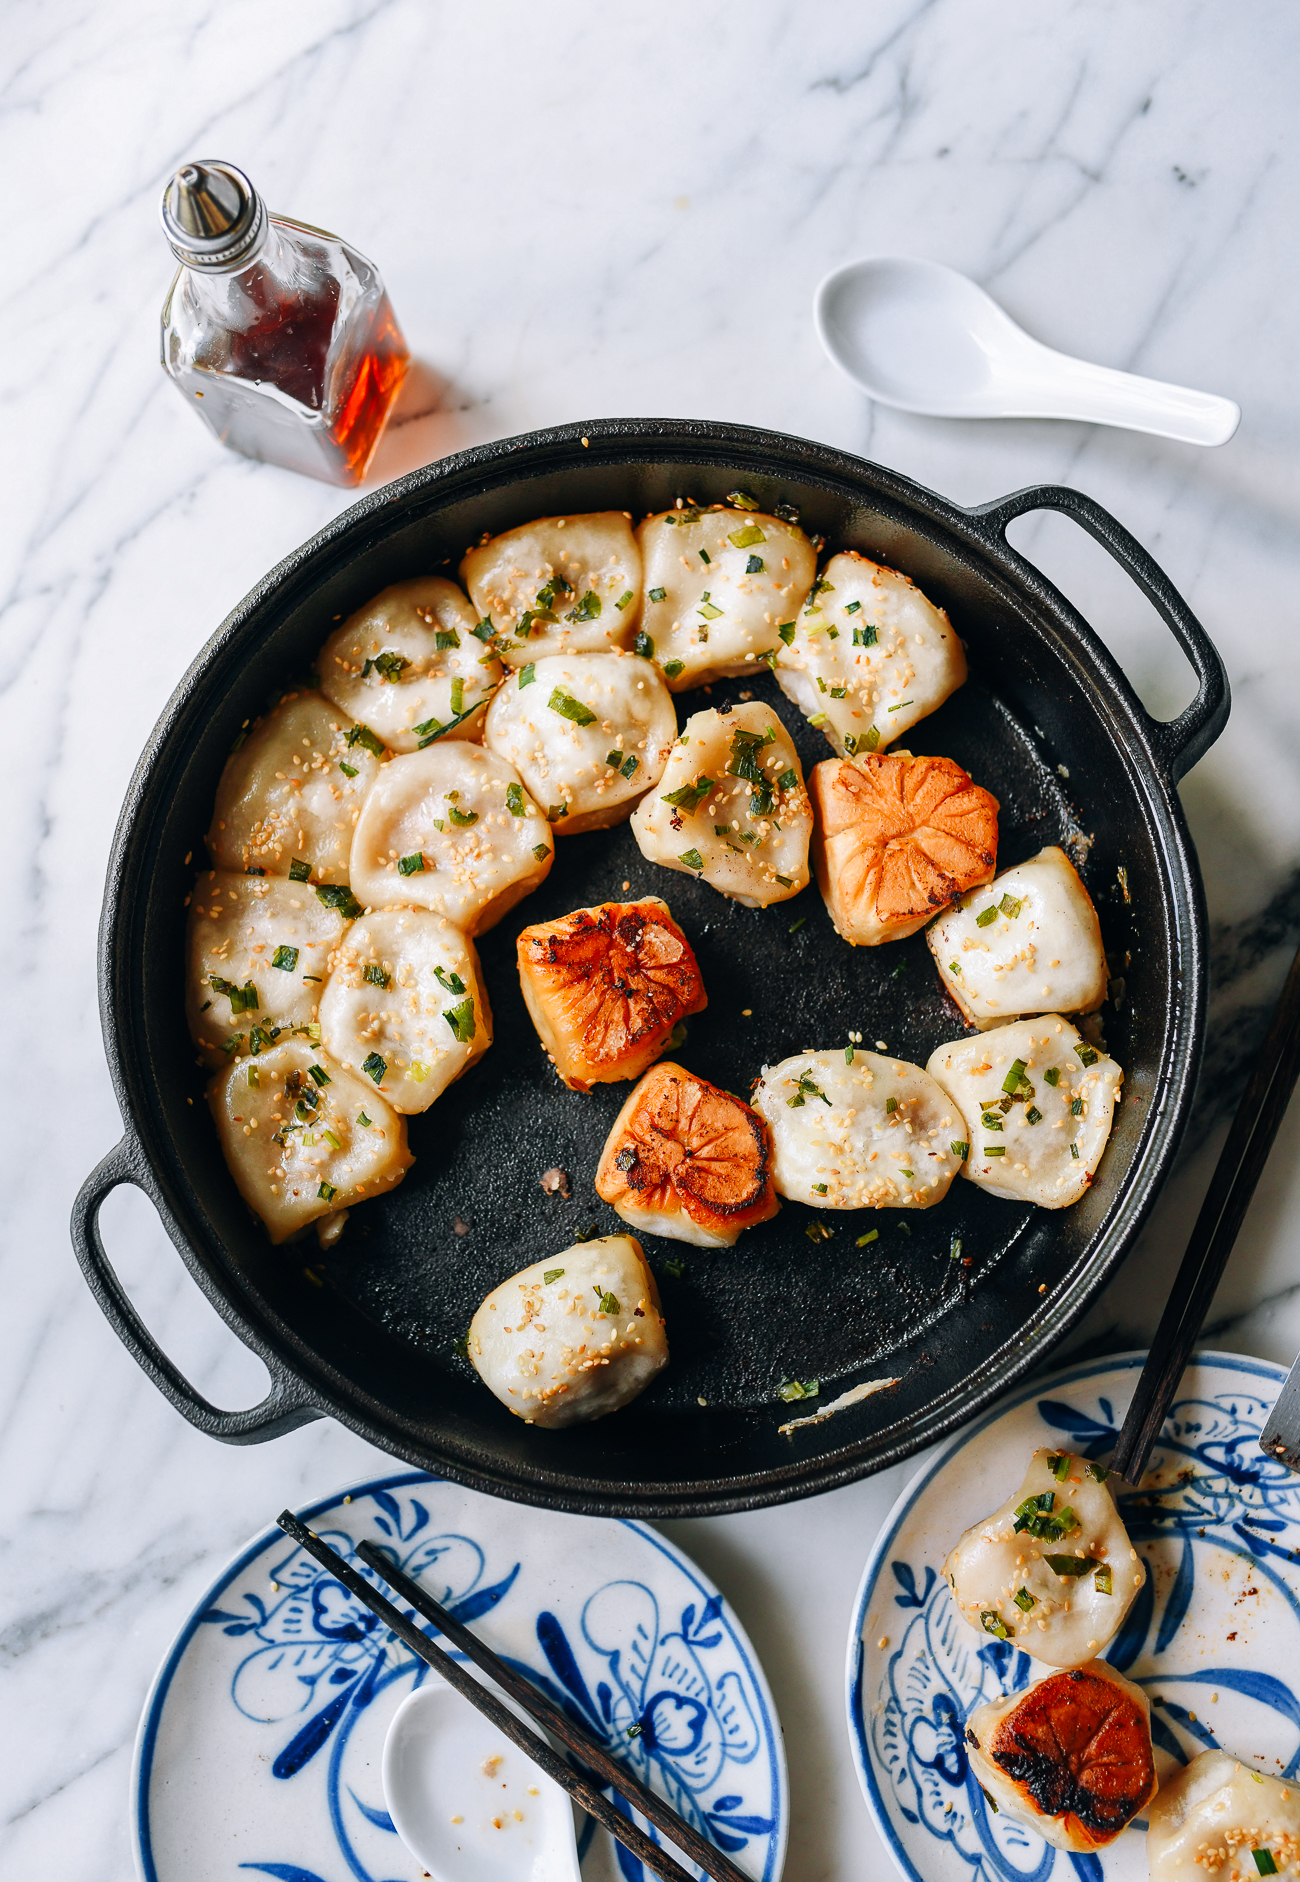
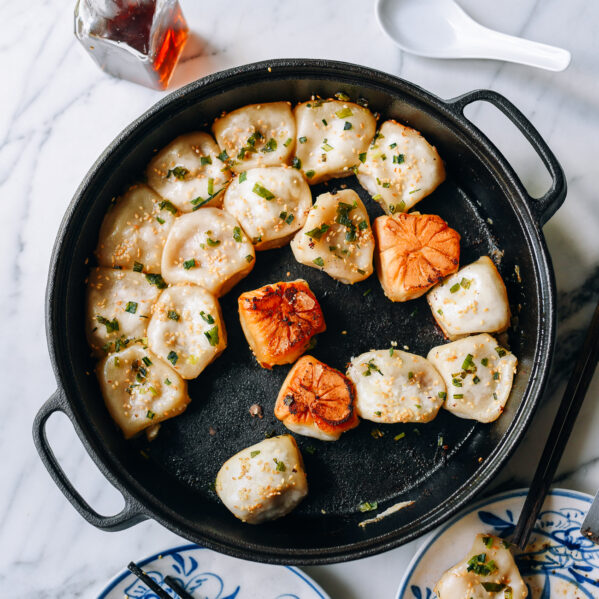
It’s not authentic unless the top of the bun caves in toward the filling after cooking. That’s the right look and texture of a good Shanghai pan-fried pork bun.
This authentic version is very difficult to find here in the U.S., where the buns are often too fluffy and bread-like.
3 Keys to Good Shengjian Mantou
Each element of the bun is important to achieving the perfect shengjian mantou: the dough, the fried bottom, and the juicy filling.
1. The Dough:
Again, the texture of the dough should be somewhere between a dumpling wrapper and a regular fluffy steamed bun. The secret: partially proof the dough. You don’t want it to rise too much and become fluffy. However, you also want it to be somewhat light while retaining that slight chew.
2. Shallow-frying:
You may be a bit surprised by the amount of oil you need for this recipe, but it’s necessary to get authentic results. While these are called “pan-fried” buns, the process is actually more like shallow-frying.
3. Filling:
The filling should be just like soup dumpling filling in that the first bite has a characteristic stream of piping hot juice. Aspic is a vital ingredient. The quality of ground pork is also incredibly important. It needs a good amount of fat for the right texture and flavor.
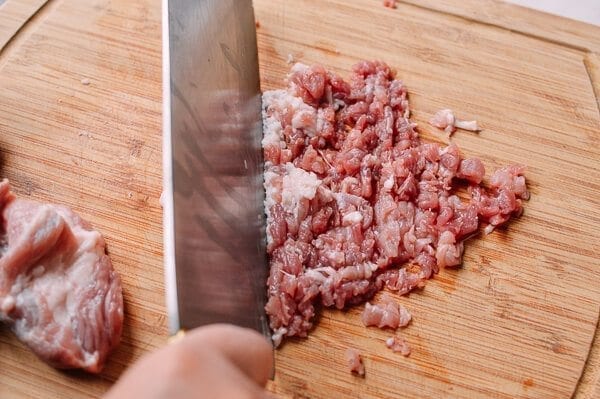
If you’re going through the trouble of making these buns, I believe hand-chopping your ground pork is a must. It just makes for a superior texture.
Important Recipe Notes: Read Before Moving On!
- While you must make the aspic the day before, it’s important not to overproof the dough. Begin making the dough 1 ½ to 2 hours before you plan to serve them. Serve them immediately after cooking, and plan the timing of your meal accordingly!
- The pork should be 70% lean, 30% fat. The best way to do this is to buy a fatty cut like pork butt or shoulder (a picnic shoulder will have all the meat, fat, and skin you need for this recipe, and it’s economical!). Then, you can simply weigh out the fat and lean meat to get the right ratio, and hand chop it using our easy chopped meat technique.
- Fresh, never-frozen pork is always preferred for an authentic taste. However, since that’s hard to find stateside, a pinch of MSG can help the flavor if you don’t mind using it.
- Use a thick-bottomed pot to make the aspic. It will heat more evenly and slowly, so you won’t lose too much liquid during the simmering process.
- Instead of using ginger and scallions in the filling, many recipes call for ginger scallion water. You make it by soaking ginger and scallions to infuse their flavor into the water. I personally disagree with this method. The grated ginger and scallions in this recipe are quite mild after cooking. I would save yourself the trouble!
- The dough should hold its shape and be soft, but not wet. It’s too dry if it rips as you pleat the buns. It’s too wet if the bun sags as it sits.
- Solutions to dry or wet dough: If the dough is too dry, add a very small amount (a couple teaspoons) of water, and thoroughly knead the dough until the water is well-incorporated and the dough is smooth again. If the dough is too wet, you can knead the dough on a floured surface so the dough can absorb more flour and firm up. Test it by pleating a bun and checking whether it cracks/sags. It shouldn’t do either!
- When assembling the buns, keep your fingers as dry and clean as possible, away from the filling. Wet or oily fingers make sealing the buns very difficult!
- Because the filling is loaded with yummy soup, losing the soup is sacrilege! Cooking the buns upside down (pleated side down) is traditional, and helps create a thick crunchy crust. However, cook them right side up if this is your first time making this recipe (or if you’re generally not confident in your pleating skills). This will make it less likely that a weakly sealed bun will break open and leak. Once you’re confident in your bun-shaping abilities, you can cook them upside down.
- Use a wide, relatively deep non-stick pan to cook the buns for the most consistent results. You can also use a cast iron pan like I did, but you have to preheat it until it’s smoking, oil it, and COOL it completely before adding the buns. This step ensures any residual moisture has evaporated out of the pan. Due to the importance of timing in this recipe (and not over-proofing the dough), it’s a good idea to prepare the pan in advance (right before you make the dough) if you plan to use cast iron.
- These should be served immediately. As the bun cools, the soup in the filling will absorb into the surrounding dough. This is another reason why the dough is not fully proofed—so it is less absorbent.
- That said, be very careful when biting into a hot bun. The soup inside can be scalding! Start by biting a little hole into the side of the bun to let some of that steam and heat out. Be sure to have a spoon to help you catch any soup that comes out.
Need a substitution for pork?
We all know Chinese people love pork, and pork is the traditional filling for these buns. However, if pork is not allowed in your diet, you can use dark meat chicken! It’s also best to grind it yourself using my method for grinding meat without a grinder. To make the aspic, use chicken feet and chicken bones/carcasses.
Shanghai Pan-fried Pork Buns: Recipe Instructions
Equipment:
- A thick-bottomed medium pot
- 1-2 wide non-stick pans (or cast iron pans, enough to fit 30 buns)
- Electric stand mixer with a dough hook attachment (or large mixing bowl if hand-kneading)
- Pastry brush
- Rolling pin (a thin Chinese-style rolling pin or Italian or French rolling pins without handles work best)
THE DAY BEFORE: Make the aspic
Add the pork skin and bones to a thick-bottomed medium pot with just enough water to cover them.
Bring to a boil, and boil for 1 minute. Turn off the heat, and rinse the pork skin and bones under running water to clean them. Clean the pot as well.
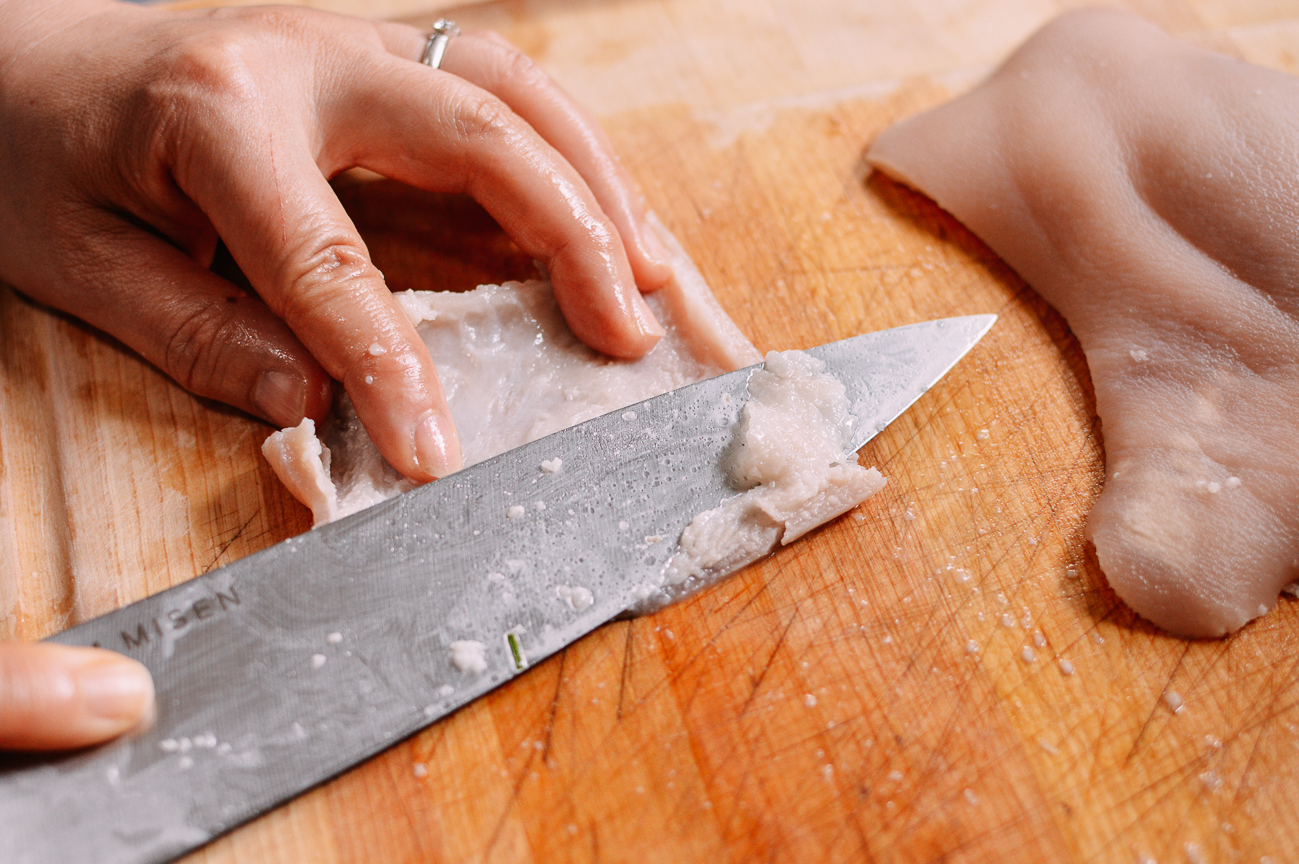
Trim away all the fat under the pork skin…
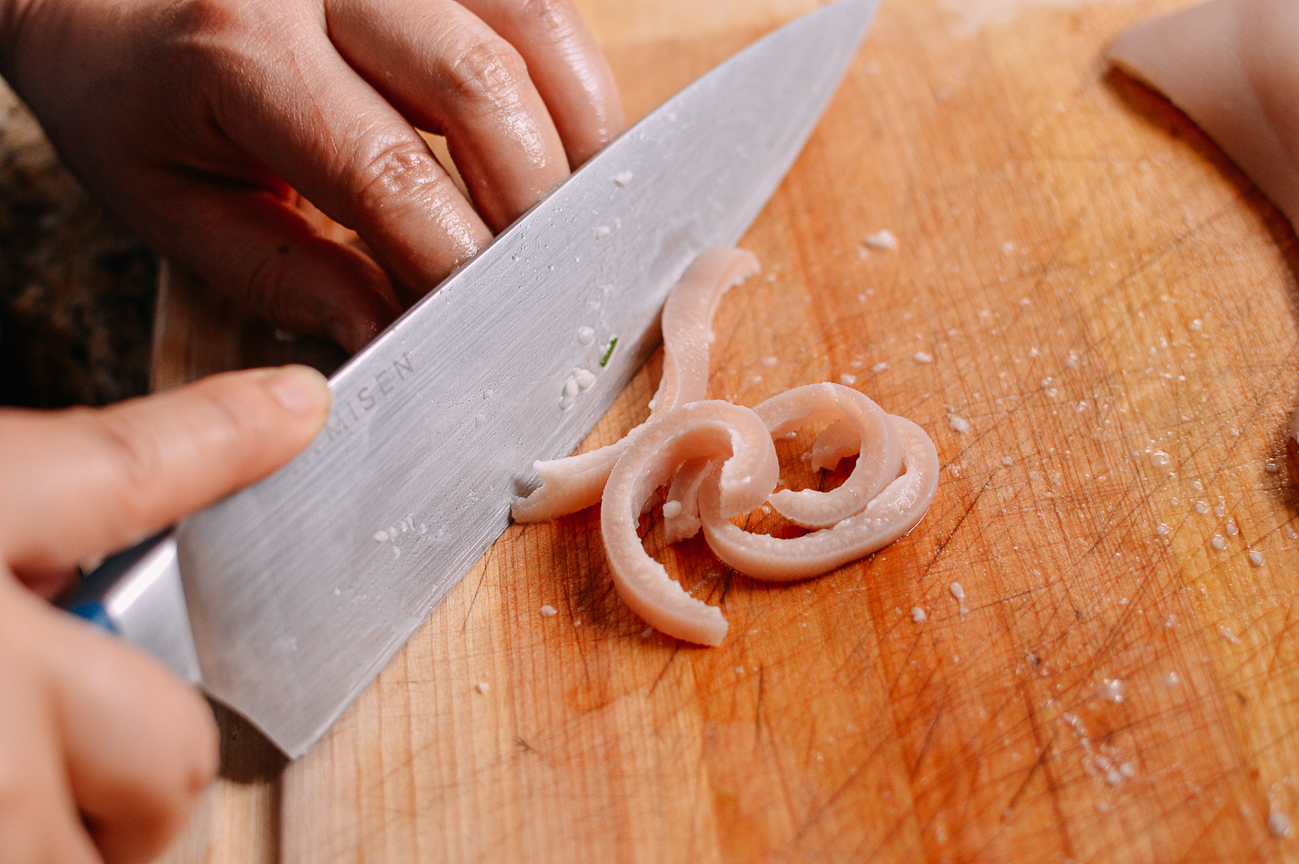
And cut it into thin slices. This makes it easier for the collagen to release.
Fill the clean pot with 3 cups of water. Add the pork skin and bones, along with the Shaoxing wine, ginger, and scallion. Bring to a boil, and lower the heat to medium low. Simmer for 1 hour. It should bubble gently at a low simmer.
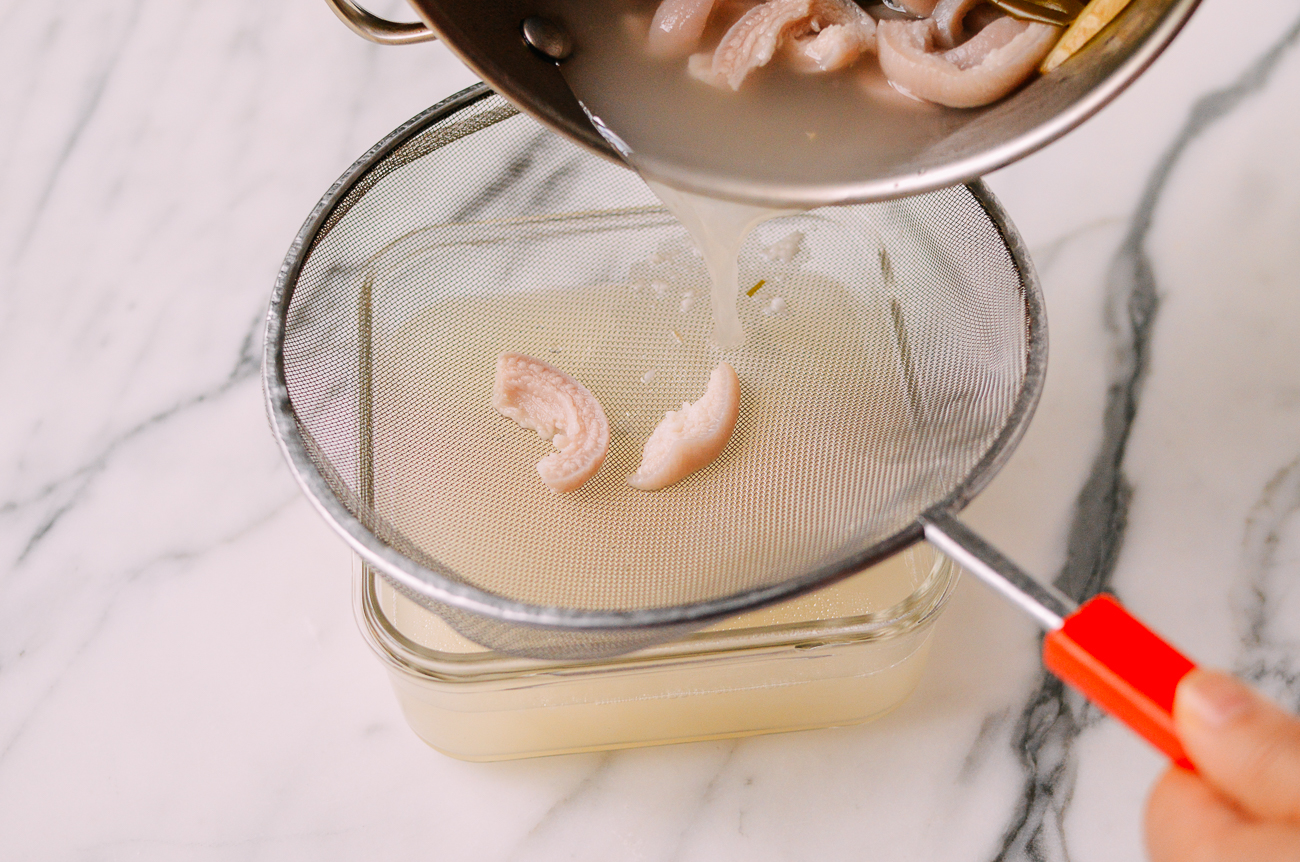
After 1 hour, the pork skin should be very tender, and the stock should look thick and almost milky. Strain the stock to remove all solids, and add salt to taste.
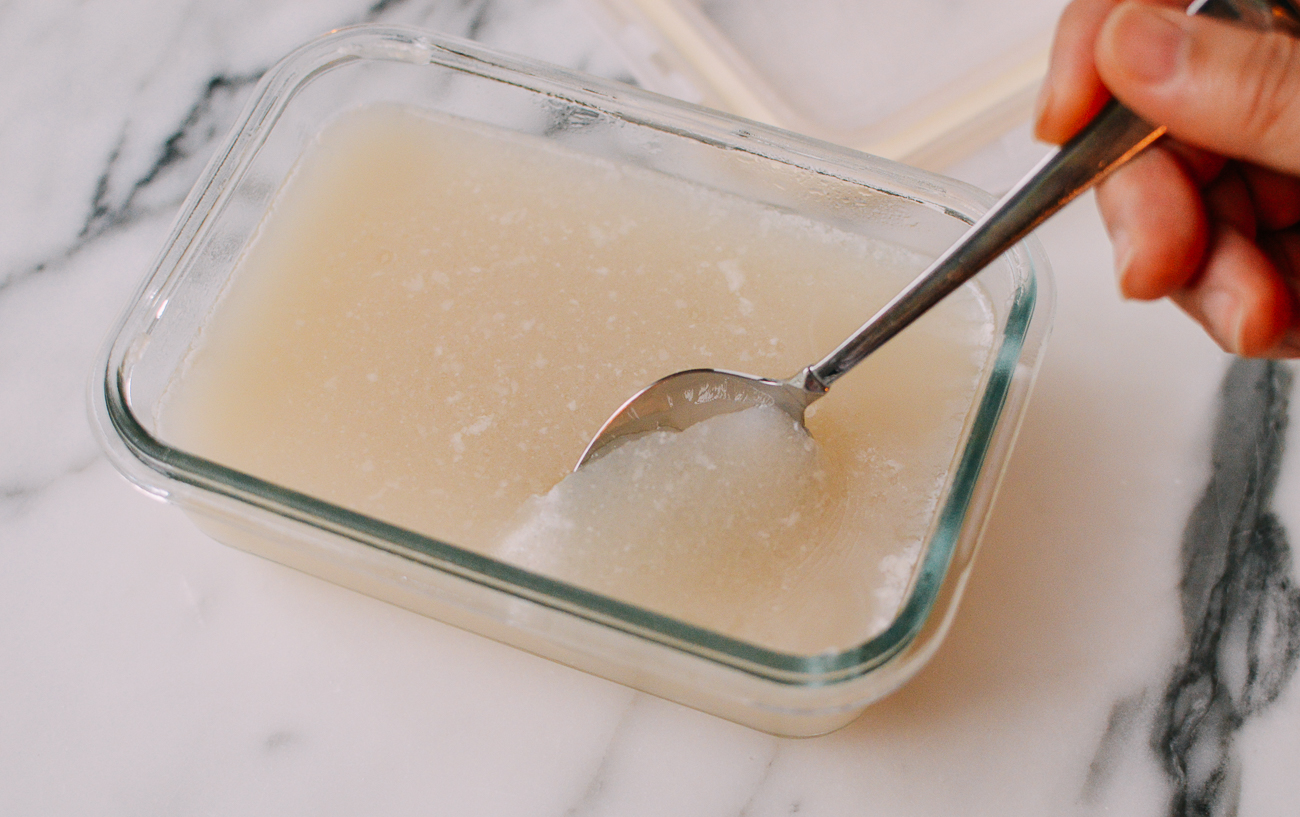
Let the liquid solidify in a covered container in the refrigerator overnight.
This should yield 1½ cups of aspic—the perfect amount for this recipe.
THE DAY OF/NIGHT BEFORE: Make the filling
Make-Ahead Tip!
If making the filling the night before, don’t mix in the aspic until the next day (after it has solidified).
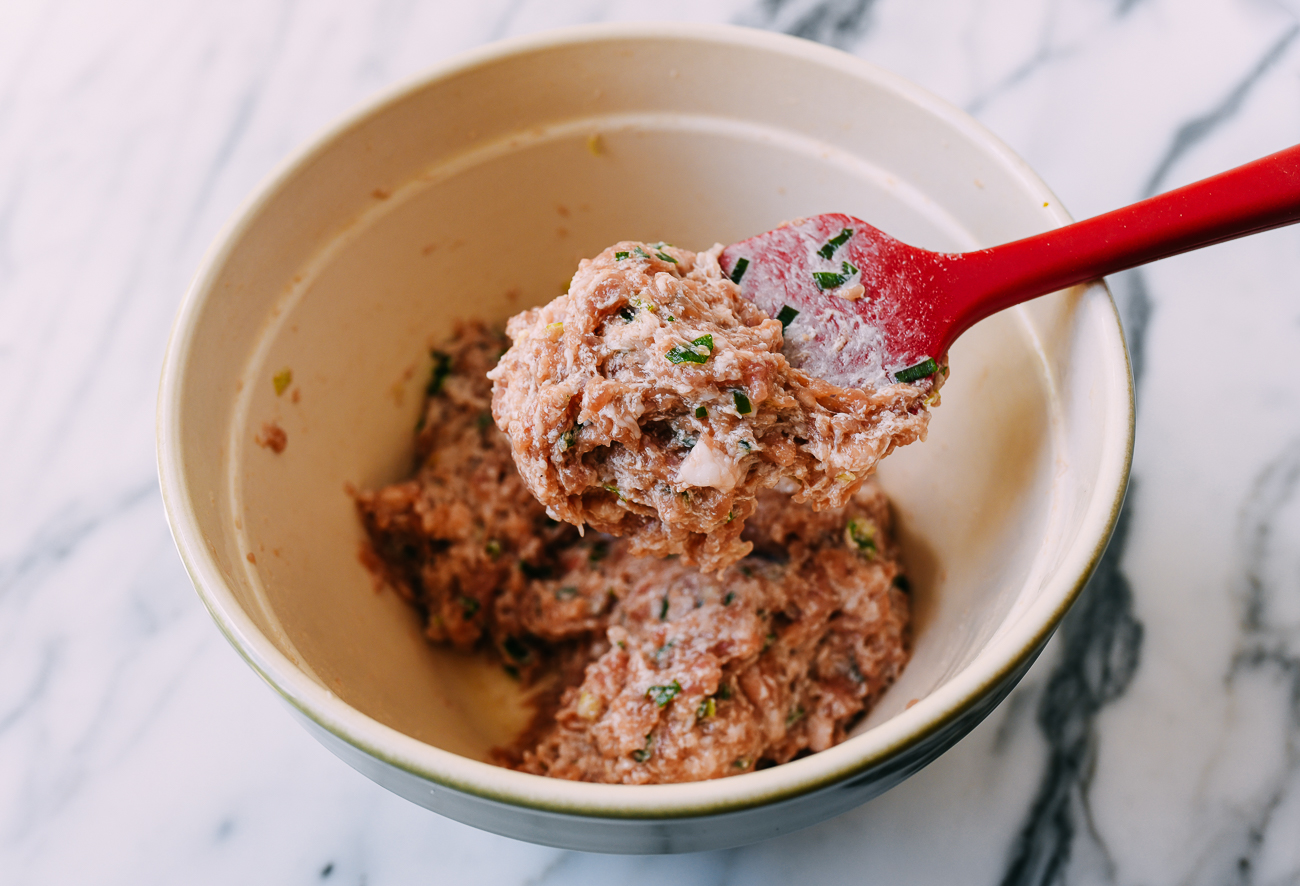
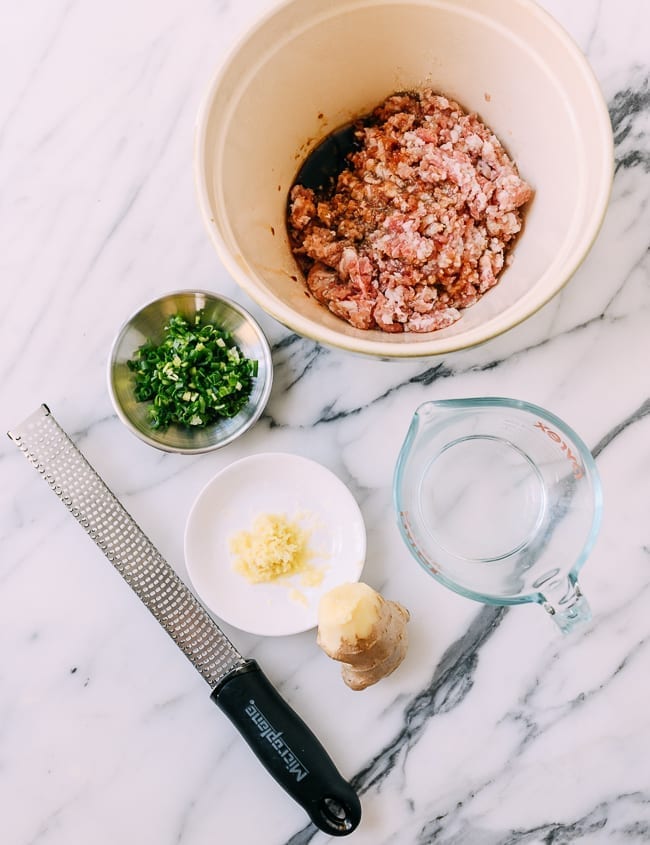
In a large bowl, combine the ground pork, Shaoxing wine, salt, sesame oil, sugar, water, dark soy sauce, light soy sauce, ground white-pepper, grated ginger, and minced scallions.
Whip in one direction for 5 minutes until it has the texture of a thick paste.
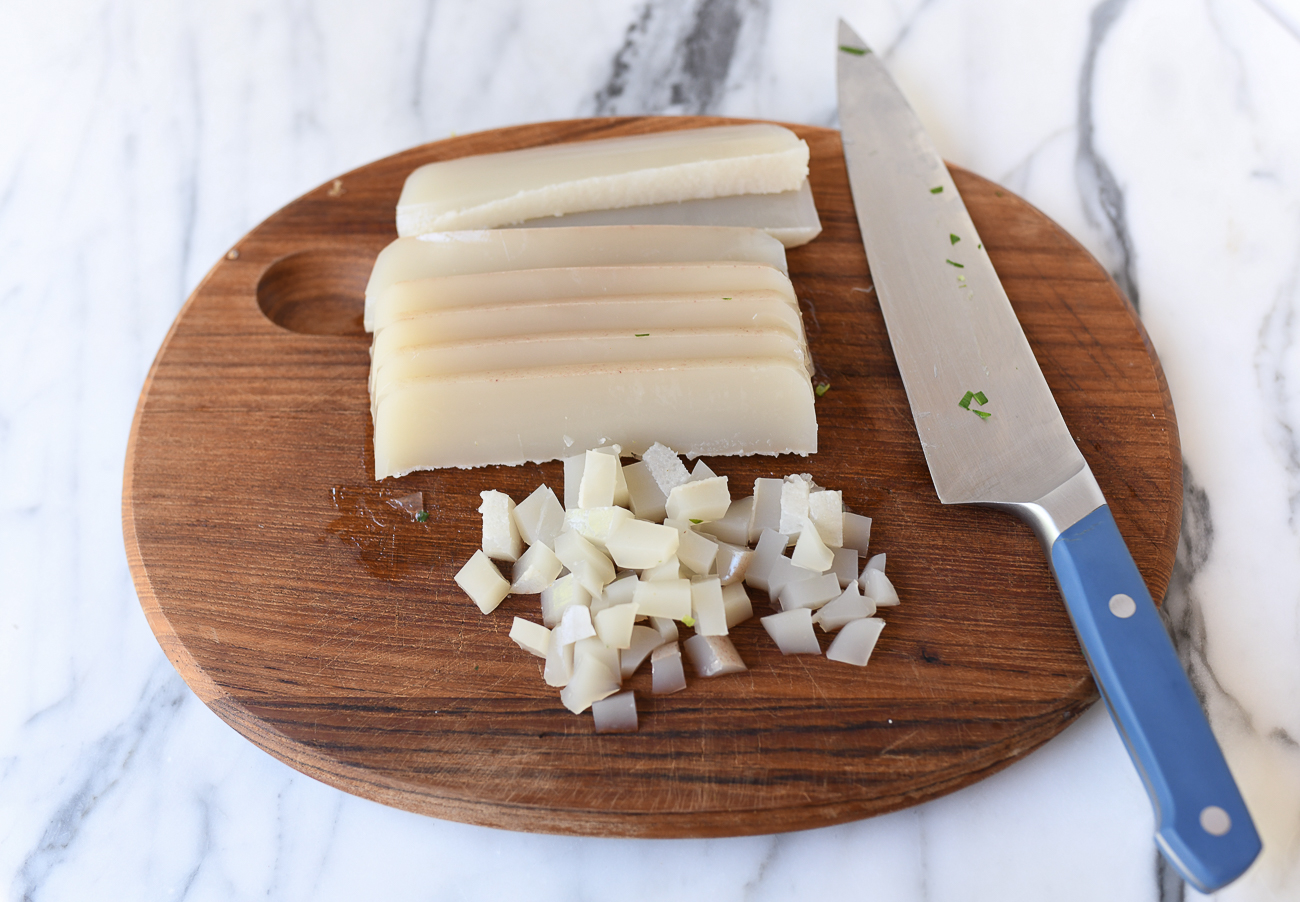
Dice the aspic into ¼-inch cubes.
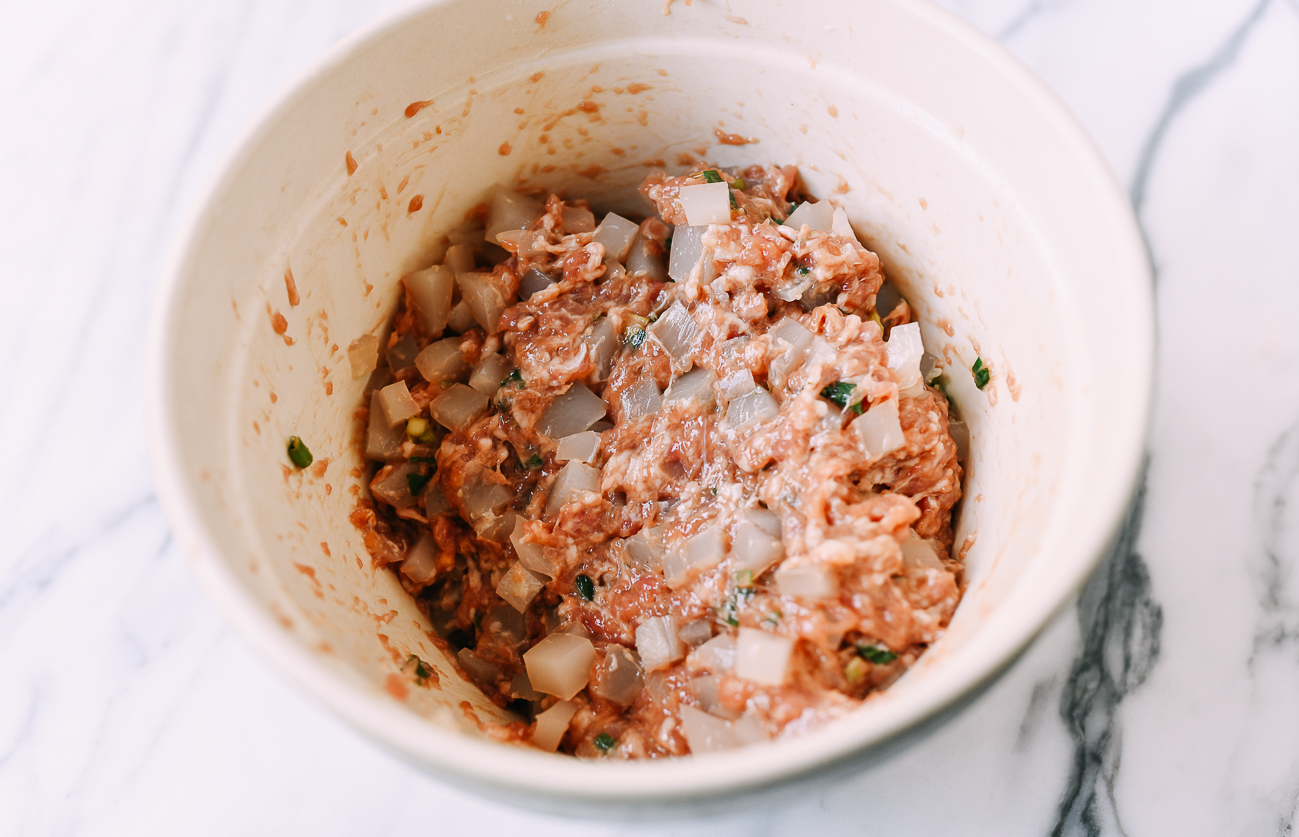
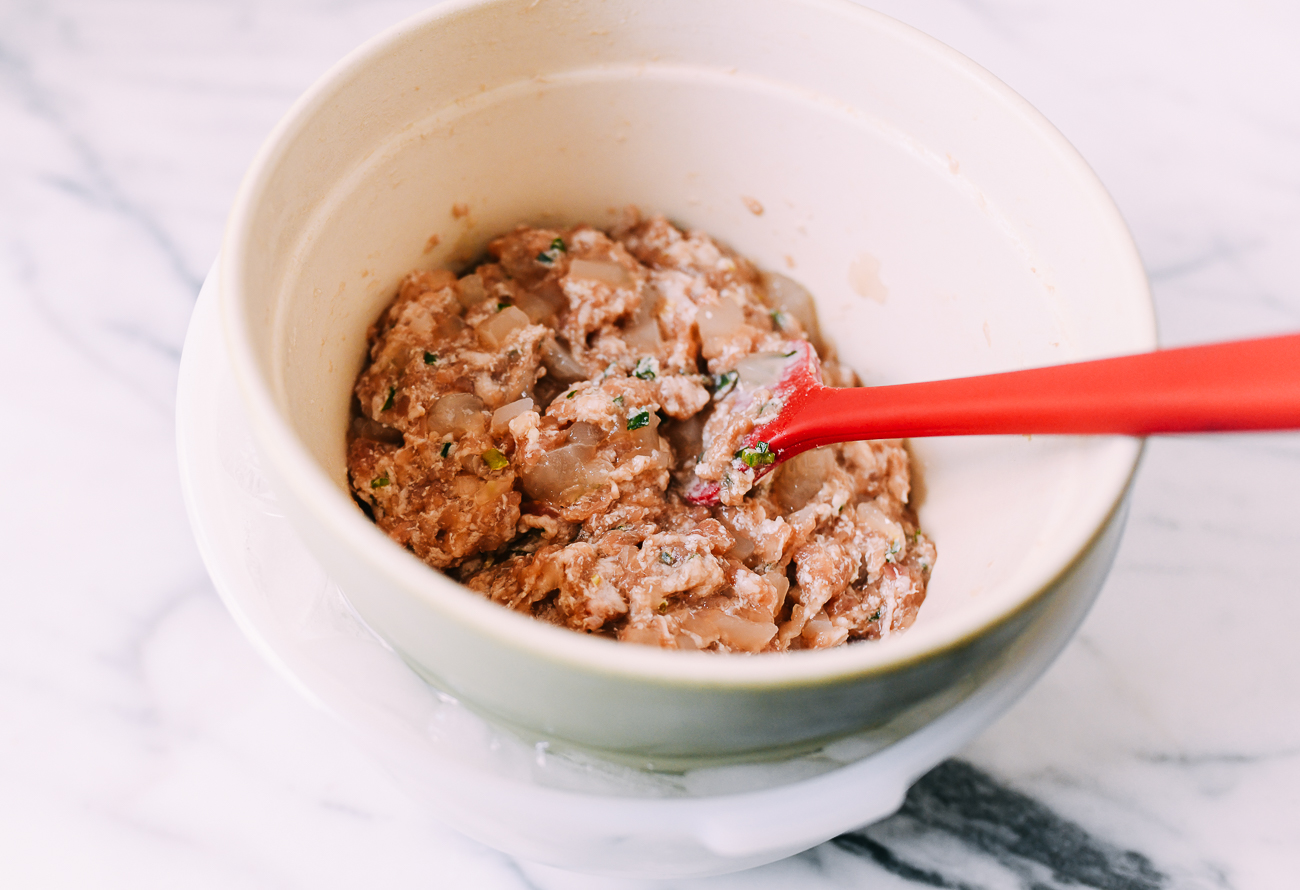
And carefully stir it into the filling to evenly distribute.
Transfer the bowl to the refrigerator. Chill for at least 1 hour, preferably 1 ½ – 2 hours while you make the dough.
Tip!
Keeping the filling cold makes the buns easier to assemble. In the summertime, you may want to rest the bowl in an ice bath while assembling the buns.
1 ½ TO 2 HOURS BEFORE SERVING: Make the dough
In the bowl of an electric mixer, add the cake flour, all purpose flour, salt, and instant yeast.
Attach the dough hook, and turn the mixer on, to the lowest setting. Slowly stream in the water.
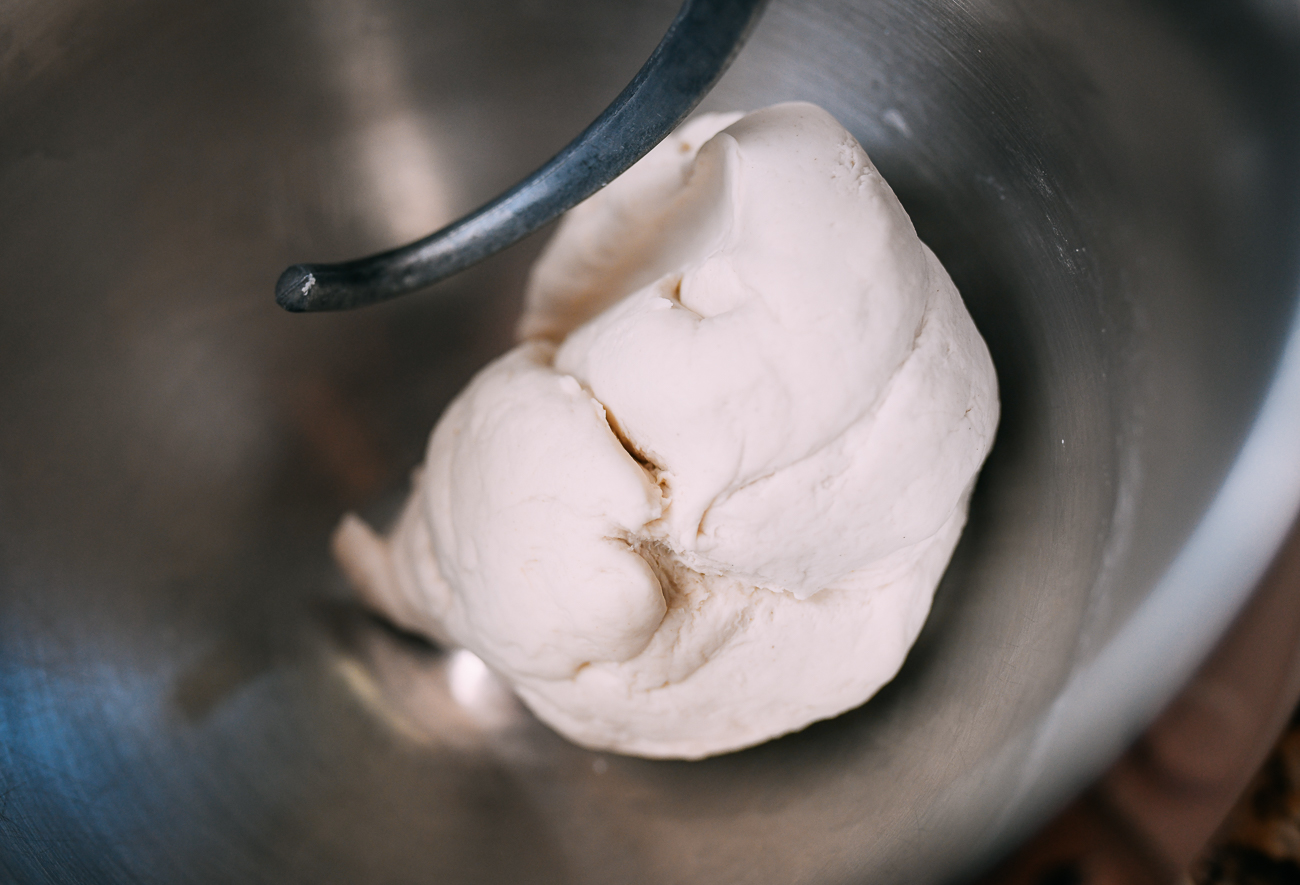
Knead the dough for 10 minutes until smooth. The dough should be soft but hold its shape.
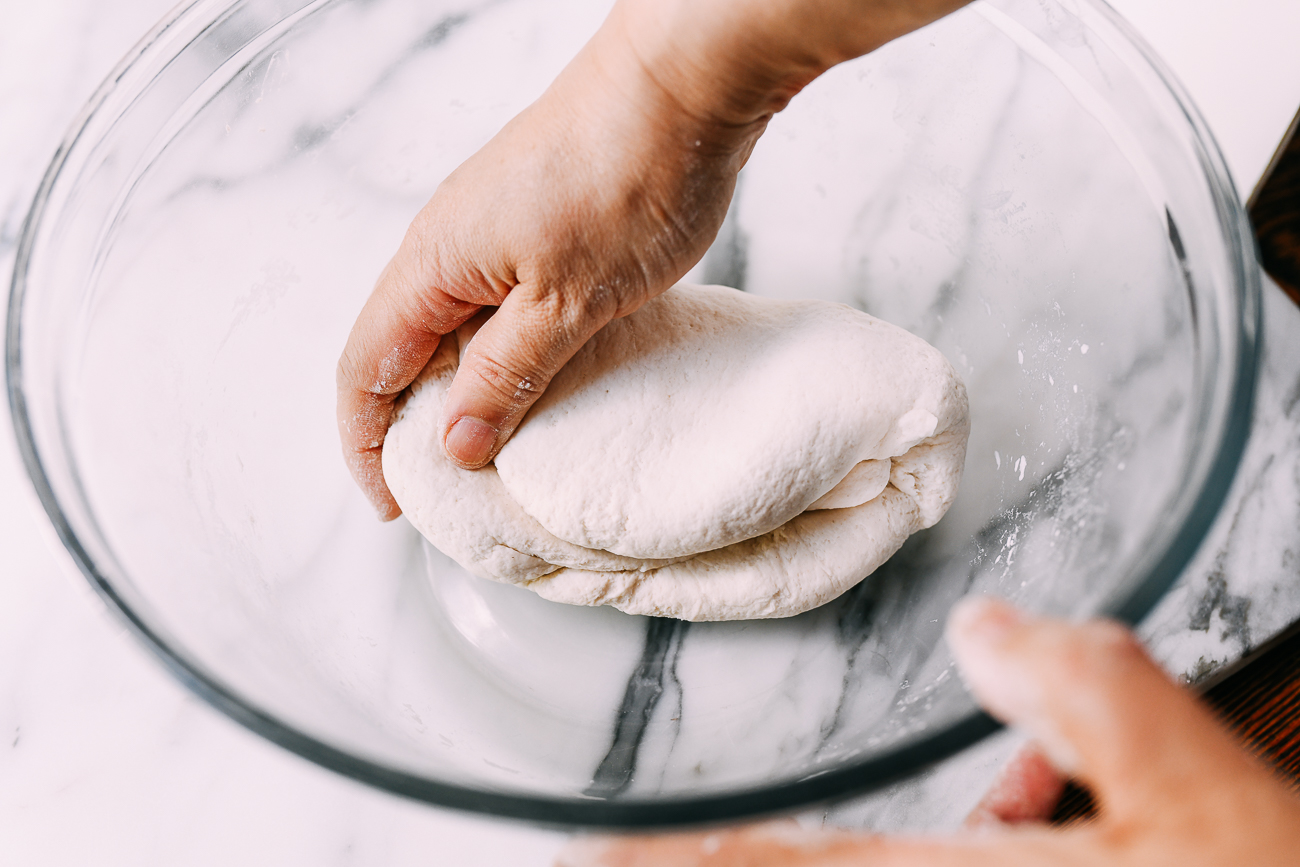
Shape the dough into a smooth ball, brush the top with oil, and cover the mixing bowl with a plate. Proof at room temperature for 30 minutes.
Note: You can also knead by hand. If so, add 5 minutes to the kneading time, for a total of 15 minutes.
Assemble the buns:
These buns will go straight into the pan as you assemble them, so prepare the pan first by lightly oiling it with a neutral flavored cooking oil. A wide non-stick pan works best.
A cast-iron pan also works, but can be more challenging when it comes to preventing the buns from sticking. You’ll need to pre-heat it until it’s just smoking, cover it with a thin layer of cooking oil, and let it cool completely.
Now you’re ready to assemble your buns.
Once the dough finishes proofing, knead it for 3 minutes on the lowest setting of your stand mixer. (If kneading by hand, knead for 5 minutes.) Remove ⅓ of the dough, and keep the rest covered to prevent it from drying out.
When you’re ready to start rolling out the dough, take your filling out of the refrigerator. If it’s warm in your kitchen (especially in the summertime), rest the bowl of filling in an ice bath to keep it cold while you assemble the buns.
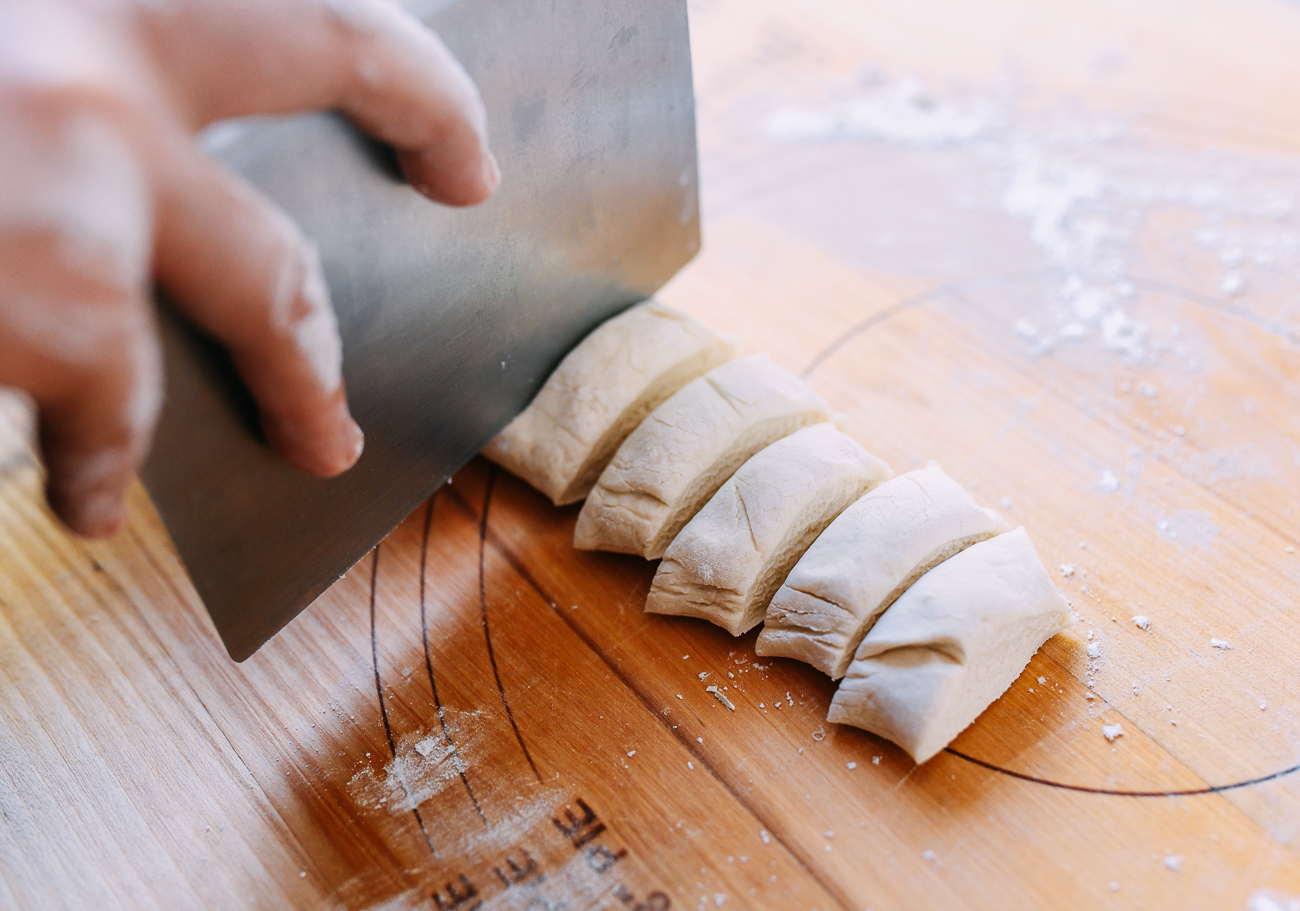
On a clean and lightly-floured surface, roll the dough into a long tube and cut it into small 20 gram pieces, measured with a kitchen scale.
Keep in mind, this recipe makes about 30 buns, so your piece of dough (⅓ of the total) should divide into ten 20g pieces.
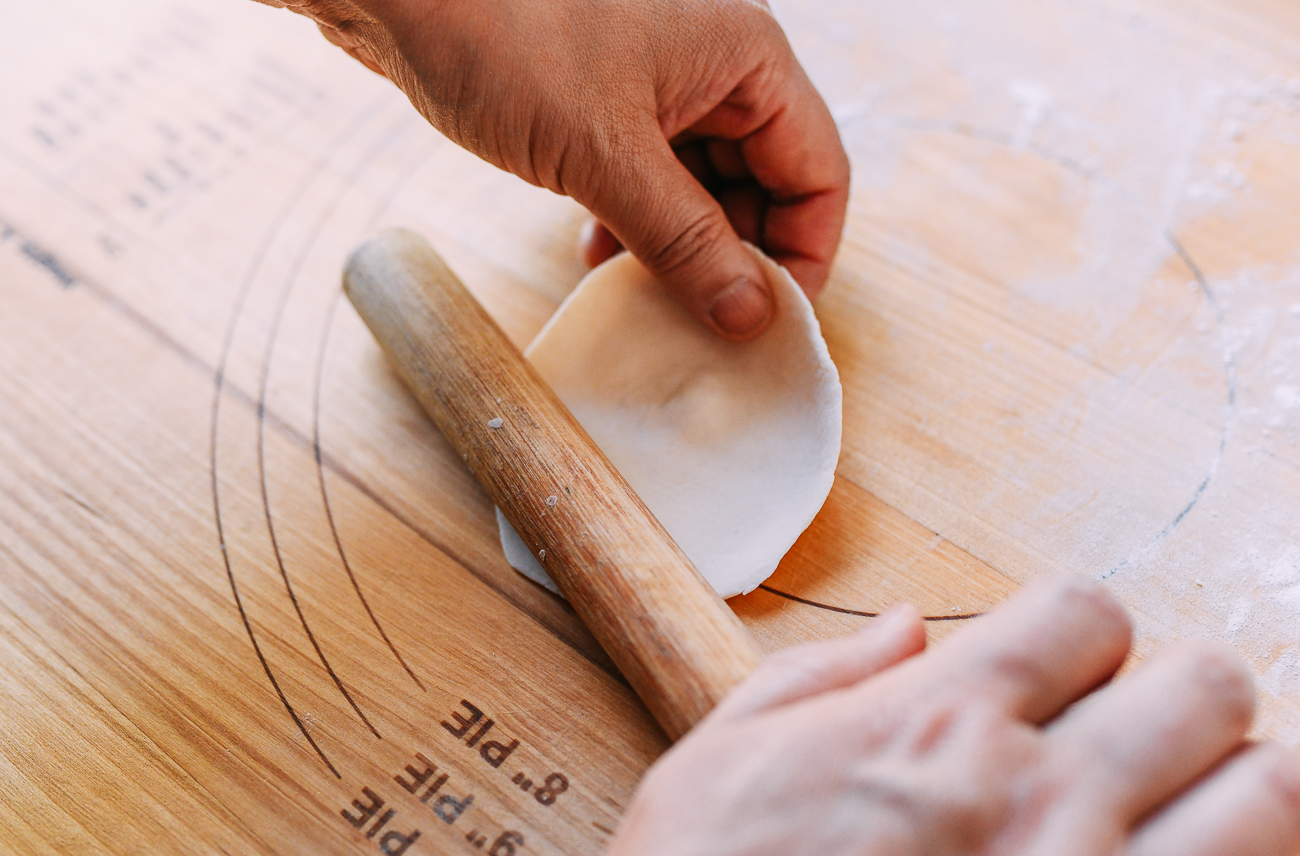
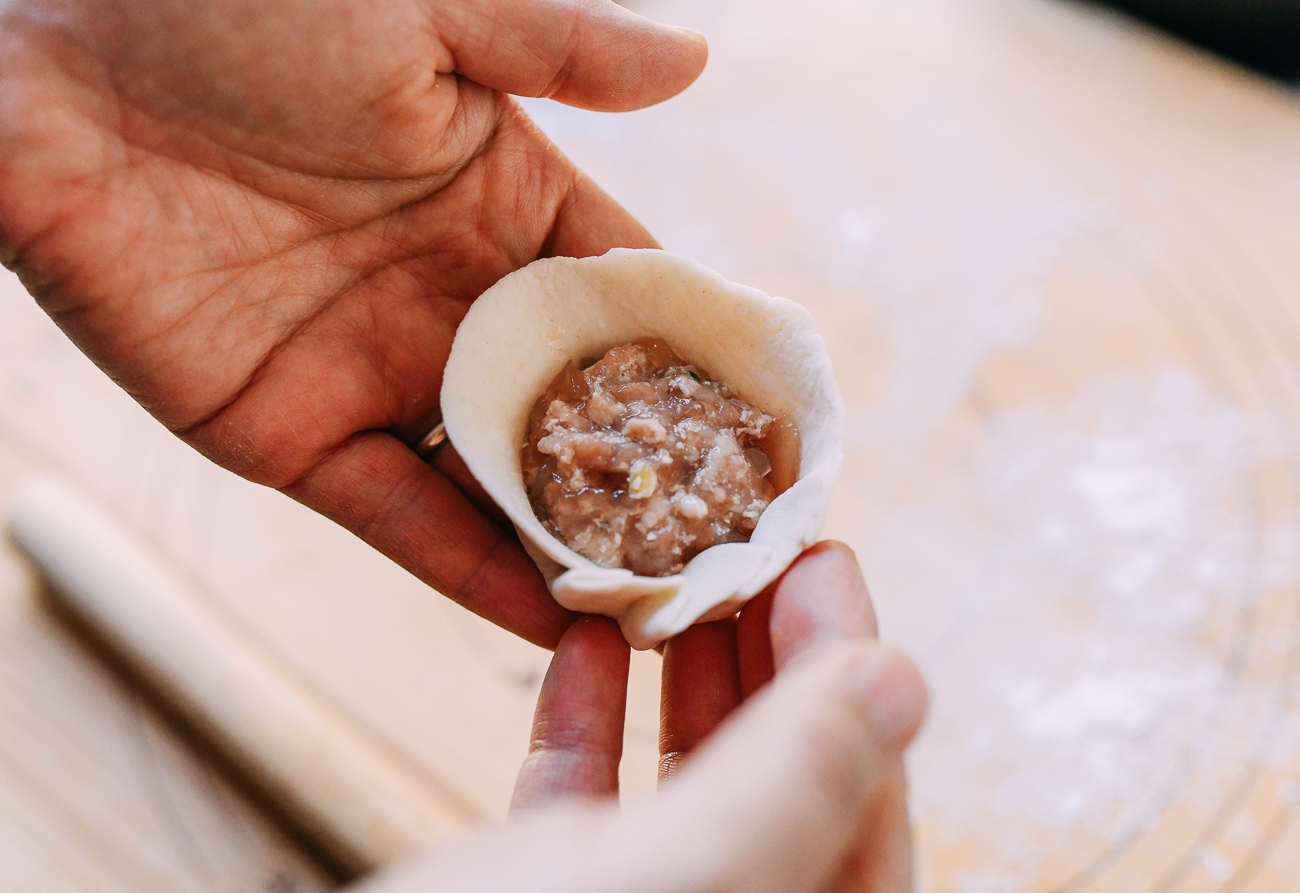
Take each piece, roll it into a round ball, and press to flatten. Roll it out using a rolling pin from edge to center, rotating the dough as you roll.
You should have a 4-inch round wrapper where the edges are thinner than the center.
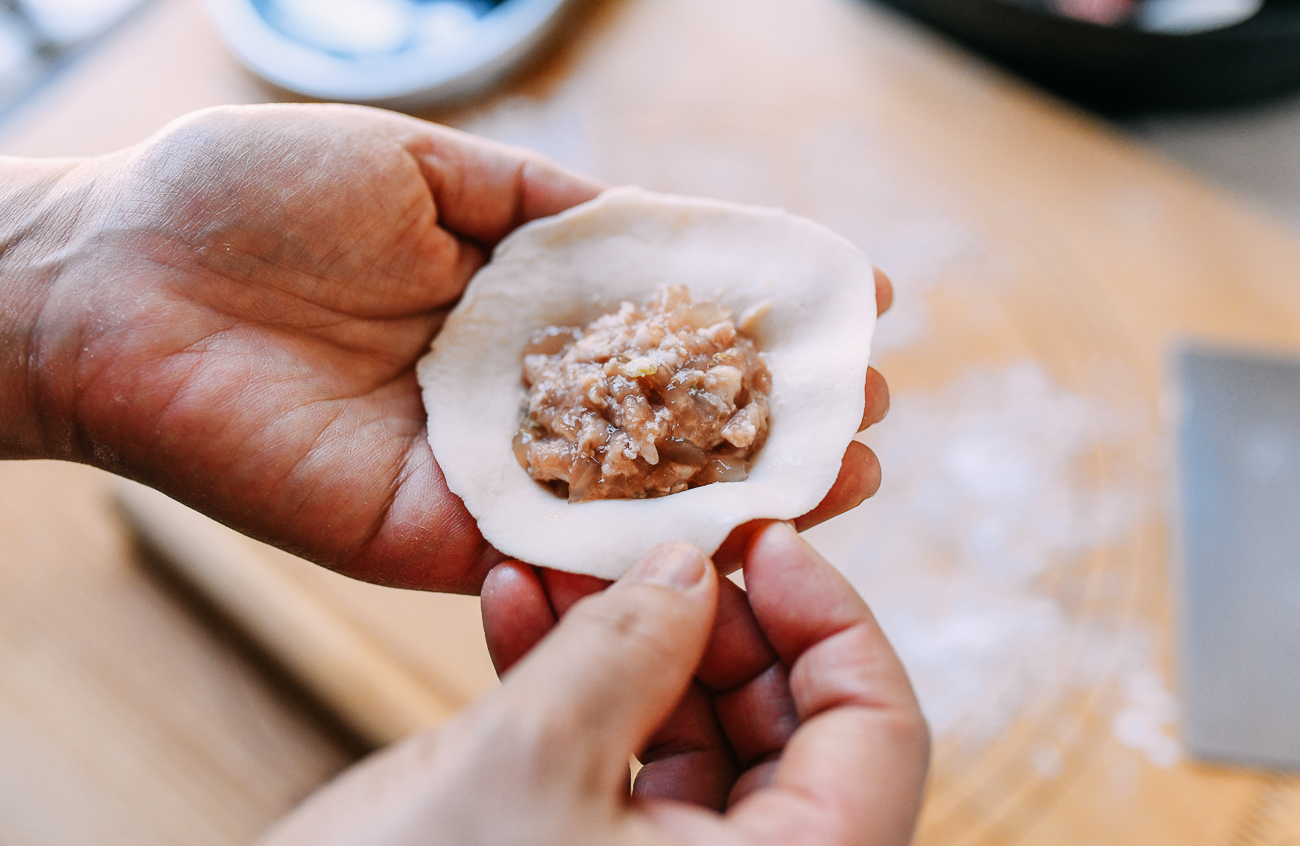
Add about 2 tablespoons of filling in the center.
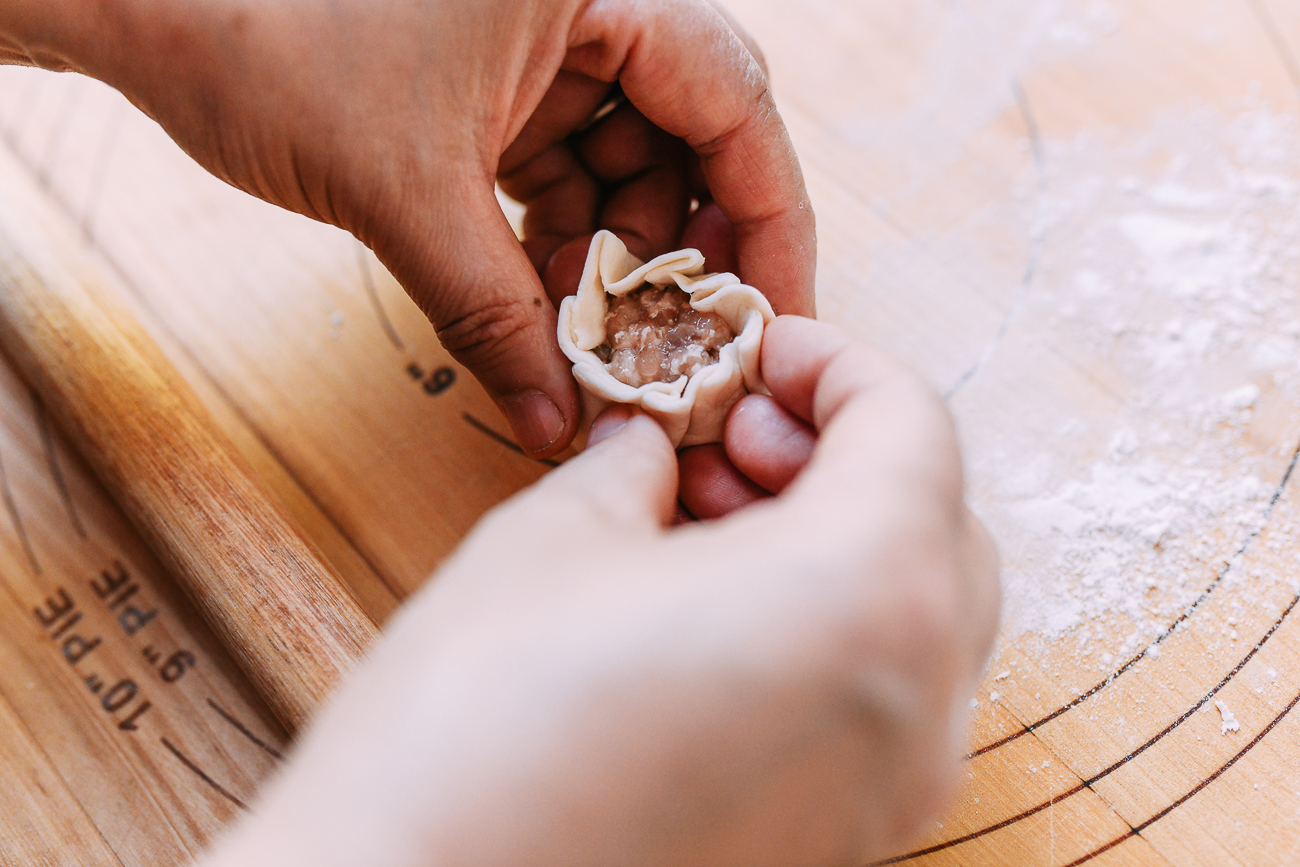
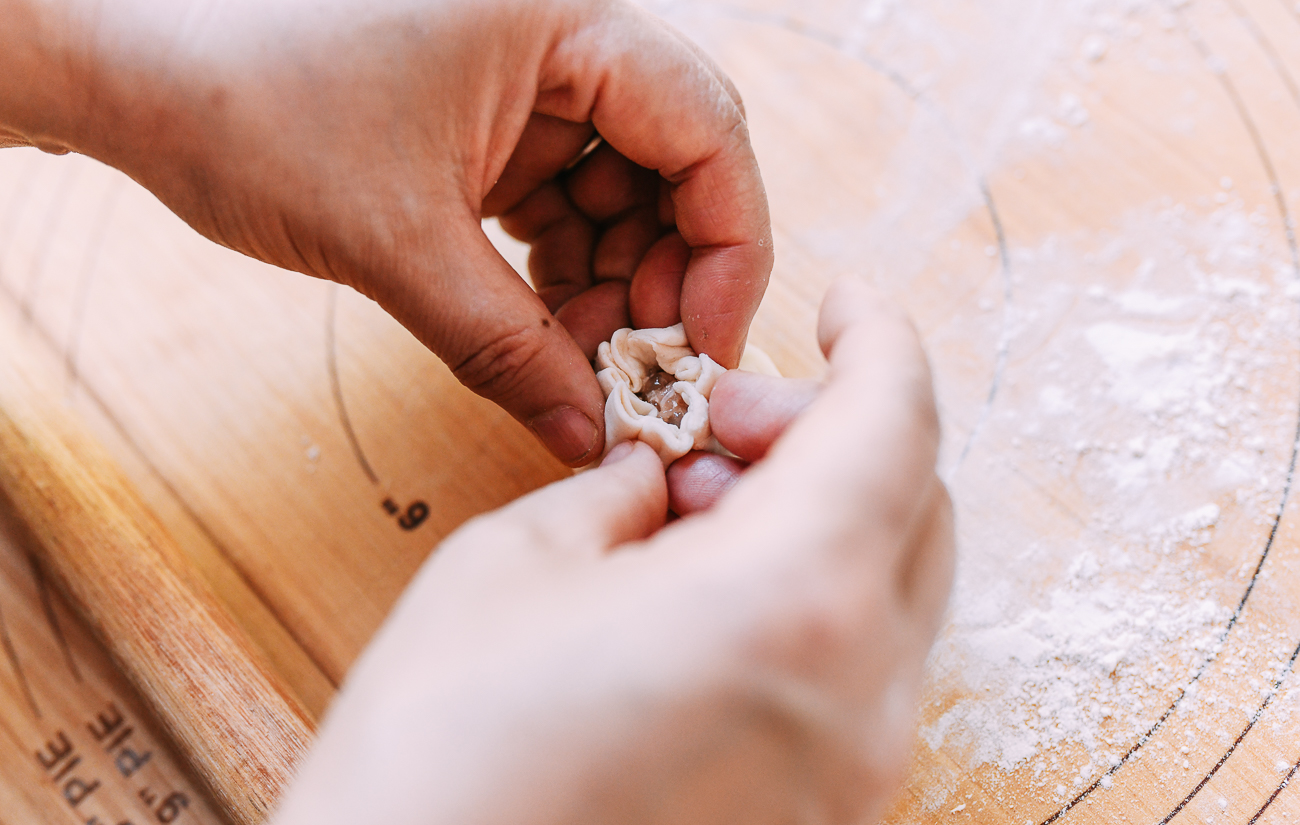
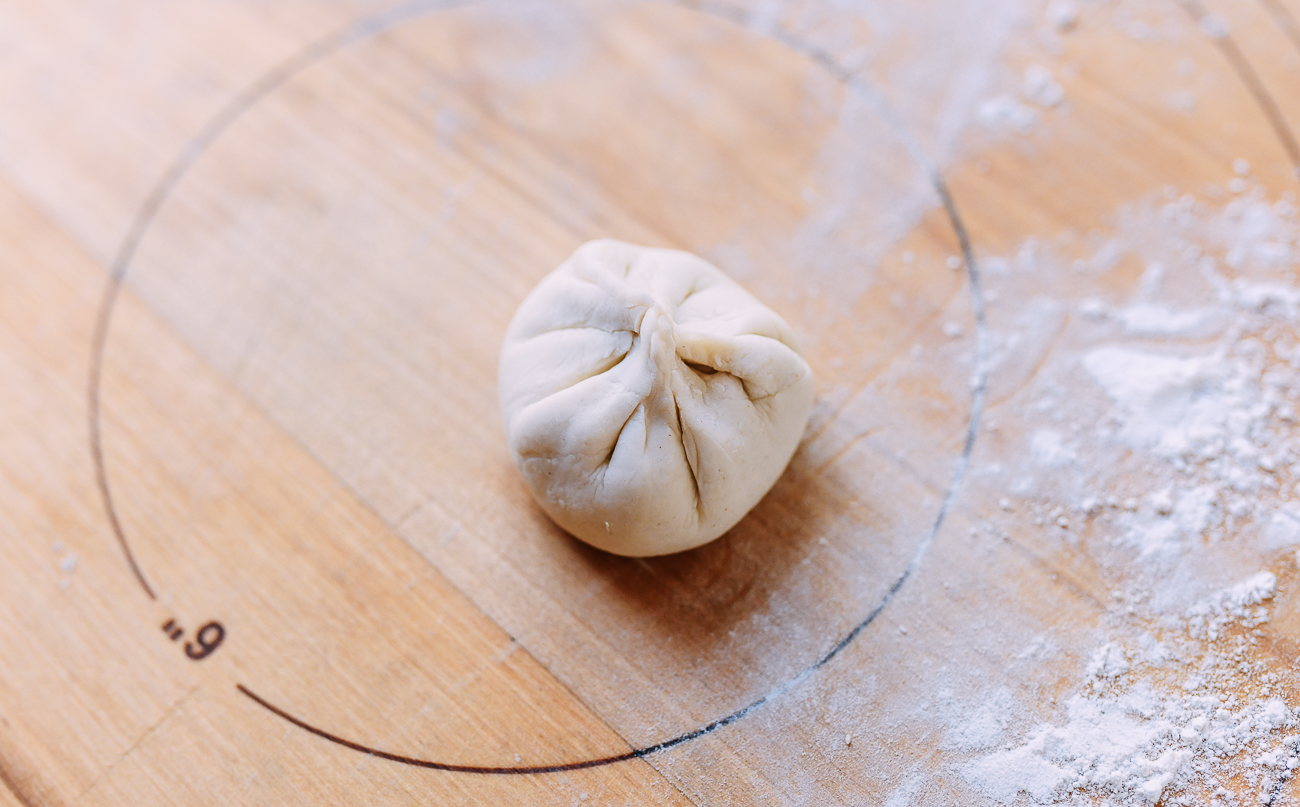
Pleat to close the top as shown (check out our Carrot Ginger Pork Bun Recipe for a video of this pleating in action).
Make one with less filling to start, so you can gauge quantities and adjust accordingly.
Make sure you keep your fingers as clean as possible during this process. Wet or greasy fingers make it challenging to seal the buns.
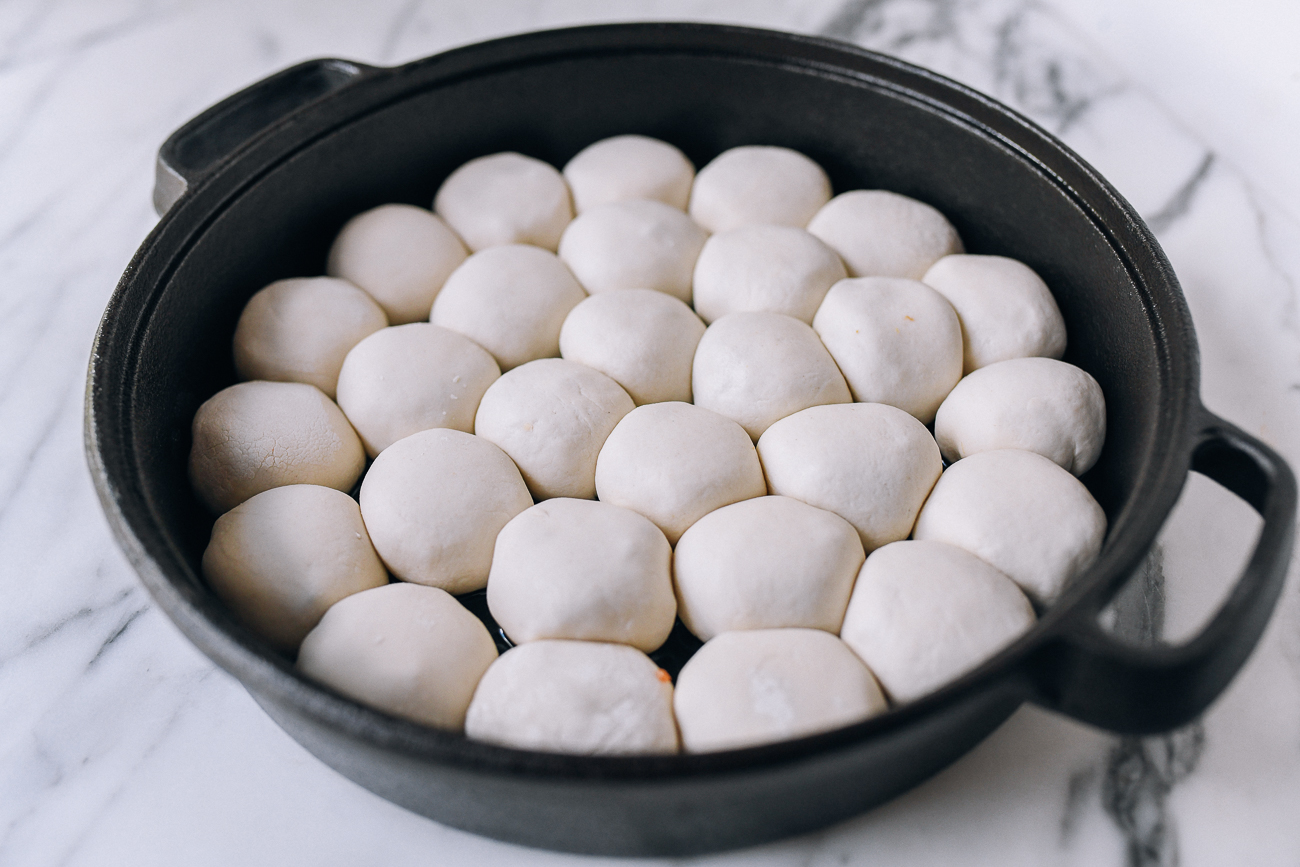
As you make the buns, arrange them in your pre-oiled pan.
Placing them pleated-side down is traditional, but only do this if you’re confident that your buns are well shaped and sealed. If not, place them pleated side up!
Each bun should have half an inch of surrounding clearance. (You’ll see I put them a bit closer together in my pan, which made them more difficult to separate!)
Repeat this process until your pan is full. Now it’s time to immediately move them to the stove!
Tip!
Depending on the size of your pan, you may need to cook this recipe in two pans. If so, cook the first batch while you continue to assemble the second batch of buns.
Cook the buns:
Once the pan is filled with your first batch of buns, immediately move it to the stove, and turn on the heat to medium. Add enough oil such that the buns are sitting in about ⅛-inch of oil.
As the oil heats up, move the pan around so the edges of the pan are also heated. The oil should start bubbling lightly all around the pan as the buns slowly begin to shallow-fry.
DO NOT be tempted to turn up the heat. We don’t want to burn the bottoms. Also, at this point, DO NOT touch the buns with any kitchen tool WHATSOEVER. They can be easily damaged, as they are not yet set.
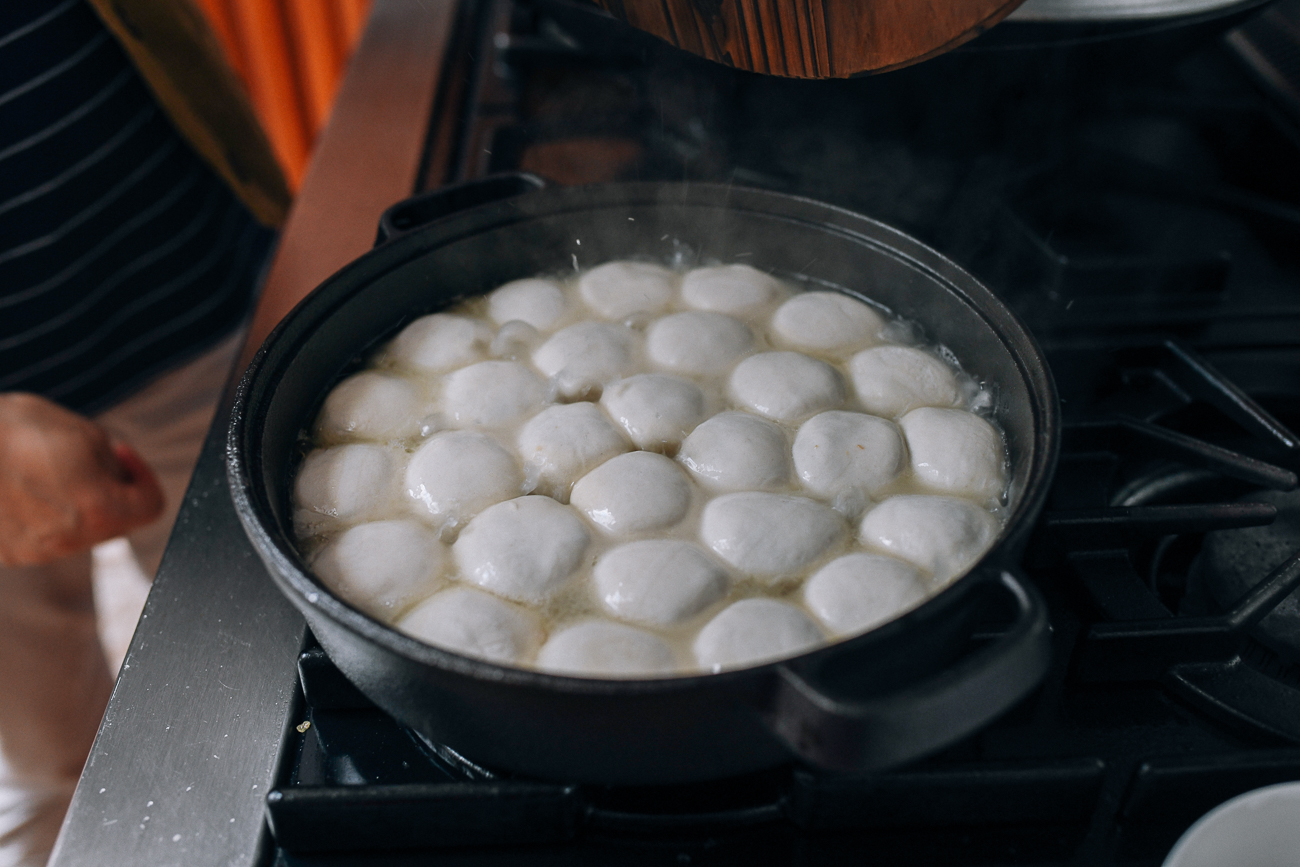
After about 8-10 minutes, the oil should be bubbling evenly. The bottom edges of the buns should be beginning to brown lightly, and the buns will expand a little as they cook.
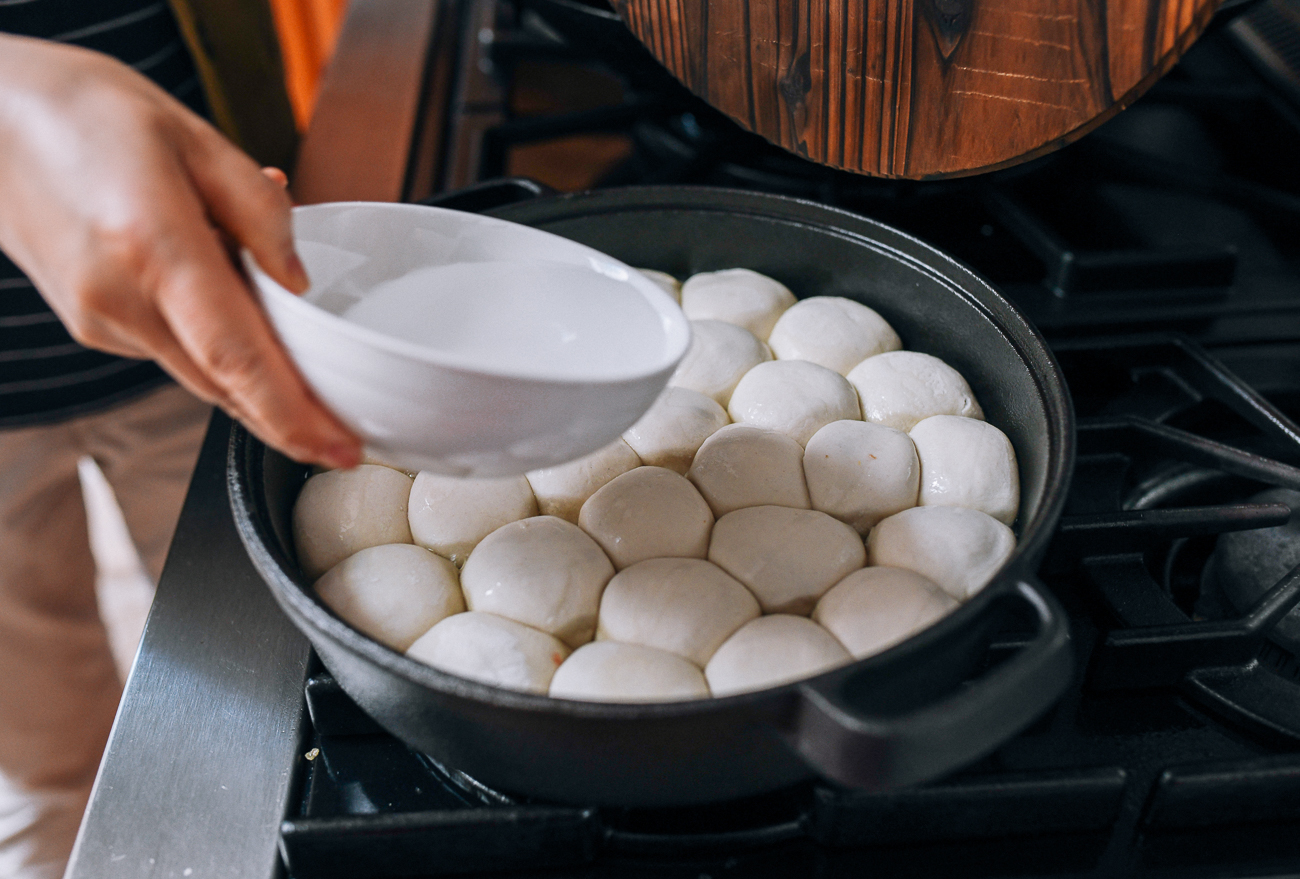
At this stage, add enough water so it comes up about ½ an inch (1.25 cm) in the pan. The water should come up about a third of buns’ height.
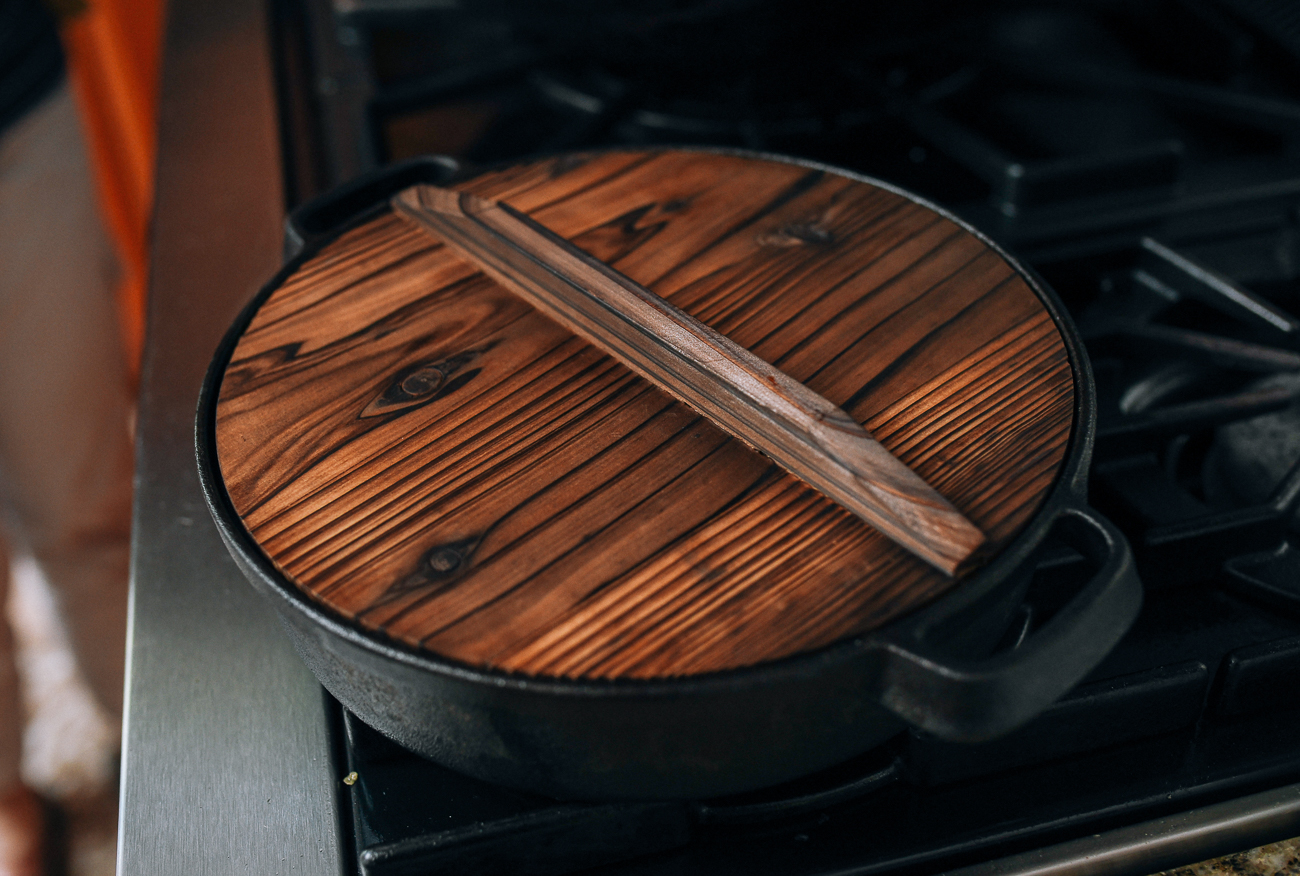
Immediately cover the pan with a tight-fitting lid, and cook for another 8-10 minutes on medium-low heat.
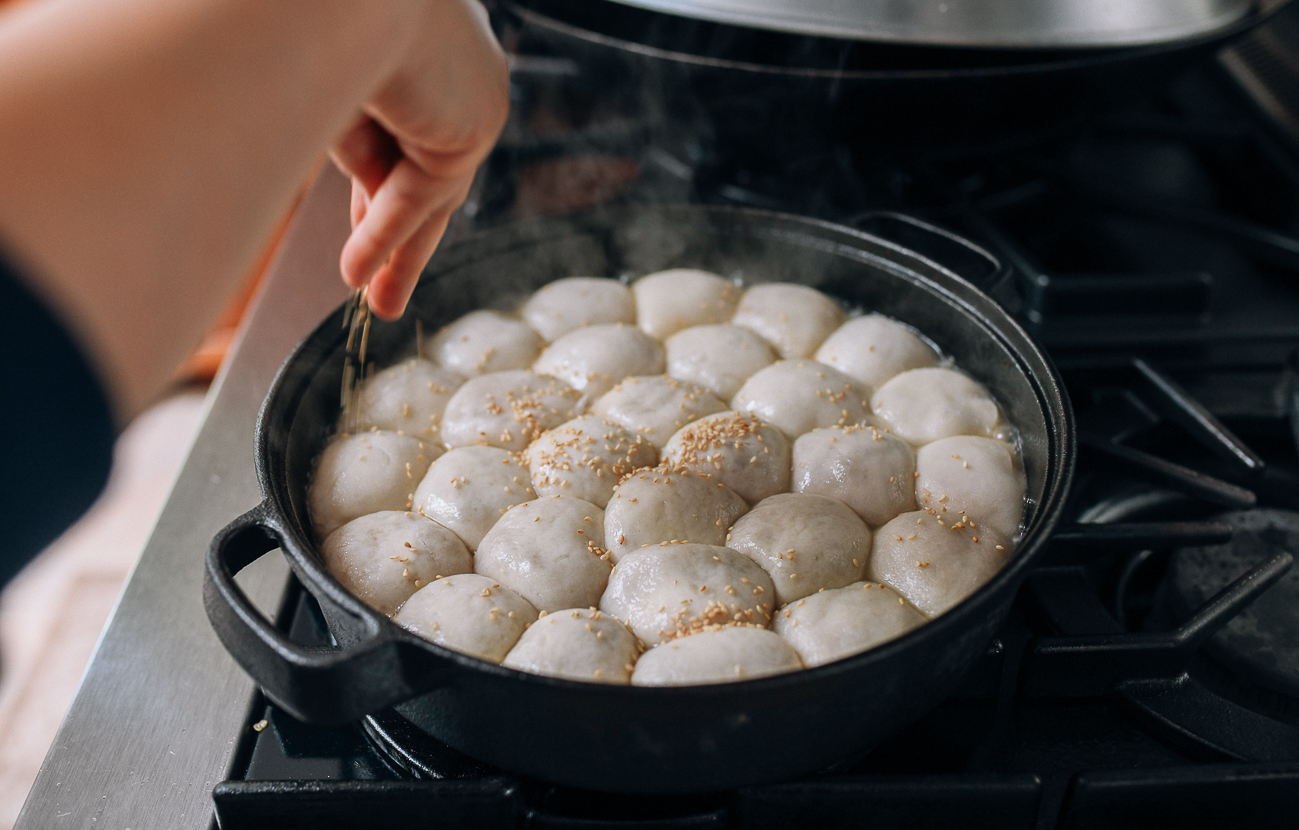
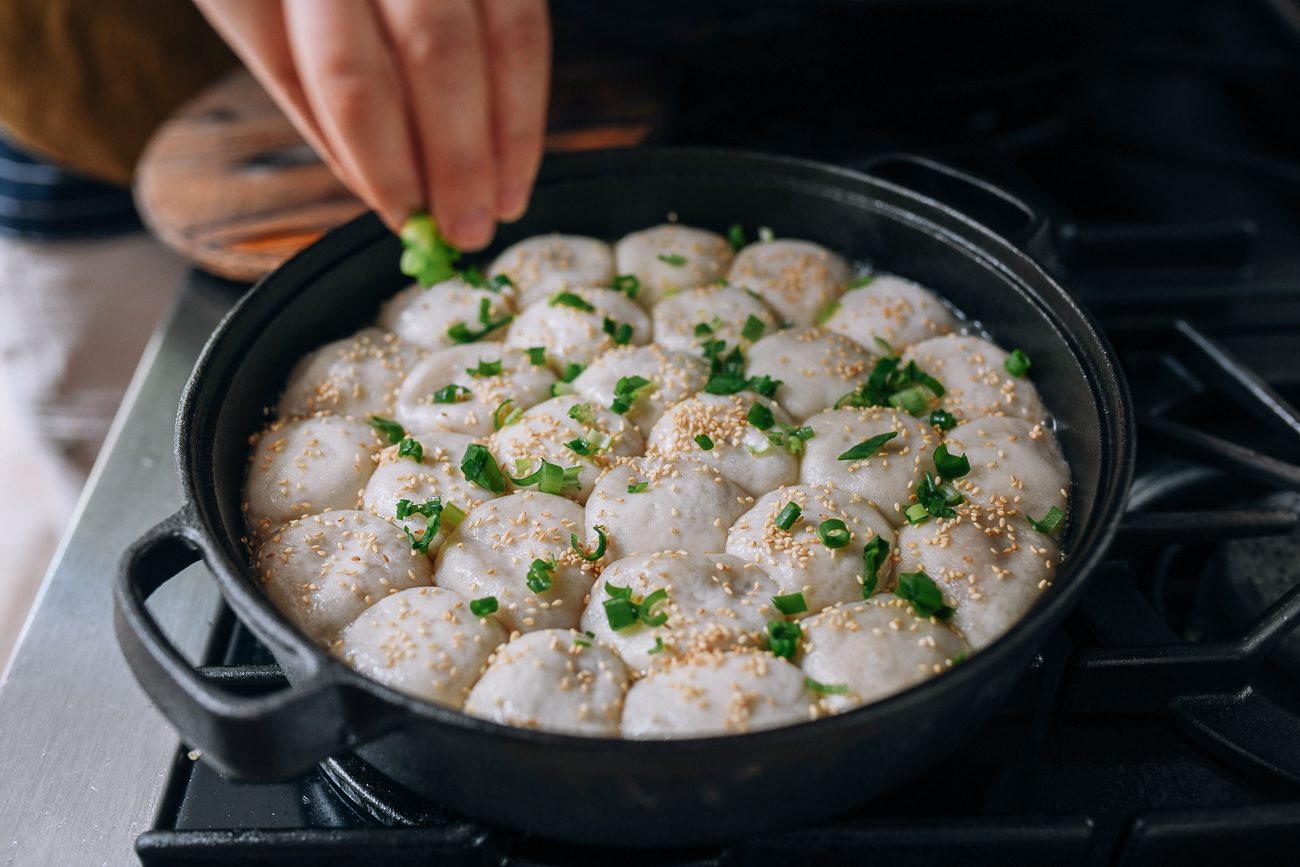
Next, uncover the pan. The water should be mostly gone. Sprinkle the sesame seeds and chopped scallions over the top.
Put the lid back on, and cook for another 5 minutes over medium-low heat. (If there’s still a significant amount of water left in the pan at this point, you can turn up the heat slightly, but do take care not to burn the buns.)
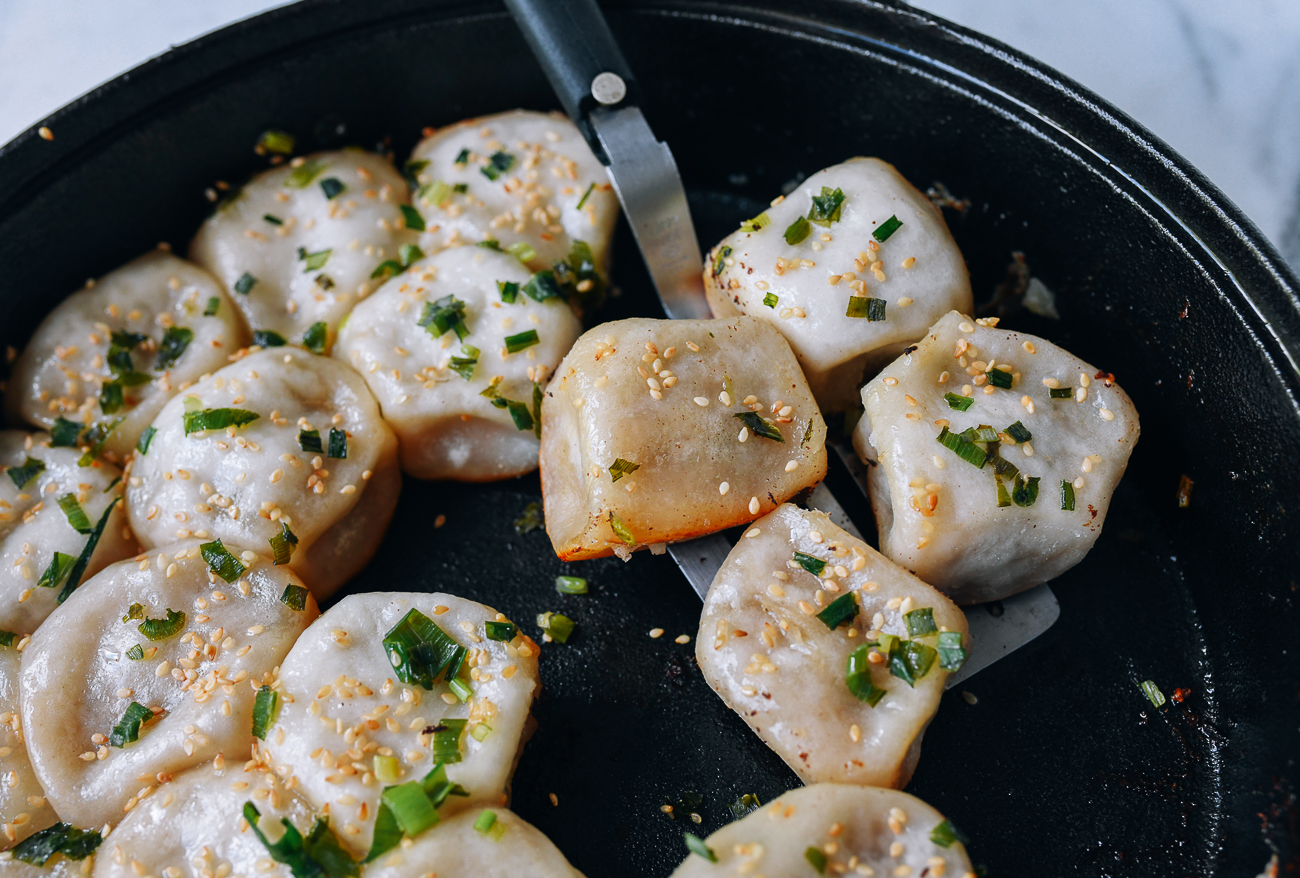
The buns are done once you’ve cooked off all the water and the bottoms are golden brown. Use a dull kitchen tool to remove the buns, and avoid puncturing them. A stiff rubber spatula works well.
Once you have removed some of them and have more space to work with, you can use a thin metal spatula to scrape the rest up.
Serve immediately with Shanghai rice vinegar or just eat it as is, taking care with the hot soup inside!
Shanghai Pan-Fried Pork Buns (上海生煎馒头)
Ingredients
For the aspic:
- 1/2 pound pork skin
- 1/2 pound pork and/or chicken bones (preference for chicken bones)
- 3 cups water
- 2 tablespoons Shaoxing wine
- 3 slices ginger
- 1 scallion
- salt to taste
For the filling:
- 1 pound ground pork (70% lean 30% fat)
- 1/4 cup Shaoxing wine
- 3/4 teaspoon salt
- 1 teaspoon sesame oil
- 1 tablespoon sugar
- 3 tablespoons water
- 1/2 teaspoon dark soy sauce
- 1 1/2 tablespoons light soy sauce
- 1/4 teaspoon ground white pepper
- 1 1/2 tablespoons ginger (grated)
- 1/4 cup scallions (minced)
- 1 1/2 cups aspic (diced into ¼-inch pieces)
For the dough:
- 2 cups cake flour (can substitute 1 ¾ cups all-purpose flour and ¼ cup cornstarch sifted together)
- 1 cup all purpose flour
- 1/2 teaspoon salt
- 1/2 teaspoon instant yeast
- 3/4 cup water (may need an additional tablespoon depending on the humidity)
- 1/2 teaspoon neutral oil (such as avocado oil or vegetable oil, for brushing)
To cook the buns:
- neutral flavored cooking oil (such as avocado, vegetable, or canola oil)
- water
- toasted sesame seeds (black and white sesame seeds both work)
- 1 scallion (finely chopped)
Instructions
THE DAY BEFORE: Make the aspic
- Add the pork skin and bones to a thick-bottomed medium pot with just enough water to cover them. Bring to a boil, and boil for 1 minute. Turn off the heat, and rinse the pork skin and bones under running water to clean them. Clean the pot as well.
- Trim away all the fat under the pork skin and cut into very thin slices. This makes it easier for the collagen to release.
- Fill the clean pot with 3 cups of water. Add the pork skin and bones, along with the Shaoxing wine, ginger, and scallion. Bring to a boil, and lower the heat to medium low. Simmer for 1 hour. (It should bubble gently at a low simmer).
- After 1 hour, the pork skin should be very tender, and the stock should look thick and almost milky. Strain to remove all solids, and add salt to taste. Let the liquid solidify in a covered container in the refrigerator overnight.
- This should yield 1½ cups of aspic, the perfect amount for this recipe.
THE DAY OF/NIGHT BEFORE: Make the filling
- In a large bowl, combine the ground pork, Shaoxing wine, salt, sesame oil, sugar, water, dark soy sauce, light soy sauce, ground white-pepper, grated ginger, and minced scallions. Whip in one direction for 5 minutes until it has the texture of a thick paste.
- Dice the aspic into ¼-inch cubes. Carefully stir it into the filling to evenly distribute. Transfer the bowl to the refrigerator. Chill for at least 1 hour, preferably 1 ½ - 2 hours while you make the dough.
1 ½ TO 2 HOURS BEFORE SERVING: Make the dough
- In the bowl of an electric mixer, add the cake flour, all purpose flour, salt, and instant yeast. Attach the dough hook, and turn the mixer on to the lowest setting. Slowly stream in the water. Knead the dough for 10 minutes until smooth. The dough should be soft but hold its shape.
- Shape the dough into a smooth ball, brush the top with oil, and cover the mixing bowl with a plate. Proof at room temperature for 30 minutes.
Assemble the buns:
- These buns will go straight into the pan as you assemble them, so prepare the pan first by lightly oiling it with a neutral flavored cooking oil. A wide non-stick pan works best. A cast-iron pan also works, but can be more challenging when it comes to preventing the buns from sticking. You’ll need to pre-heat it until it’s just smoking, cover it with a thin layer of cooking oil, and let it cool completely. Now you’re ready to assemble your buns.
- Once the dough finishes proofing, knead it for 3 minutes on the lowest setting of your stand mixer. (If kneading by hand, knead for 5 minutes.) Remove ⅓ of the dough, and keep the rest covered to prevent it from drying out.
- When you’re ready to start rolling out the dough, take your filling out of the refrigerator. If it’s warm in your kitchen (especially in the summertime), rest the bowl of filling in an ice bath to keep it cold while you assemble the buns.
- On a clean and lightly-floured surface, roll the dough into a long tube and cut it into small 20 gram pieces, measured with a kitchen scale. Keep in mind, this recipe makes about 30 buns, so your piece of dough (⅓ of the total) should divide into ten 20g pieces.
- Take each piece, roll it into a round ball, and press to flatten. Roll it out using a rolling pin from edge to center, rotating the dough as you roll. You should have a 4-inch round wrapper where the edges are thinner than the center.
- Add about 2 tablespoons of filling in the center, and pleat to close the top. Make sure you keep your fingers as clean as possible during this process. Wet or greasy fingers make it challenging to seal the buns.
- As you make the buns, arrange them in your pre-oiled pan. Placing them pleated-side down is traditional, but only do this if you're confident that your buns are well shaped and sealed. If not, place them pleated side up! Each bun should have half an inch of surrounding clearance. (You'll see I put them a bit closer together in my pan, which made them more difficult to separate!)
Pan-fry the buns:
- Once the pan is filled with your first batch of buns, immediately move it to the stove, and turn on the heat to medium. Add enough oil such that the buns are sitting in about ⅛-inch of oil.
- As the oil heats up, move the pan around so the edges of the pan are also heated. The oil should start bubbling lightly all around the pan as the buns slowly begin to shallow-fry. DO NOT be tempted to turn up the heat. We don’t want to burn the bottoms. Also, at this point, DO NOT touch the buns with any kitchen tool WHATSOEVER. They can be easily damaged, as they are not yet set.
- After about 8-10 minutes, the oil should be bubbling evenly. The bottom edges of the buns should be beginning to brown lightly, and the buns will expand a little as they cook.
- At this stage, add enough water so it comes up about ½ an inch (1.25 cm) in the pan. The water should come up about a third of buns’ height. Immediately cover the pan with a tight-fitting lid, and cook for another 8-10 minutes on medium-low heat.
- Next, uncover the pan. The water should be mostly gone. Sprinkle the sesame seeds and chopped scallions over the top, put the lid back on, and cook for another 5 minutes over medium-low heat. (If there’s still a significant amount of water left in the pan at this point, you can turn up the heat slightly, but do take care not to burn the buns.)
- The buns are done once you’ve cooked off all the water and the bottoms are golden brown. Use a dull kitchen tool to remove the buns, and avoid puncturing them. A stiff rubber spatula works well.
- Serve immediately with Shanghai rice vinegar or just eat it as is, taking care with the hot soup inside!
